
![]()
![]()


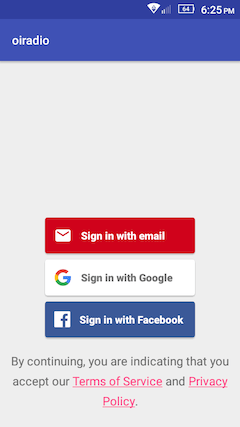
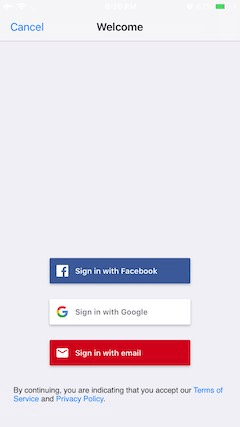
react-native-firebaseui-auth
Easily add sign-in to your React Native app with FirebaseUI
Getting started
Add Firebase to your project
Android:
- Follow the Android setup guide
- Follow the sign-in methods guide
iOS:
-
Follow the iOS setup guide
-
Add FirebaseUI to your Podfile:
pod 'FirebaseUI'Run
$ pod update -
Follow the sign-in methods guide
Installation
$ npm install react-native-firebaseui-auth --save
or
$ yarn add react-native-firebaseui-auth
Linking (RN >= 0.60 skip this step)
RN <= 0.59 only
Automatic
$ react-native link react-native-firebaseui-auth
Manual
iOS
- In XCode, in the project navigator, right click
Libraries➜Add Files to [your project's name] - Go to
node_modules➜react-native-firebaseui-authand addRNFirebaseuiAuth.xcodeproj - In XCode, in the project navigator, select your project. Add
libRNFirebaseuiAuth.ato your project'sBuild Phases➜Link Binary With Libraries - Run your project (
Cmd+R)
Android
- Open up
android/app/src/main/java/[...]/MainApplication.java- Add
import com.oijusti.firebaseuiauth.RNFirebaseuiAuthPackage;to the imports at the top of the file - Add
new RNFirebaseuiAuthPackage()to the list returned by thegetPackages()method
- Add
- Append the following lines to
android/settings.gradle:include ':react-native-firebaseui-auth' project(':react-native-firebaseui-auth').projectDir = new File(rootProject.projectDir, '../node_modules/react-native-firebaseui-auth/android') - Insert the following lines inside the dependencies block in
android/app/build.gradle:implementation project(':react-native-firebaseui-auth')
Usage
import Auth, {AuthEventEmitter, AuthEvents} from 'react-native-firebaseui-auth';

...

  componentDidMount() {
    this.eventListener = AuthEventEmitter.addListener(
      AuthEvents.AUTH_STATE_CHANGED,
      event => {
        console.log('user:', event.user);
      }
    );
  }

  componentWillUnmount() {
    this.eventListener.remove(); //Removes the listener
  }

...

  const config = {
    providers: [
      'anonymous',
      'facebook',
      'google',
      'email',
      'phone',
      'apple',
      'yahoo',
      'github',
      'twitter',
      'microsoft'
    ],
    tosUrl: 'https://example.com/tos.htm',
    privacyPolicyUrl: 'https://example.com/privacypolicy.htm',
  };

  Auth.signIn(config)
    .then(user => console.log(user))
    .catch(err => console.log(err));

...

  Auth.getCurrentUser().then(user => console.log(user));

...

  Auth.signOut().then(res => console.log(res));

...

  Auth.deleteUser().then(res => console.log(res));

...
Returns: user
| Field | Type | Description |
|---|---|---|
| uid | string |
The provider's user ID for the user. |
| displayName | string |
The name of the user. |
| photoURL | string |
The URL of the user's profile photo. |
string |
Indicates the email address associated with this user |
|
| phoneNumber | string |
A phone number associated with the user. |
| providerId | string |
The provider identifier. |
| isNewUser | boolean |
Indicates whether or not the current user was signed in for the first time. |
| creationTimestamp | number |
Stores the timestamp at which this account was created as dictated by the server clock in milliseconds since epoch. |
| lastSignInTimestamp | number |
Stores the last signin timestamp as dictated by the server clock in milliseconds since epoch. |
UI Customization
Optionally, you can use the option customizations to change the look of the authentication screens. This does not apply to the actual sign-in buttons and their position. What you can change depends on the platform.
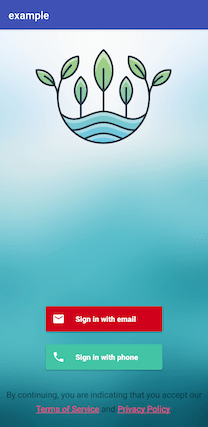
 ##### Android
The values available for android customization are as follows,
```javascript
const config = {
...
customizations: [
'theme',
'logo'
],
};
```
First add FirebaseUI in your build.gradle (:app),
```javascript
dependencies {
implementation 'com.firebaseui:firebase-ui-auth:6.4.0'
...
```
For `theme`, add the next style in your `styles.xml`, then copy into the `drawable` folder an image to use for background and name it `auth_background.png`.
```javascript
```
For `logo`, copy an image in the `drawable` folder and name it `auth_logo.png`.
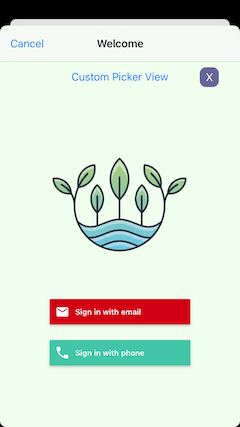
##### iOS
The values available for iOS customization correspond to specific screens and are as follows,
```javascript
const config = {
...
customizations: [
'auth_picker',
'email_entry',
'password_sign_in',
'password_sign_up',
'password_recovery',
'password_verification'
],
};
```
Open your project in `XCode` and add the `.xib` file of the screen you want to customize. The .xib files are located in `./ios/custom-screens/` of this library. Let's say, you want to customize the `auth-picker` screen, add the file `FUICustomAuthPickerViewController.xib` and use the XCode tools to add it labels, images, change colors, and so on.
### Email Password Settings
You can control whether new users can sign in or not by using the option `allowNewEmailAccounts`. Also, if you do not want to require the user name during sign up you can set the option `requireDisplayName` to false.
```javascript
const config = {
...
allowNewEmailAccounts: false,
requireDisplayName: false,
};
```
### Anonymous User upgrade Settings
When an anonymous user signs in or signs up with a permanent account, the `autoUpgradeAnonymousUsers` option allows you to link the existing account (anonymous) with permanent account. This way the user can continue with what they were doing before signing up. By default this option is disabled.
```javascript
const config = {
...
autoUpgradeAnonymousUsers: true,
};
```
## Example Project
Download example from [react-native-firebaseui-auth-example](https://github.com/oijusti/react-native-firebaseui-auth-example)
Create a project in the [Firebase Console](https://console.firebase.google.com) and add apps for Android and iOS. Then enable Email/Password provider in Authentication.
#### Android
Make sure you type `com.example` in the `Android package name` field.
Download the file `google-services.json` in the android/app folder.
#### iOS
Make sure you type `com.example` in the `iOS bundle ID` field.
Download the file ``GoogleService-Info.plist`` in the ios/example folder and add it into the project using xcode.
Update pods `$ pod install`
## Contributing
Feel free to report bugs, ask questions and submit a PR.
If this is your first open source contribution, please take a look at this [guide](https://egghead.io/courses/how-to-contribute-to-an-open-source-project-on-github) .
## Find this library useful?
Please give me a star ✭ if you like it!
## License
(MIT)
##### Android
The values available for android customization are as follows,
```javascript
const config = {
...
customizations: [
'theme',
'logo'
],
};
```
First add FirebaseUI in your build.gradle (:app),
```javascript
dependencies {
implementation 'com.firebaseui:firebase-ui-auth:6.4.0'
...
```
For `theme`, add the next style in your `styles.xml`, then copy into the `drawable` folder an image to use for background and name it `auth_background.png`.
```javascript
```
For `logo`, copy an image in the `drawable` folder and name it `auth_logo.png`.
##### iOS
The values available for iOS customization correspond to specific screens and are as follows,
```javascript
const config = {
...
customizations: [
'auth_picker',
'email_entry',
'password_sign_in',
'password_sign_up',
'password_recovery',
'password_verification'
],
};
```
Open your project in `XCode` and add the `.xib` file of the screen you want to customize. The .xib files are located in `./ios/custom-screens/` of this library. Let's say, you want to customize the `auth-picker` screen, add the file `FUICustomAuthPickerViewController.xib` and use the XCode tools to add it labels, images, change colors, and so on.
### Email Password Settings
You can control whether new users can sign in or not by using the option `allowNewEmailAccounts`. Also, if you do not want to require the user name during sign up you can set the option `requireDisplayName` to false.
```javascript
const config = {
...
allowNewEmailAccounts: false,
requireDisplayName: false,
};
```
### Anonymous User upgrade Settings
When an anonymous user signs in or signs up with a permanent account, the `autoUpgradeAnonymousUsers` option allows you to link the existing account (anonymous) with permanent account. This way the user can continue with what they were doing before signing up. By default this option is disabled.
```javascript
const config = {
...
autoUpgradeAnonymousUsers: true,
};
```
## Example Project
Download example from [react-native-firebaseui-auth-example](https://github.com/oijusti/react-native-firebaseui-auth-example)
Create a project in the [Firebase Console](https://console.firebase.google.com) and add apps for Android and iOS. Then enable Email/Password provider in Authentication.
#### Android
Make sure you type `com.example` in the `Android package name` field.
Download the file `google-services.json` in the android/app folder.
#### iOS
Make sure you type `com.example` in the `iOS bundle ID` field.
Download the file ``GoogleService-Info.plist`` in the ios/example folder and add it into the project using xcode.
Update pods `$ pod install`
## Contributing
Feel free to report bugs, ask questions and submit a PR.
If this is your first open source contribution, please take a look at this [guide](https://egghead.io/courses/how-to-contribute-to-an-open-source-project-on-github) .
## Find this library useful?
Please give me a star ✭ if you like it!
## License
(MIT)