
ENFUGUE is an open-source web app for making studio-grade images and video using generative AI.
For server or desktop, beginners or pros.
New - Come visit the Discord!


 Views of the ENFUGUE user interface in various configurable themes, click to view full-size.
# Feature Summary
- 🚀 **One Click Install:** Use our convenient installation script to install, update and launch ENFUGUE without any configuration needed.
- **Plays Nice with Others:** Share AI models or entire server environments between ENFUGUE and all the most popular open-source AI applications.
- 🔪 **Cutting Edge:** All the best open-source image/video generartion models are implemented and available as soon as they're released to the public.
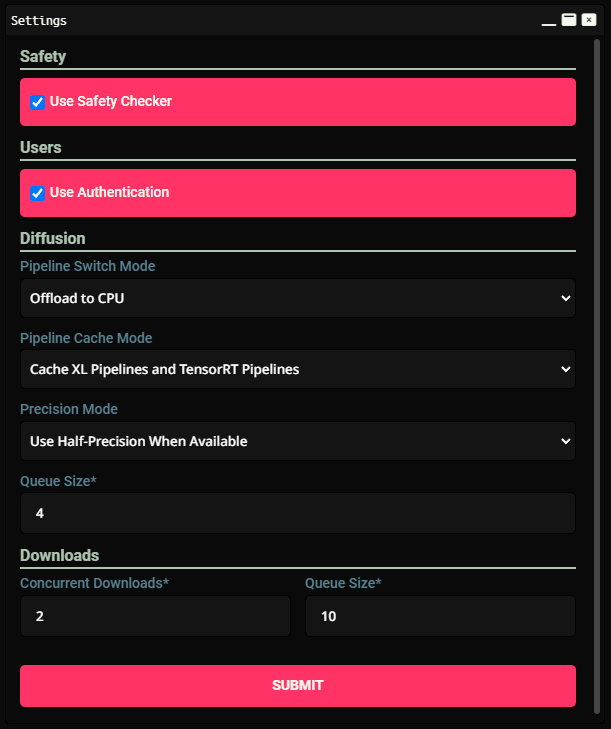
- 👥 **Owners and Users:** Optional authentication and authorization keeps your installation settings locked down for shared environments.
- 🗃 **Easy Model Management:** In-app CivitAI browser brings all the best community models to
- 🧷 **Safety's On:** Safety checker is on by default, and can be disabled by owners right in the UI. You can feel safe
- ♻️ **Waste Not, Want Not:** AI can take a lot of resources, and ENFUGUE takes care to only use what it needs. It will free your GPU as soon as it's no longer needed and clean up unneeded files as it goes.
- 🧈 **Unified Pipeline:** You never need to switch tabs to change input modes. Text-to-image, image-to-video, and all kinds of advanced operations are all immediately available through a combination of the layered canvas and input roles.
- 🛈 **Tooltipped:** Wondering what an input does? Hover your mouse over it and find out; documentation is available right in-app to help ease you into learning features as you need them.
- 🔌 **Plug Away:** All features are available via JSON API, or can be added to your Python scripts using our `diffusers` extensions.
- ☁️ **Your Own Cloud:** All of the best features you would expect from a SaaS application, with the security of knowing nothing ever leaves your computer. Results are kept by the app until you no longer need them, and your browser keeps a lengthy history of workspaces so you can always revisit where you left off.
- ⚙️ **Configurable:** Numerous configuration options are available, both in the GUI and via configuration file. Change IP addresses, ports, SSL configuration, directories, and much more.
# Installation and Running
A script is provided for Windows and Linux machines to install, update, and run ENFUGUE. Copy the relevant command below and answer the on-screen prompts to choose your installation type and install optional dependencies.
## Windows
Access the command prompt from the start menu by searching for "command." Alternatively, hold the windows key on your keyboard and click `x`, then press `r` or click `run`, then type `cmd` and press enter or click `ok`.
```cmd
curl https://raw.githubusercontent.com/painebenjamin/app.enfugue.ai/main/enfugue.bat -o enfugue.bat
.\enfugue.bat
```
## Linux
```sh
curl https://raw.githubusercontent.com/painebenjamin/app.enfugue.ai/main/enfugue.sh -o enfugue.sh
chmod u+x enfugue.sh
./enfugue.sh
```
Both of these commands accept the same flags.
```sh
USAGE: enfugue.(bat|sh) [OPTIONS]
Options:
--help Display this help message.
--conda / --portable Automatically set installation type (do not prompt.)
--update / --no-update Automatically apply or skip updates (do not prompt.)
--mmpose / --no-mmpose Automatically install or skip installing MMPose (do not prompt.)
```
## Manual Installation
If you want to install without using the installation scripts, see this [Wiki page](https://github.com/painebenjamin/app.enfugue.ai/wiki/Installation-and-Running#manual-installation).
## Configuration
Many configuration options are available, but none are required. If you want to specify things such as the host and port that the server listens on, please review the documentation for this on [this Wiki page](https://github.com/painebenjamin/app.enfugue.ai/wiki/Configuration-for-Advanced-Users).
# Application Usage
## Accessing the UI
By default,the UI deploys two servers, one with and without SSL. After starting the server, open a browser and navigate to `https://app.enfugue.ai:45554`. If that doesn't work due to your networking configuration, you can instead access the server at `http://127.0.0.1:45555` or `http://localhost:45555`. Some features are only available in a secure environment and will be disabled when using the insecure server, review the troubleshooting and configuration guides to figure out why it may not be working.
## Quickstart Guide
Please read the newly-written [New User Quick-Start Guide](https://github.com/painebenjamin/app.enfugue.ai/wiki/New-User-Quick%E2%80%90Start-Guide) for basic usage and controls.
## Authentication
When enabled, authentication will be required when using Enfugue. This enables system administrators to create a two-tiered hierarchy of users and administrators, where users are not permitted to modify models or the installation itself; they are only allowed to use the pre-configured setup. The primary impetus behind this was to create the ability for parents to curate an environment for children to safely experiment with generative AI.
Once enabled in the settings menu, you will be taken to a login screen. The default user and password are both `enfugue`, all lowercase. You can change any other user's password as an administrator.
If you ever forget your password, you can reset the root password by creating a file named `password_reset.txt` in the enfugue cache directory with the desired new password, then restart the server. The cache directory is located at `~/.cache/enfugue/`, where `~` is your home directory or user directory, depending on platform.
## Tips
Here are a few quick tips to getting great results:
1. The base Stable Diffusion model can create some pretty good images, but it's with the fine-tuned models from the larger AI community that you will see the best images. Open up the CivitAI browser and download the latest and greatest models to give them a try.
2. The very first invocation with a new model will always take quite a bit longer than subsequent ones, as Enfugue moves files and downloads any other necessary files.
3. Upscaling can take an image from mediocre to great with surprising frequency. Try out the AI upscale methods and upscale diffusion to take your image generation to the next level.
# Troubleshooting
Here are a few steps to take if you're having trouble getting Enfugue to work for you:
1. Ensure your Firewall is not blocking port inbound ports `45554` and `45555`. This would be uncommon, but possible in strict environments. See [here](https://learn.microsoft.com/en-us/windows/security/operating-system-security/network-security/windows-firewall/create-an-inbound-port-rule) for details on how to create an Inbound Port rule.
2. Instead of typing in `my.enfugue.ai`, go directly to `https://app.enfugue.ai:45554/`
3. Instead of trying to use the secure server, use the insecure one by doing to `http://127.0.0.1:45555/`.
4. Clear you cache and cookies, then try reload the app.
5. Report your issue [in the issues tab](https://github.com/painebenjamin/app.enfugue.ai/issues)
If all else fails, you can always try deleting the `enfugue` folder and `enfugue.db` file in your `~/.cache` directory to re-initialize the application.
# FAQ
## What is "Full FP32", "Pruned PickleTensor", etc.?
These flags are the precision level and format of the model. In order to use all of Enfugue's features, Enfugue will change these formats and precisions as necessary, so in theory any of them will work the same as the other. In practice, if one is available, pick `Pruned` and `FP16/Half` for the fastest download and processes.
## What are the best settings for the best images?
There is still much to be learned about generative AI in general, and Stable Diffusion in specific. A great starting point has been preconfigured in Enfugue, but there will be no one-size-fits-all set of parameters that works for every kind of image you want to generate. The best way to learn is simply to play with the values and see what the effect is on the final image.
## Where can I learn more?
1. [The Wiki](https://github.com/painebenjamin/app.enfugue.ai/wiki) (in progress)
2. [The Discussion Boards](https://github.com/painebenjamin/app.enfugue.ai/discussions)
Additional resources will be made available as they are needed, so don't hesitate to ask for what you think will work best for you.
# For Developers
## The Enfugue Diffusion Pipeline
Enfugue uses an extension of `diffusers.StableDiffusionPipeline` that provides a number of additional arguments over the typical signature, weaving between `txt2img`, `img2img`, `inpaint` and `controlnet` as necessary. It also has TensorRT support for all models in the pipeline. Start [here](https://github.com/painebenjamin/app.enfugue.ai/tree/main/src/python/enfugue) for documentation on how it is used.
## Enfugue JSON API
The entirety of Enfugue's capabilities are available via JSON API. Find the documentation in [the wiki.](https://github.com/painebenjamin/app.enfugue.ai/wiki/JSON-API)
## Building
For anyone interested in building from source themselves, simply check out this repository and issue a `make` command to build the associated binary release. See below for all make targets.
| Build Step | Description | Depends On |
| ---------- | ----------- | ---------- |
| **clean** | This target removes build artifacts. | None |
| **typecheck** | This step runs `mypy` against each source file. See [mypy-lang.org](https://mypy-lang.org/) for details on python static typing. Mypy is ran with the `--strict` flag, meaning all constraints are opted in. | Python source files |
| **importcheck** | This step runs `importcheck` against each source file. See [github](https://github.com/python-coincidence/importcheck) for details on importcheck; simply put, it will produce an error if an imported module is not used. | Python source files |
| **unittest** | This step runs `doctest` against each source file. See [the Python Documentation](https://docs.python.org/3/library/doctest.html) for details on doctest. This will run all tests placed in docstrings, you will see these as python commands in the documentation, prepended by `>>>` | Python source files |
| **test** | This step runs `enfugue.test.run`. This will run the `main` method in `
*.py` files places in the `test` directory. | Python source files, python test files |
| **vendor** | This step fetches vendor resources by running all scripts under the `vendor/` directory. | Script files |
| **js** | This step compresses and mangles the `.mjs` files using `terser`. | `src/js/*.mjs` files |
| **css** | This step minifies all `css` files using `cssminify`. | `src/css/*.css` files |
| **html**, **img** | These step simply copy the relevant static directories (`/html`, `/img`) to the build directory. | `src/html/*.html` files, `src/img/*.*` files |
| **sdist** | This step compiles the source distribution into an installable `.tar.gz` file, suitable for passing to `pip install`. Contains all the results of the previous steps | Python source files, passing `typecheck`, `importcheck`, `unittest`, and `test`, running `vendor`, compiling `js`, `css`, `html`, and `img` |
| **dist** | This step compiles the relevant executable artifact (and zips/tars it). | sdist |
| **dockerfile** | This step compiles the dockerfile and prepares it for building. | sdist |
| **docker** | This step builds the docker image. | dockerfile |
## Running directly from Source
To run directly from source (in development mode,) use the `scripts/run-dev.sh` script. This works on Windows (in Cygwin) and on Linux, it has not been tested on MacOS.