

![]()
Plaid
Plaid lets you get a better overview of your Jira worklog. Add, edit and remove your worklog entries, which are neatly laid out on a calendar. Works both with Jira Server and Jira Cloud.
Features
-
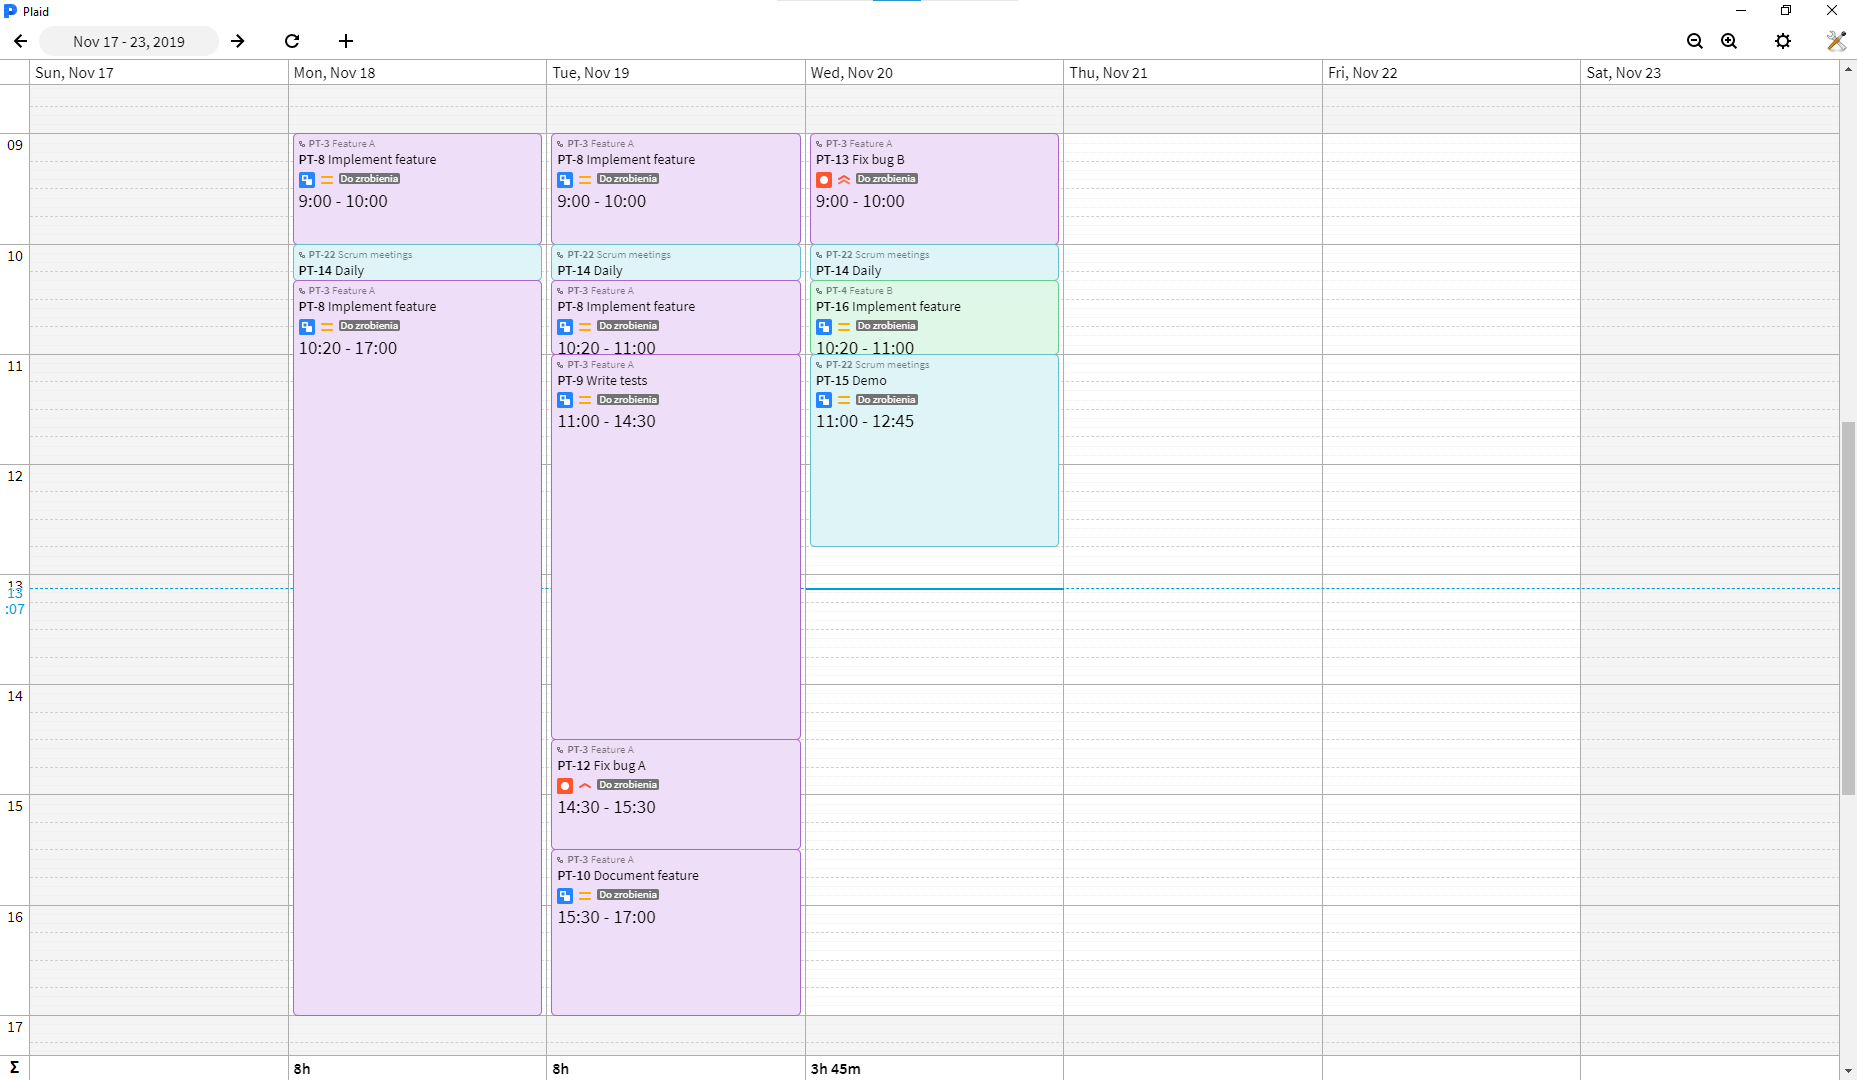
Displaying your worklog
In the upper left corner select the week which you want to display and see your worklog laid out on a vertical timeline. In settings, you may choose to hide weekends if you want more horizontal space, or enable dark mode if you want the grid to be black, and your worklog to be dark. Use zoom buttons in the upper right corner, or Ctrl mouse wheel, to change vertical zoom level.
Note: If prior to using Plaid you did not carefully specify starting time when adding worklog entries, then your existing worklog entries will be scattered across the calendar.
-
Editing entries
Hover you mouse over a worklog entry panel to reveal action buttons. Click the pencil button to enter worklog entry editor. In the form inside the editor panel you may change the entry date and comment. Zoom in if the entry is too short for the form to be legible.
Hold and drag the back of the editor panel to move the entry. Move horizontally to change the date and vertically to change starting and ending time. Hold and drag the upper or lower handle to change starting and ending time independently. You can hold modifier keys to change dragging precision:
- default - 5 minutes,
- Alt - 1 minute,
- Shift - 15 minutes,
- Ctrl - 60 minutes.
Click "Save" to submit changes to Jira.
-
Adding entries
Click the + button in the top bar to invoke worklog entry editor in adding mode. Choose the issue, to which you want to log your work, by clicking on the first field in the editor form. Plaid will suggest issues, with which you interacted, which had recently changed status (or which were newly created). You can also search issues by text in the issue, or issue key. Above that you can mark issues as favorite, that way they will appear on top of the suggestions list.
Plaid also hints you to fill gaps:
- between your worklog entries,
- between the start of the work day (adjustable in settings) and the first entry in the day,
- between the last entry in the day and the end of the work day (adjustable in settings),
- the last entry and present time.
Hold your mouse over a gap to reveal a + button. Click it to invoke worklog entry editor in adding mode filling the gap.
Click "Add" to submit the new entry to Jira.
-
Deleting entries
Hover you mouse over a worklog entry panel to reveal action buttons. Click the trash button and then click "Yes" to delete the entry.
New in 1.0
- Adding new worklog entries
- Deleting existing worklog entries
- Keyboard navigation in worklog entry editor form is now possible
See full change log in changelog.md
Installation
Windows
Download the installer from the latest release. Run the executable, and you're good to go. Your application will automatically update to newer releases.
Ubuntu
Application is available to install from Snapcraft:
sudo snap install plaidDevelopment
Make sure you have npm installed on your system and available globally. Then install the dependencies:
npm installAt this point you can start debugging the application by serving the Angular project:
npm run serve-devand in a separate terminal running Electron:
npm run start-devBuilding
To build the Angular project to ./build, run:
npm run buildThe built project can then be run without packaging:
npm run startAfter building, you can also package the project for the current platform to ./dist:
npm run package