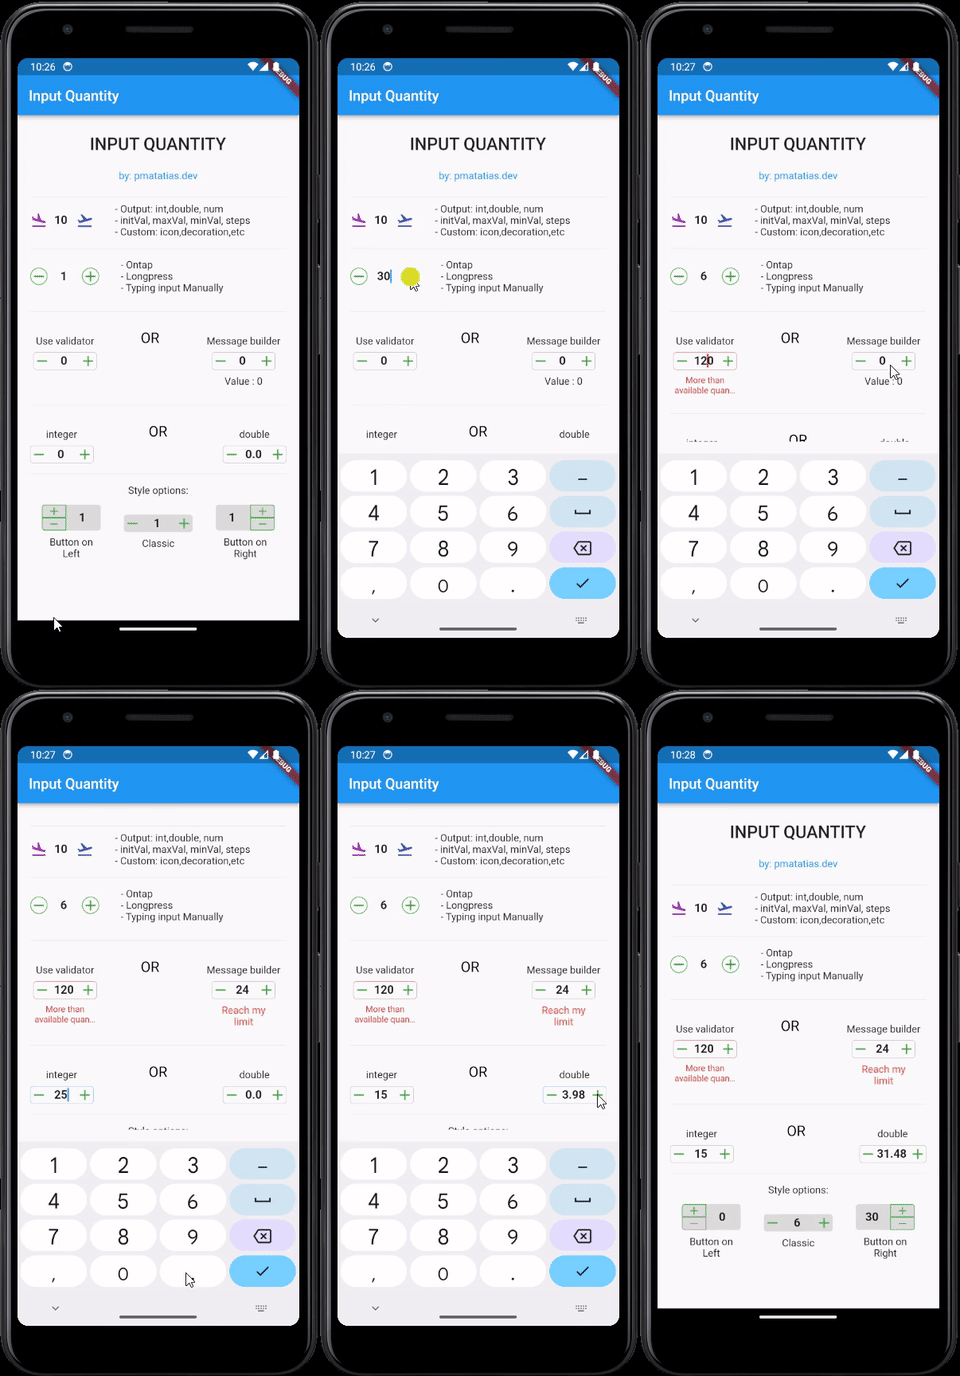
Input Quantity
Flutter widget for quantity input. Increase or decrease the input value by pressing the button. It's built with text fields, so InputQty also supports manually typing quantities. Very flexible for large quantities. For example, if the user wants to enter the value 19243, it will be very difficult to only rely on buttons.
Set input limits so that input values automatically return to predefined maximum/minimum values.

Features
- Simple and easy to use
- Customizable
- Output:
int,double, ornum - Style options: classic, button on the left or button on the right
- Tap once to update the value,
longpressfor update the value continuously, or type the value manually. - Add validator form, or use custom message builder
Usage
- example:
import 'package:input_quantity/input_quantity.dart';
...
  InputQty(
    maxVal: 100,
    initVal: 0,
    minVal: -100,
    steps: 10,
    onQtyChanged: (val) {
      print(val);
    },
  ),
Typing manual
if you want to prevent typing manually, you can disable it from enableTyping
InputQty(
  qtyFormProps: QtyFormProps(enableTyping: false),
  ...
)
Output
By default, the output will be as a num.
InputQty(
  onQtyChanged: (val) {
      print(val.runType);// num
    },
)
in v1, we need to parse the output back to int or double inside onChange. Now from v2, you can specify the output.
as int
InputQty.int(
  onQtyChanged: (val) {
      print(val.runType);// int
    },
)
or as double
InputQty.double(
  onQtyChanged: (val) {
      print(val.runType);// double
    },
)
The position and orientation of the button
by default will be set as classic mode. Which is the plus button on the right and the minus button on the left
InputQty(
   decoration: const QtyDecorationProps(
          qtyStyle: QtyStyle.classic
   )
)
Put the button on the left :
InputQty(
   decoration: const QtyDecorationProps(
       qtyStyle: QtyStyle.btnOnLeft
       orientation: ButtonOrientation.horizontal
   )
)
last choice, on the right side
InputQty(
   decoration: const QtyDecorationProps(
      qtyStyle: QtyStyle.btnOnRight
      orientation: ButtonOrientation.vertical
   )
)
For other example styling, you may check on the example page

To Do
- Add more documentation
- Splash effect
- Export icon decoration
- Add more example
Additional information
-
To contribute to this project, you can open a PR or an issue.
-
Want to thank me? you can buy me a coffee


