MMM-GoogleSheets
NOTE: If you use this module, please send me example images that I can include in the bottom of this page so others can be inspired by your work!
This a module for MagicMirror²
https://github.com/MagicMirrorOrg/MagicMirror
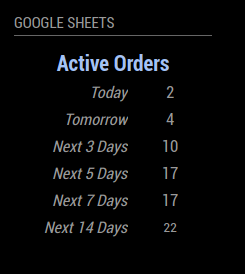
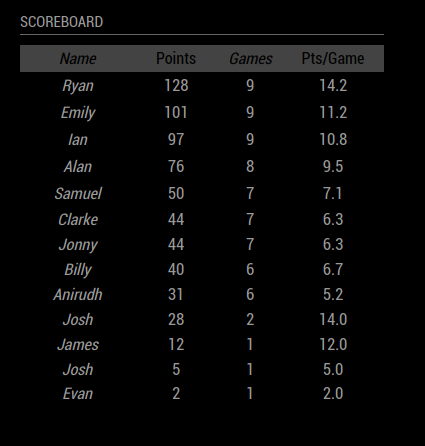
This module displays data from Google Sheets Spreadsheets on the MagicMirror². Any data that you can display on a spreadsheet you can now display on your MM! Create your own custom dashboard, stay up to date on important data, or even create your own custom modules in Google Sheets without having to write the code.


Installation
This installation process is two steps. Step 1 involves getting Google Apps Script set up to communicate with our MagicMirror² module. Step 2 is the standard MagicMirror² module installation.
-
Setting up the Google Apps Script
- Navigate to the Google Sheet that you want to pull data from
- In the top menu, click on
Extensionsand thenApps Script
- In the new script editor window, click on
Add a Library
- Paste the following into the "Script ID" field
1a6A0PqVebZUkbUC8lq__djKv6y9wZyF8y7v8dIkPpV7-mdmxwrt5SxDK - Click "Look Up"
- Select the most recent version of the library (currently 21)
- Make sure the identifier says
MMMGoogleSheets - Click
Add -
Paste the following code into the code editor (you can remove the default code)
function doGet(e){ return MMMGoogleSheets.doGet(e); } - Near the top right, click
Deployand thenNew Deployment
- In the menu that pops up, press the gear in the top left and then
Web app
-
In the menu that pops up:
- Add a description (optional)
- Leave "Execute the app as:" as your account.
- CRITICAL STEP: Do not change it
- Change "Who has access:" to
Anyone - CRITICAL STEP: this must say
Anyone

- Click
Deploy- If this is your first time deploying the app, it will ask you to grant permissions
- Click "Authorize access"
- Click on your gmail account (the one that owns the spreadsheet)
- In the popup that says "Google hasn't verified this app" click on "Advanced"
- Click on "Go to {project name} (unsafe)"
- (Why unsafe?)
- Click on Allow
- Copy the URL (NOT the Deployment ID) in the following screen, this will be used in your config for the module
-
Setting up the module
-
Navigate into your MagicMirror²
modulesfolder and executegit clone https://github.com/ryan-d-williams/MMM-GoogleSheets.git.
-
Configuration
At a minimum you need to supply the following required configuration parameters:
url(the URL you got from step 1 of the installation process)sheet(sheet name you want to get the range from)- Example: "Sheet1"
- IMPORTANT: This is the sheet name (located in the bottom left of the screen when you have the Google Sheet open). This is not the document name (located in the top left of the of the screen when you have the Google Sheet open).
range(eitherautoor range of cells - in A1 notation - that you want to display on the MM)- Auto will use the
getDataRange()function to pull all data from the sheet - Example of A1 notation: "A1:B7"
- Auto will use the
Other optional parameters
| Option | Description |
|---|---|
updateInterval |
How frequently, in minutes, to refesh data from Google Sheets. Type NumberDefaults to 10 |
requestDelay |
In milliseconds, how long to delay the request. Type NumberDefaults to 0 |
updateFadeSpeed |
How quickly in milliseconds to fade the module out and in upon data refresh. Set this to 0 for no fade.Type NumberDefaults to 500 (i.e.: 1/2 second). |
language |
The language to be used for display. Type StringDefaults to the language set for MagicMirror² |
cellStyle |
How to style the spreadsheet data. Options are: mimic - Mimics the styling of the Google Sheetflat - No styling applied. Data is shown in default MM stylingtext - Only the Google Sheet font colors are appliedinvert - Cell background colors are used for text colors. Good for sheets that have lots of cell colorscustom - Custom user styling using other config options (below)Note: See the limitations section for info on what styling can and cannot be mimicked from Google Sheets Type StringDefaults to mimic |
border |
Applies a border to the cells. Options are: dimmed - MM dimmed colored border (#666)normal - MM normal colored border (#999)bright - MM bright colored border (#fff){CUSTOM CSS} - Custom CSS string that will applied as the border property. This string must be a valid CSS border property (i.e. "1px solid red").Type StringDefaults to none |
stylesFromSheet |
List of style properties to use from the Google Sheet. This is useful if you want to mimic some of the Google Sheet styling but not all of it. Available properties are background-color, color, text-decoration, font-style, font-size, font-weight, text-align, vertical-align, width, and heightExample: ["background-color", "font-size"]Note: This property will override cellStyle properties if there are conflicts. Type String[]Defaults to [] |
customStyles |
List of custom CSS styles that will be applied to each cell Example: ["padding: 5px 10px","font-size:25px"]Note: This property will override cellStyle properties if there are conflicts Type String[]Defaults to [] |
headerStyles |
Similar to customStyles, but only applied to the first row (header row) Note: This property will override cellStyle properties if there are conflicts Type String[]Defaults to [] |
styleFunc |
Custom function that returns styles for each cell. The function inputs are the row number, column number, and the Google Sheets properties of the cell at that row and column number. The function should return a valid CSS property string that will be applied to that cell. Example (color every other row text red): (rowNum, colNum, cellProps) => {if(rowNum%2 == 0){return "color:red;"}}The available properties of the third argument to the function are background_color, color, text_decoration, font_style, font_size, font_weight, text_align, vertical_align, height, width, display (true if the cell will be rendered) Note that these properties are not CSS properties, but rather the attributes pulled from Google Sheets. These attributes will not be applied to the cell unless you are in a mimic mode with cellStyle or stylesFromSheet Note: This property will override cellStyle properties if there are conflicts Type FunctionDefaults to null |
Sample Configurations
Minimal required Configuration
{
  module: "MMM-GoogleSheets",
  header: "Google Sheets",
  position: "top_right",
  config: {
    url: "URL From Installation Step 1",
    sheet: "Sheet1",
    range: "A1:B6"
  }
}
Sample Configuration with all properties
Note there are a lot of style conflicts here. See the property descriptions above for notes on conflict precedence
{
  module: "MMM-GoogleSheets",
  header: "Google Sheets",
  position: "top_right",
  config: {
    url: "URL From Installation Step 1",
    sheet: "Sheet1",
    range: "A1:B6",
    updateInterval: 1, // minutes
    requestDelay: 250, // ms
    updateFadeSpeed: 0, // ms
    cellStyle: "mimic",
    border: "1px solid #777",
    stylesFromSheet: ["background-color", "color", "font-weight"],
    customStyles: ["font-size: 18px", "padding: 5px"],
    headerStyles: ["font-weight: bold"],
    styleFunc: (rowNum, colNum, cellProps) => {if(rowNum%2 == 0){return "background-color:#666;"}} // Colors every other row background
  }
}
Sample Configs with Images

{
  module: "MMM-GoogleSheets",
  header: "Grocery List",
  position: "bottom_left",
  config: {
    url: "URL From Installation Step 1",
    sheet: "Sheet1",
    range: "A1:B10",
    cellStyle: "invert",
    stylesFromSheet: ["font-size", "text-align", "font-style", "vertical-align", "width", "height"]
  }
}
Using the module for different Google Sheets
If you want to use multiple instances of the module for multiple different Google Sheet ranges, you will need to follow step 1 of the installation process for each sheet (you need to set up a different script for each spreadsheet and get a new url for each instance of the module).
If you are using multiple instances of the module for the same spreadsheet, you can use the same URL and only one script is required.
In the future (if there is demand) I will update the library to use one script for any spreadsheet in Google Drive
Limitations
- When mimicking cell styling from Google Sheets, I am unable to pull the border styles (it does not exist as an option in the API without a major hack. However, this has been mitigated with the
borderproperty above where you can add your own custom border - When mimicking cell styling from Google Sheets, bandings (alternating row / column colors) are not mimicked (yet - in a future version this will be allowed). However, this has been mitigated with the
styleFuncproperty above where you can add your own custom function to style bandings (or any other conditional styles that you want).
| Can Mimic | Cannot Mimic |
|---|---|
|
|
Google Apps Script Library
The library feature of google apps script is used to make it easy to update the code in the future for new features or bug fixes. If you feel more comfortable seeing the code yourself, you can copy the code from the file in this repo. Note that if you choose this option, you will need to manually copy-paste future updates in.
Updating the library
If the libary requires an update (your version is less than the version listed above), you should follow the following steps:
- Open the script file (
Extensions->Apps Scriptfrom your spreadsheet) - On the left under "Libraries" you should see
MMMGoogleSheets. Click on it - Update the "Version" dropdown to the latest version (currently 21)
- IMPORTANT: You must still redeploy the code as a web app for the changes to take place
- Click on
Deploy->New Deployment - ALSO IMPORTANT: Make sure "Execute as" is still your email and "Who has access" is still set to "Anyone"
- Click
Deploy - Copy the new deployment URL to your config (if you forget this step the updates will not work)
- Click on
Why Google Apps Script?
Google Apps Script was chosen instead of the Google Sheets API because the Sheet API requires OAuth2 authentication and it is a little more straight forward to get the Google Apps Script set up over the credentials via Node.js. It is currently planned that a future version of this project will allow both options for authentication
Isn't it bad that Chrome says the project is "unsafe"?
This is default behavior for a Google Apps Script being deployed for the first time. If you are uncomfortable deploying it without seeing the code, see this section above
In the Wild
Send me pictures of your Google Sheets module and I'll add them here
Bugs & Feature Requests
If you find an issue or want a new feature, add it as an issue and I'll be happy to (try to) make it happen
Attributions
I used @jclarke0000's DarkSky module as a template to build this module https://github.com/jclarke0000/MMM-DarkSkyForecast
NOTE: This module uses the Nunjucks templating system introduced in version 2.2.0 of MagicMirror². If you're seeing nothing on your display where you expect this module to appear, make sure your MagicMirror² version is at least 2.2.0.