Pega Personal Edition installation in Debian
If it is useful to you, you can click on the Star in the upper right corner of this repo to show your support.
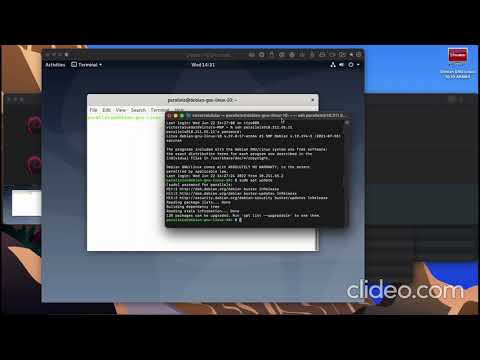
PLEASE NOTE : The following approach has been tested in vagrant Debian 10 OS as well a MacBook running m1 processor. The laptop runs DebianOS on the Parallels software. This has also been tested in Raspberry Pi running DietPi, a highly optimised version of the DebianOS.
BEFORE WE START :
The following softwares are required:
— PEGA Personal Edition 8.7 . The default downloaded ZIP folder needs to be unzipped, and kept ready. — Parallels Software. Download and install the free version of the software — Install Debian on the Parallels Software : use the default version provided in the application, and it downloads and installs it automatically.
The PEGA server would need at least 8GB of RAM to function, and 12 GB for optimal performance. We also need to first install Parallels and then install a Debian Linux GNU box on Parallels software. Both are available for free, and very easy to setup. Once the Virtual Machine (VM) is setup, shut it down, go to Configuration —> Hardware and allocate either 8GB or 12GB RAM to it. Strong recommendation here is to use 12GB RAM for this box.
Once the vm is ready the following steps needs to be performed on the VM :
NOTE: Please refer to the Video before you start the below steps
Step 1
Once the VM is up, go to the terminal inside the VM , and get the IP address by executing the command
ip aStep 2
Now, minimize the VM, go into the Mac Terminal and SSH to the Linux VM using the command :
ssh parallels@<IP Address>You will be prompted for password. This password will be the default password set of Parallels ID in Debian VM
Step 3
Install GIT on the VM , by the below set of commands :
sudo apt update
sudo apt install git
Step 4
Now run the below git command to clone the required script.
git clone https://github.com/sunilsankar/pega-pe.gitNow go inside the pega-pe folder, and execute the install script using the below set of commands :
cd pega-pe
sudo su
sh install.sh
Step 5
Now, before any further steps are taken , go to the PEGA Personal Edition folder. Inside the data folder, there should 2 .dump folders. First , create a Terminal session within Macbook, and then copy the 2 folders into the newly created VM using the below commands :
cd Downloads/117149_PE_8.7/data

scp -r *.dump parallels@<IP Address>:
Step 6
Switch to root:
sudo su -Move the folders into the required folders:
mv /home/parallels/*.dump /var/lib/postgresql Provide required access to the postgres user
chown -R postgres:postgres /var/lib/postgresql/Switch user to postgres :
su - postgresverify that you are in the required folder by doing a pwd and checking that the folder is indeed /var/lib/postgresql
Step 7
pg_restore -U postgres --disable-triggers -d postgres -O -j 2 -v sqlj.dump
pg_restore -U postgres --disable-triggers -d postgres -O -j 2 -v pega.dump
Now, the below step is optional, but would provide a significant improvement in performance.
psql

reindex database postgres;
Step 8
Test the db connectivity and verify if the server is starting up correctly.The password is postgres
psql -U postgres -h localhost -p 5432 -d postgresStep 9
Now, before any other steps are taken on the VM, inspect the Personal Edition zip folder. It contains a JAR file known as PRPC_PE.jar. Go to the same folder as the JAR file, and execute the below steps :
unzip PRPC_PE.jar
unzip PersonalEdition.zip
(On the 2nd command , you might get a question like this :
replace META-INF/MANIFEST.MF? [y]es, [n]o, [A]ll, [N]one, [r]ename: Press Y and continue.)
Step 10
In the same path as before, go inside tomcat/webapps folder. There are
scp -r *.war parallels@<IP Address>:The above command moves the file to the home folder. Now from there, move the files to the required folder, which is inside the tomcat application installed in Step 4
sudo su -

mv /home/parallels/*.war /opt/apache-tomcat-8.5.14/webapps
Step 11
Final Step !!!
Close all terminals just to be sure. Then SSH from Macbook terminal to the Debian VM, as shown in Step 2
Now, navigate to the required folder , and start the tomcat as shown below :
sudo su -
cd /opt/apache-tomcat-8.5.14/bin
./startup.sh
You can optionally tail the logs by the below steps :
cd ../logs
tail -f catalina.out
Once the server is up, go to this URL :
http://<IP Address>:8080/prweb.The server should be up !
To shut down the server , simply execute the shutdown.sh script in the same method as given above in step 11.
Troubleshooting
Incase if you see errors during startup it is due to the dump files not loaded properly into the database
Unable to load phase 2 bootstrap class: com.pega.pegarules.internal.bootstrap.phase2.PRBootstrapImpl
01-Jul-2022 03:23:49.175 SEVERE [localhost-startStop-1] com.pega.pegarules.internal.bootstrap.PRBootstrap. Error initializing PRAppLoader
 java.lang.ClassNotFoundException: com.pega.pegarules.internal.bootstrap.phase2.PRBootstrapImpl
        at com.pega.pegarules.internal.bootstrap.PRMiniLoader.loadClass(PRMiniLoader.java:378)
        at java.base/java.lang.ClassLoader.loadClass(ClassLoader.java:522)
        at com.pega.pegarules.internal.bootstrap.PRBootstrap.loadPhase2BootstrapClass(PRBootstrap.java:733)
        at com.pega.pegarules.internal.bootstrap.PRBootstrap.checkForStartup(PRBootstrap.java:676)
        at com.pega.pegarules.internal.bootstrap.PRBootstrap.invokeMethodPropagatingThrowable(PRBootstrap.java:427)
        at com.pega.pegarules.boot.internal.extbridge.AppServerBridgeToPega.invokeMethodPropagatingThrowable(AppServerBridgeToPega.java:225)
        at com.pega.pegarules.boot.internal.extbridge.AppServerBridgeToPega.invokeMethod(AppServerBridgeToPega.java:274)
        at com.pega.pegarules.internal.web.servlet.WebAppLifeCycleListenerBoot.contextInitialized(WebAppLifeCycleListenerBoot.java:92)
        at org.apache.catalina.core.StandardContext.listenerStart(StandardContext.java:4745)
        at org.apache.catalina.core.StandardContext.startInternal(StandardContext.java:5207)
        at org.apache.catalina.util.LifecycleBase.start(LifecycleBase.java:150)
        at org.apache.catalina.core.ContainerBase.addChildInternal(ContainerBase.java:752)
        at org.apache.catalina.core.ContainerBase.addChild(ContainerBase.java:728)
        at org.apache.catalina.core.StandardHost.addChild(StandardHost.java:734)
        at org.apache.catalina.startup.HostConfig.deployWAR(HostConfig.java:952)
        at org.apache.catalina.startup.HostConfig$DeployWar.run(HostConfig.java:1823)
        at java.base/java.util.concurrent.Executors$RunnableAdapter.call(Executors.java:515)
        at java.base/java.util.concurrent.FutureTask.run(FutureTask.java:264)
        at java.base/java.util.concurrent.ThreadPoolExecutor.runWorker(ThreadPoolExecutor.java:1128)
        at java.base/java.util.concurrent.ThreadPoolExecutor$Worker.run(ThreadPoolExecutor.java:628)
        at java.base/java.lang.Thread.run(Thread.java:829)
We need to run the below command to restore the dump file again.
 pg_restore -U postgres --disable-triggers -d postgres -O -j 2 -v sqlj.dump --clean
 pg_restore -U postgres --disable-triggers -d postgres -O -j 2 -v pega.dump --clean