This is a Blender add-on that allows you to import HS2/AI characters and to manipulate them.
FEATURES
- The exact rig used by the game, with armature vertex weights, bone constraints, and shape keys / blend shapes.
- Limited IK support.
- Hair, clothes, and accessories (though as far as how accurate they will be, YMMV.)
- A number of optional extensions to fine-tune character shapes in ways not natively available in-game (e.g. nostril shapes and temple depressions.)
- A "preset database" for easy manipulation of previously imported characters.
STEP BY STEP INSTRUCTIONS
INSTALLATION
Blender 4 is required (4.0.2 is known to work).
Download the project as a ZIP. In Blender, go to Edit -> Preferences -> Add-ons -> Install ..., select the downloaded package, install and enable it. You will see a 'HS2Rig' tab on the right side of the 3D viewport window.
CHARACTER EXPORT/IMPORT
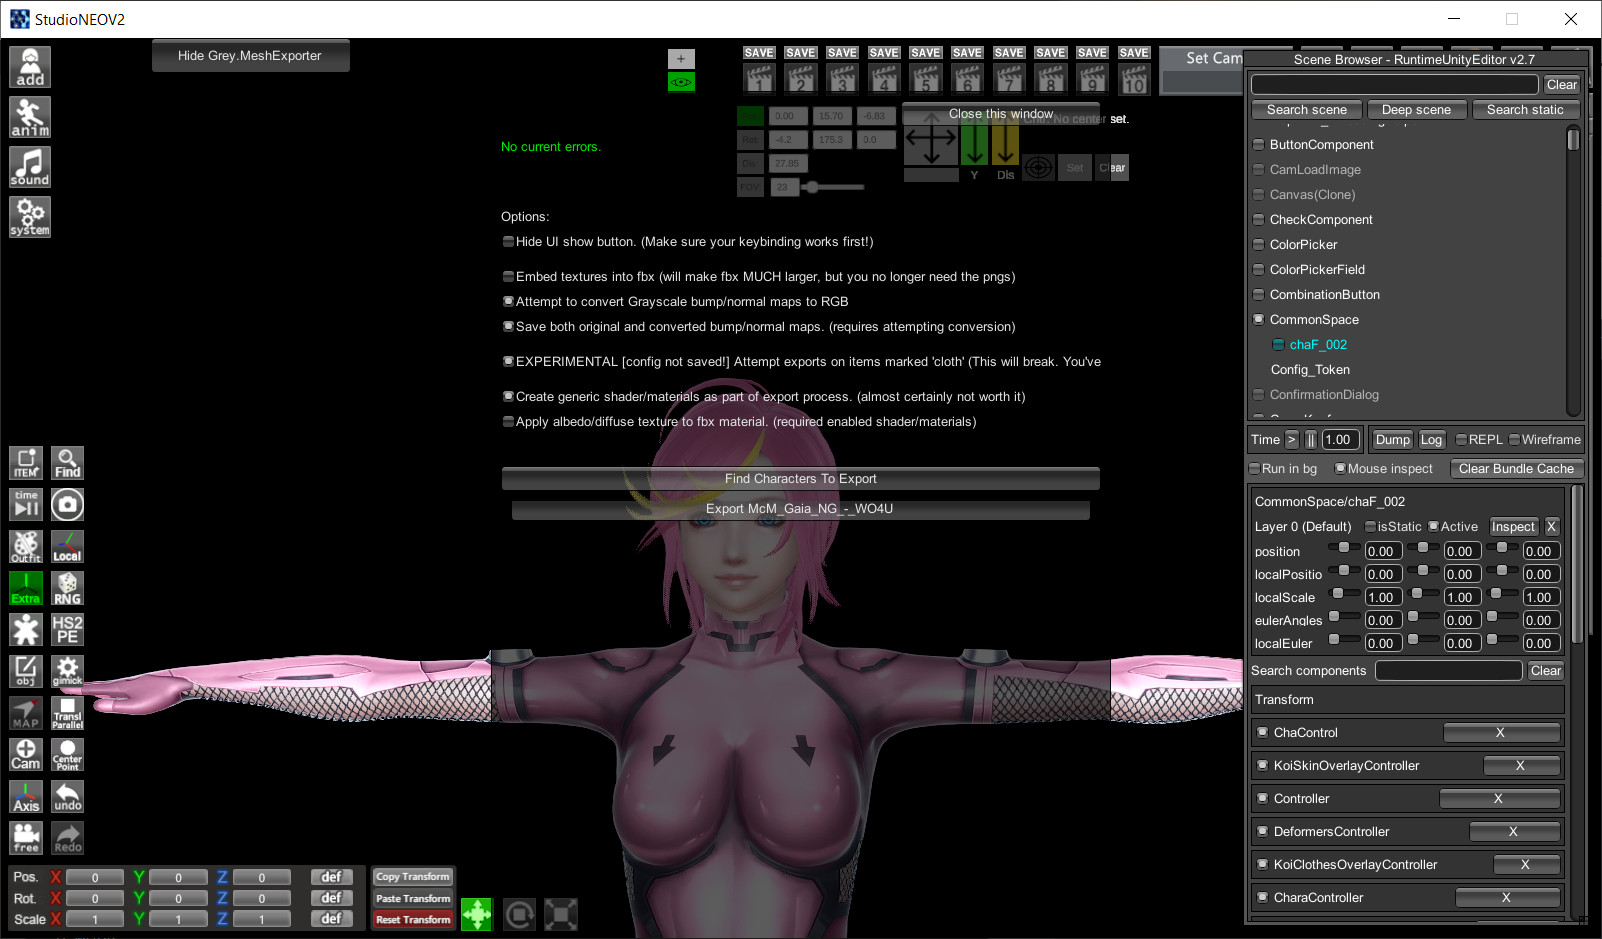
Install Grey's MeshExporter. (It comes as 'optional' with HS2 BetterRepack.)
Launch Studio Neo. Load the character. Put it in T-pose. If it is a female, remove high-heel shoes (they are known to interfere with export). Turn off blinking (Anim -> Kinematics -> Face).
Hit F1, find Runtime Unity Editor, bind a key to open it.
Use MeshExporter to export everything. Do ask for converted bump maps. Don't ask to pack png's into the fbx.
Hit the key for Runtime Unity Editor. In the "Scene Unity Editor", find the node called "Common Space". Inside it, there's a node called "ChaF_001" or something similar. Select that one and hit 'dump'. Save it in the same folder where MeshExporter put the fbx (it is typically called something like "
 Return to Blender. Click on "Import new dump" in the HS2Rig tab and select the folder containing the dump.
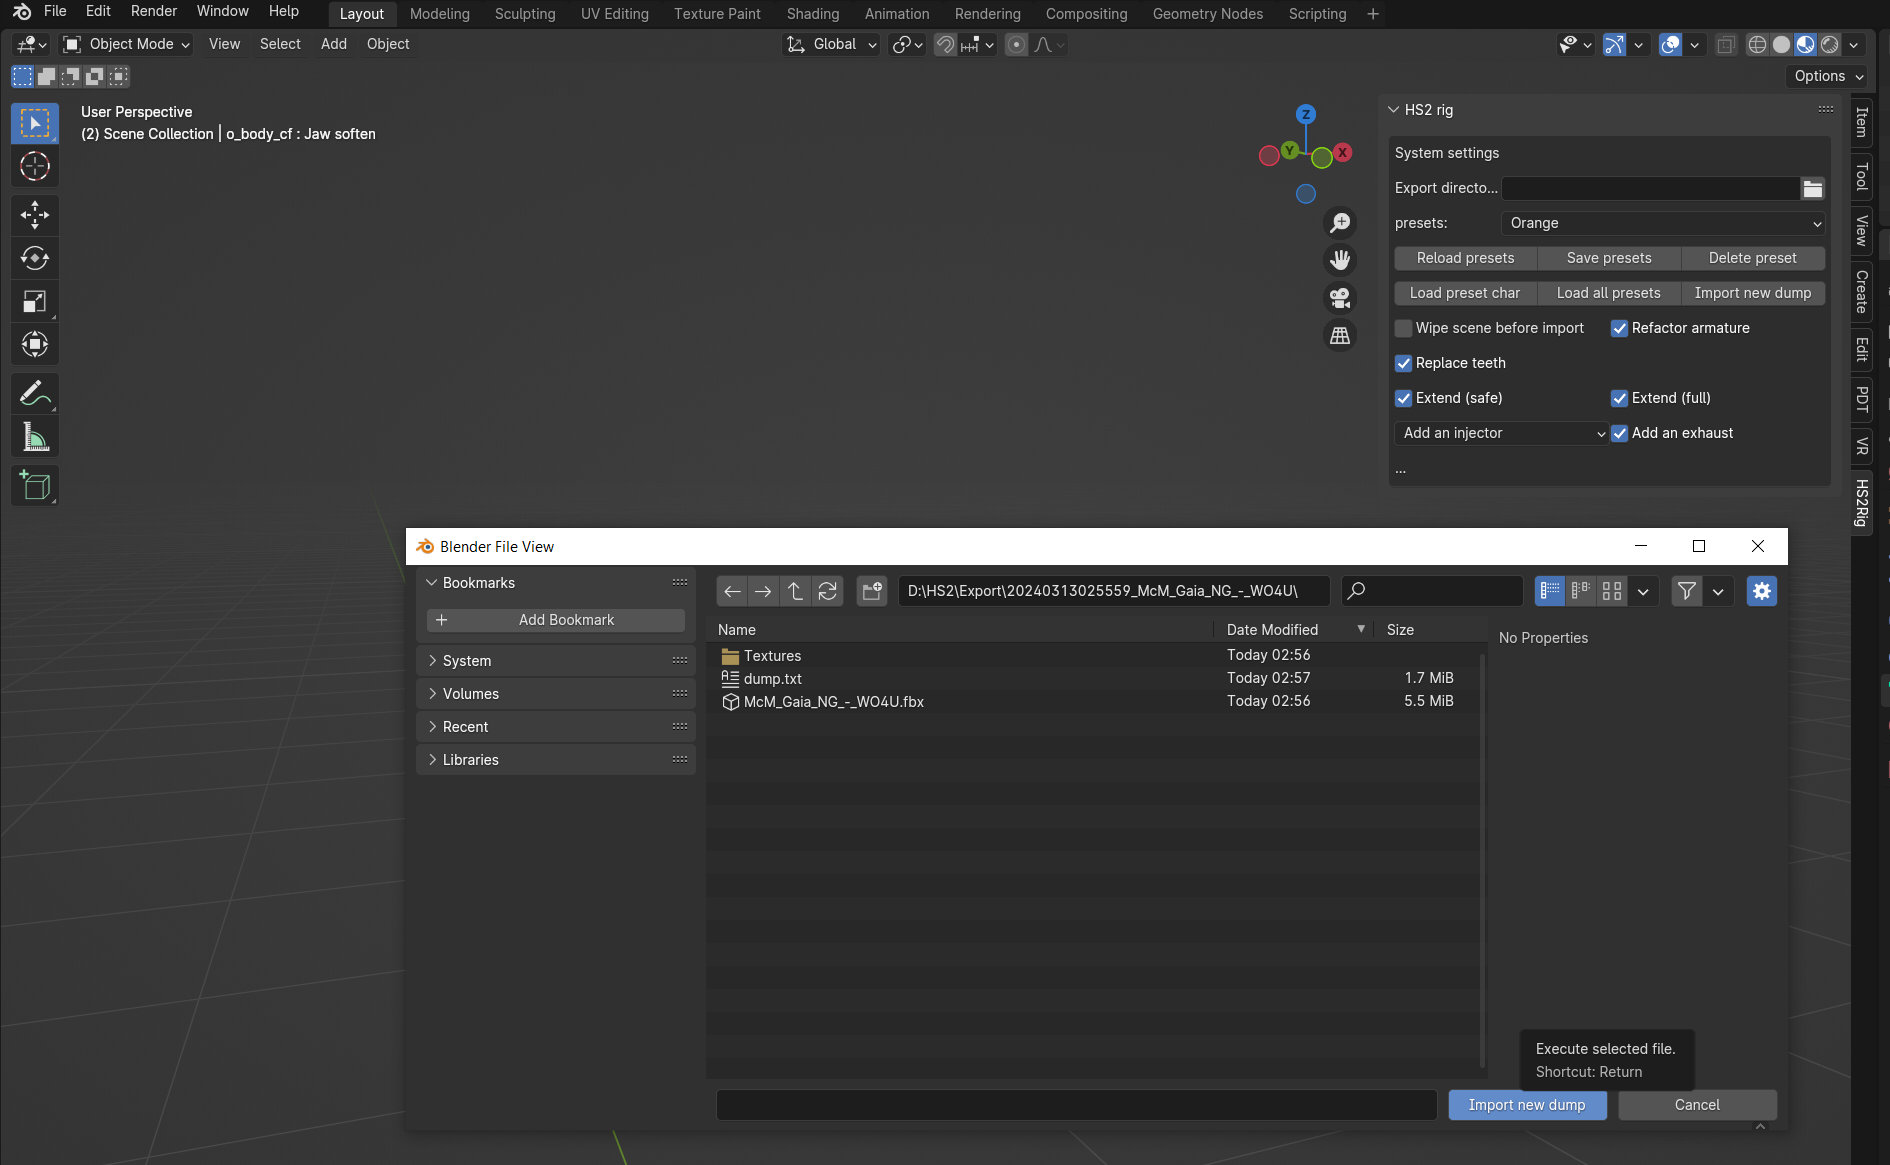
Wait for it to complete (it may take a while.)
If the process is successful, several new controls will appear, including hair color and eye color settings and a few posing controls.
The character can then be customized / fine-tuned in a number of ways:
- Moving and resizing "soft" bones (see "Bone Collections" in the armature properties). E.g., forearms could be made thicker or thinner by enabling the "Arm - soft" bone collection and changing the scale on cf_J_ArmLow01_s_L. (Only the left arm needs to be manipulated, because the corresponding bone in the right arm has a copy constraint.)
- Changing material properties, e.g. head and torso bump scale, head and torso skin gloss, eyebrow location/rotation, fingernail color.
- A couple of editable settings controlling the skin can be found in the "Custom Properties" section of the mesh.
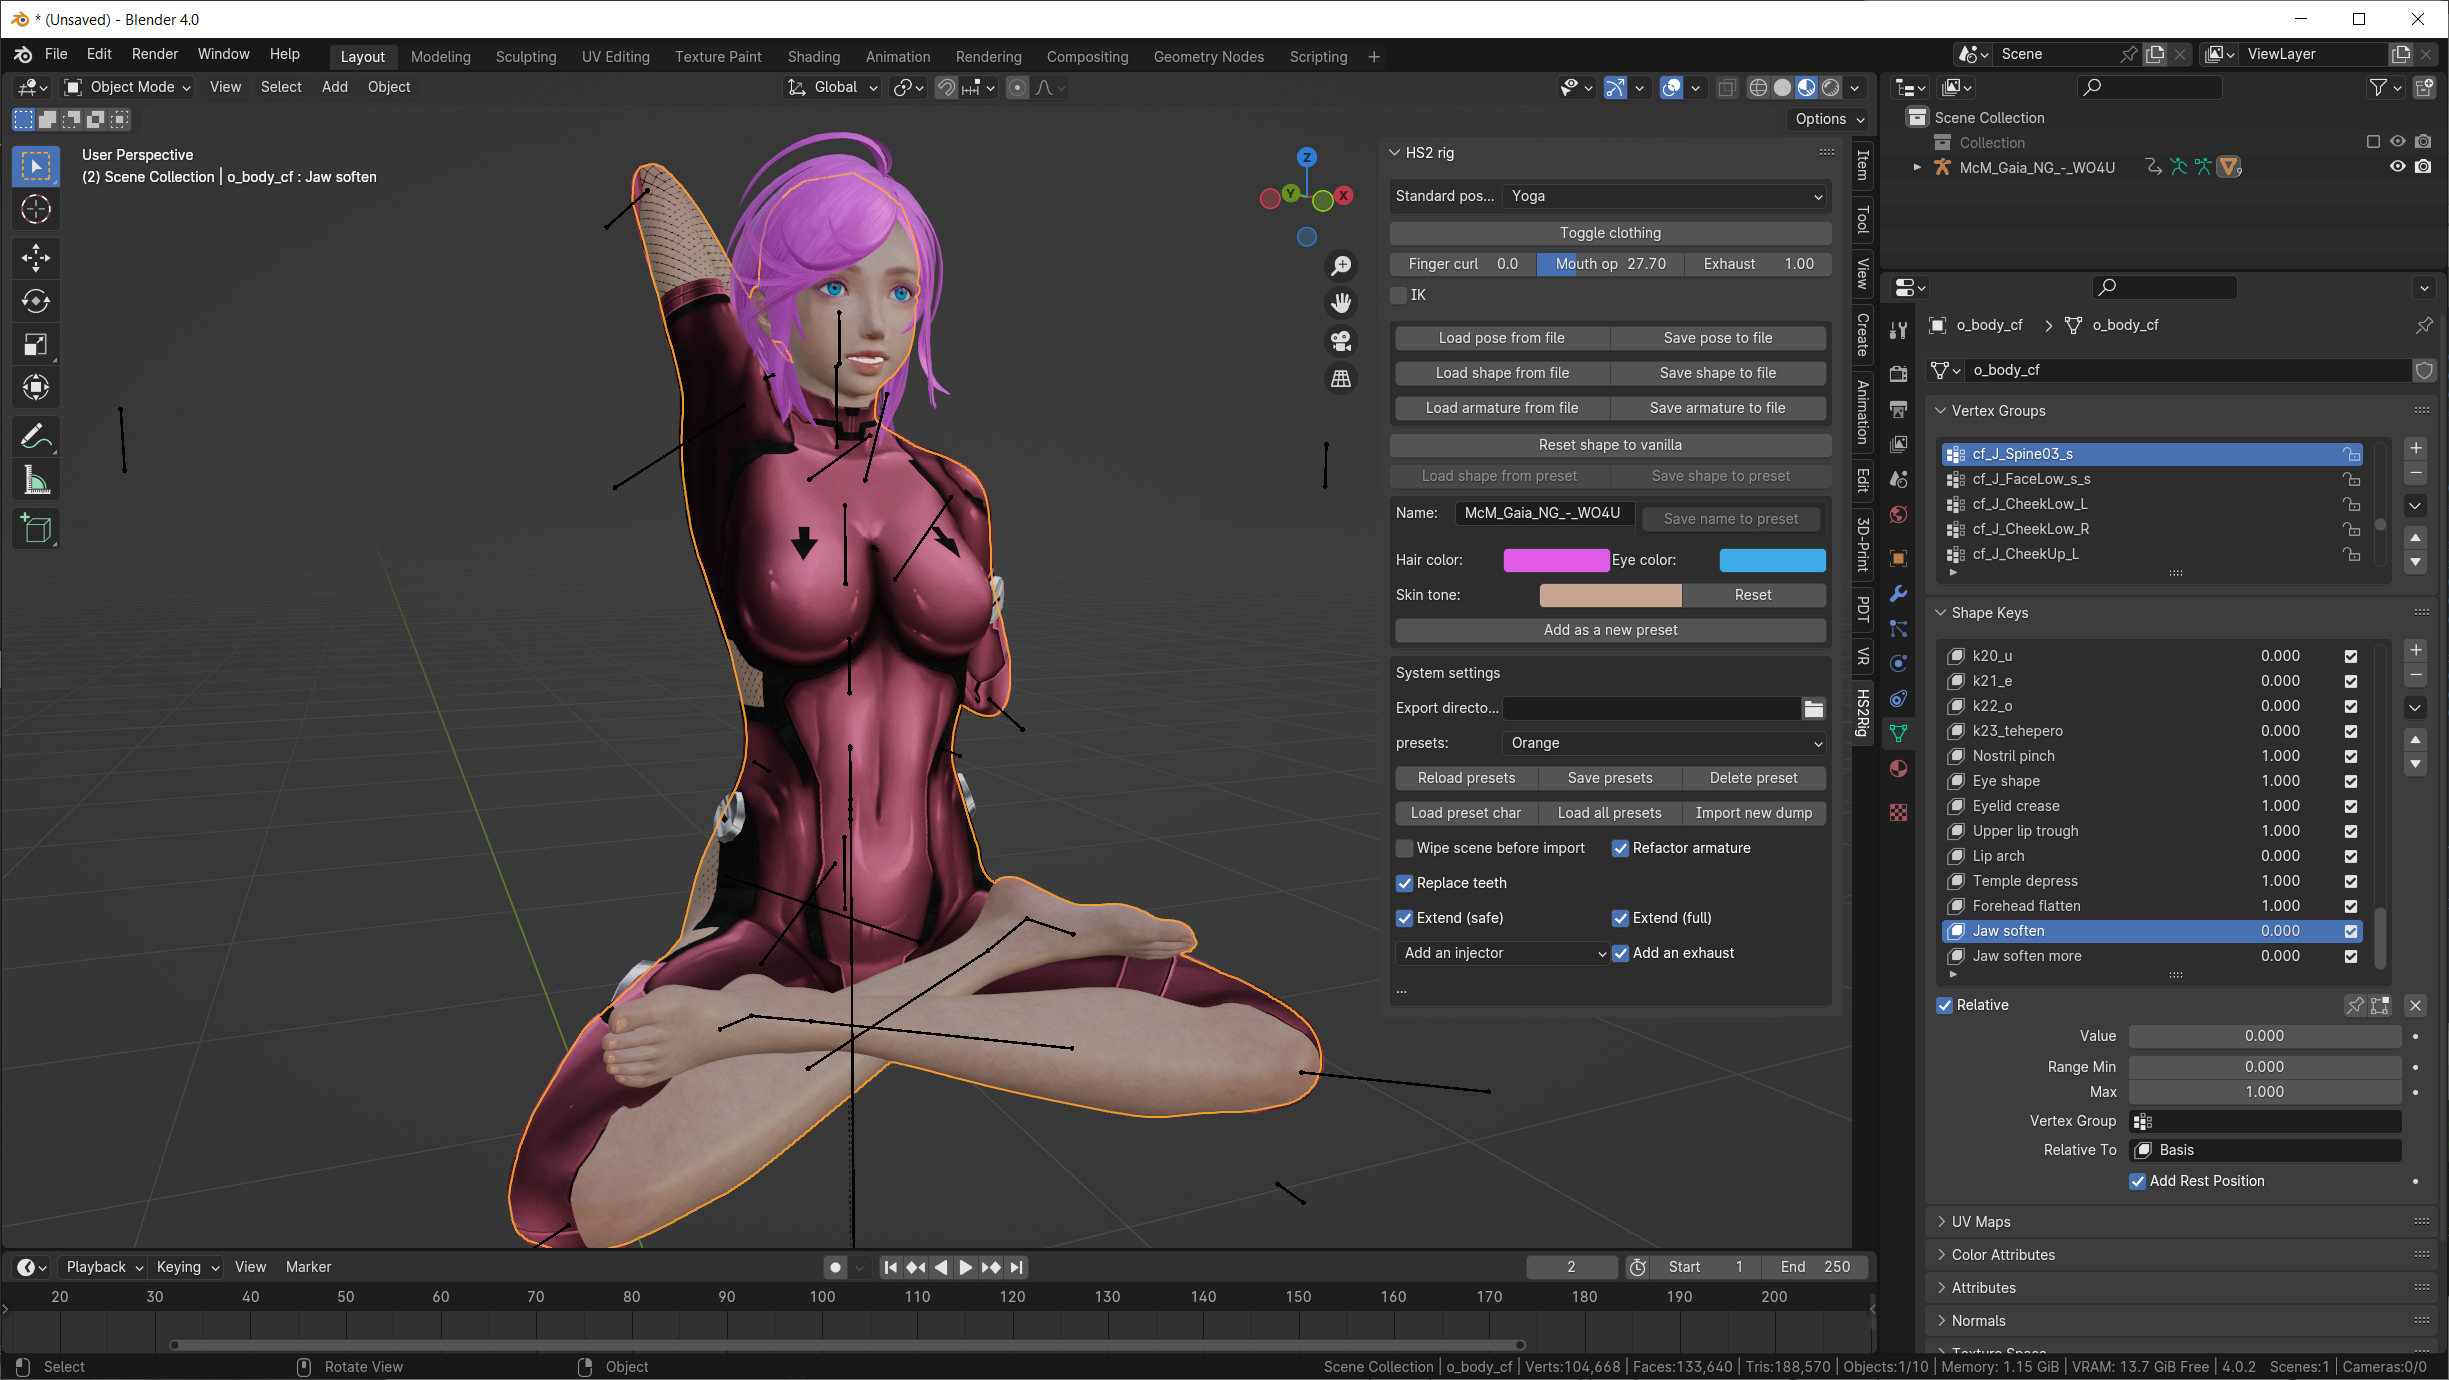
You will also see an "Add as a new preset" button, which will save the information about the imported character, including the path, hair/eye colors, shape customizations, and some material customizations, into a permanent config file. This character could then be reloaded by selecting it in the "presets" drop box and clicking "Load preset character".
TROUBLESHOOTING
- Script does not seem to do anything, or it produces an untextured / incompletely textured object:
Double check that the dump directory contains everything it should (there should be a .fbx, a text file, and a subdirectory called "Textures".) If everything is in order, you've probably encountered a bug in the importer. If a major failure occurs, the script will report the error in the "HS2 rig" panel. Detailed information will be printed in the system console.
- Script imports a character without reporting errors, but the armature is acting weird, and, when in T-pose, arm bones aren't aligned vertically with the character's arms:
May have a few different causes. One possibility is that the Unity dump is wrong (it is for the wrong character, or you've exported the wrong node). It also occurs when importing a character wearing high heels. Remove the shoes and retry. (Most shoes are okay, though. As a general rule, if the character moves up/down when you toggle 'shoes' in Studio Neo, we're going to have trouble.)
- Script imports a male character without reporting errors, but his skin is completely messed up:
To import male characters, you may need to turn off their injectors. If you don't, the injector texture may overwrite the main body texture. (Even if this problem does not occur, the importer currently does not texture them correctly. It may be safer to export the character without an injector; the importer can attach a standard version.)
- There is a visible seam (skin color discontinuity) between the shoulder and the arm:
Something went wrong with bump mapping. Disable by editing the torso material and setting both bump map levels to 0.
- There's a visible seam between the neck and the head:
Either something went wrong with bump mapping (as above, set levels to 0 on the torso and the head); or the script failed to delete some extraneous bits of mesh inside the character's neck. Look inside the neck. If there's a ring of faces sticking out (or rather, in), delete it.
- The character has the "default" low-quality teeth mesh, even though it has good teeth in the game:
This is probably a bug in Studio Neo (you may notice that the character has low-quality teeth there too.) Use MeshExporter to dump the character directly out of the game (you won't be able to do the whole process, since you can't put the character in T-pose, but you can at least get the fbx).
- The character has two pairs of eyebrows:
This happens when one pair is drawn in the head texture and the other pair is overlayed by the shader. Go to head material shader settings and set "Eyebrow scale" to 0.
- The character has two overlapping injectors/exhausts:
This is the expected outcome if the script is unable to figure out how to excise the "original" body part. In particular, this is expected to happen if "HighPoly" uncensor is in use. Manually cut out the duplicate mesh and sew on the remaining copy.
- Clothing items which are semi-transparent in-game appear opaque in Blender:
Switch the material of the clothing item from 'Alpha Clip' to 'Alpha Blend'.
TUNING
To pose or reshape the character, go to "pose mode" on the armature, select layers, then select bones and rotate them with the mouse (click 'r' to go into rotation mode) or directly from the item transform window (top right corner of the 3D view panel).
Shape changes can be committed into the preset by clicking on "Save shape to preset". This only updates the preset in memory; you'll need to click "Save presets" to commit the changes into the preset file (otherwise, changes will be lost when you close Blender.) "Save presets" also commits material settings (such as eyebrow scale) for the currently selected character only.
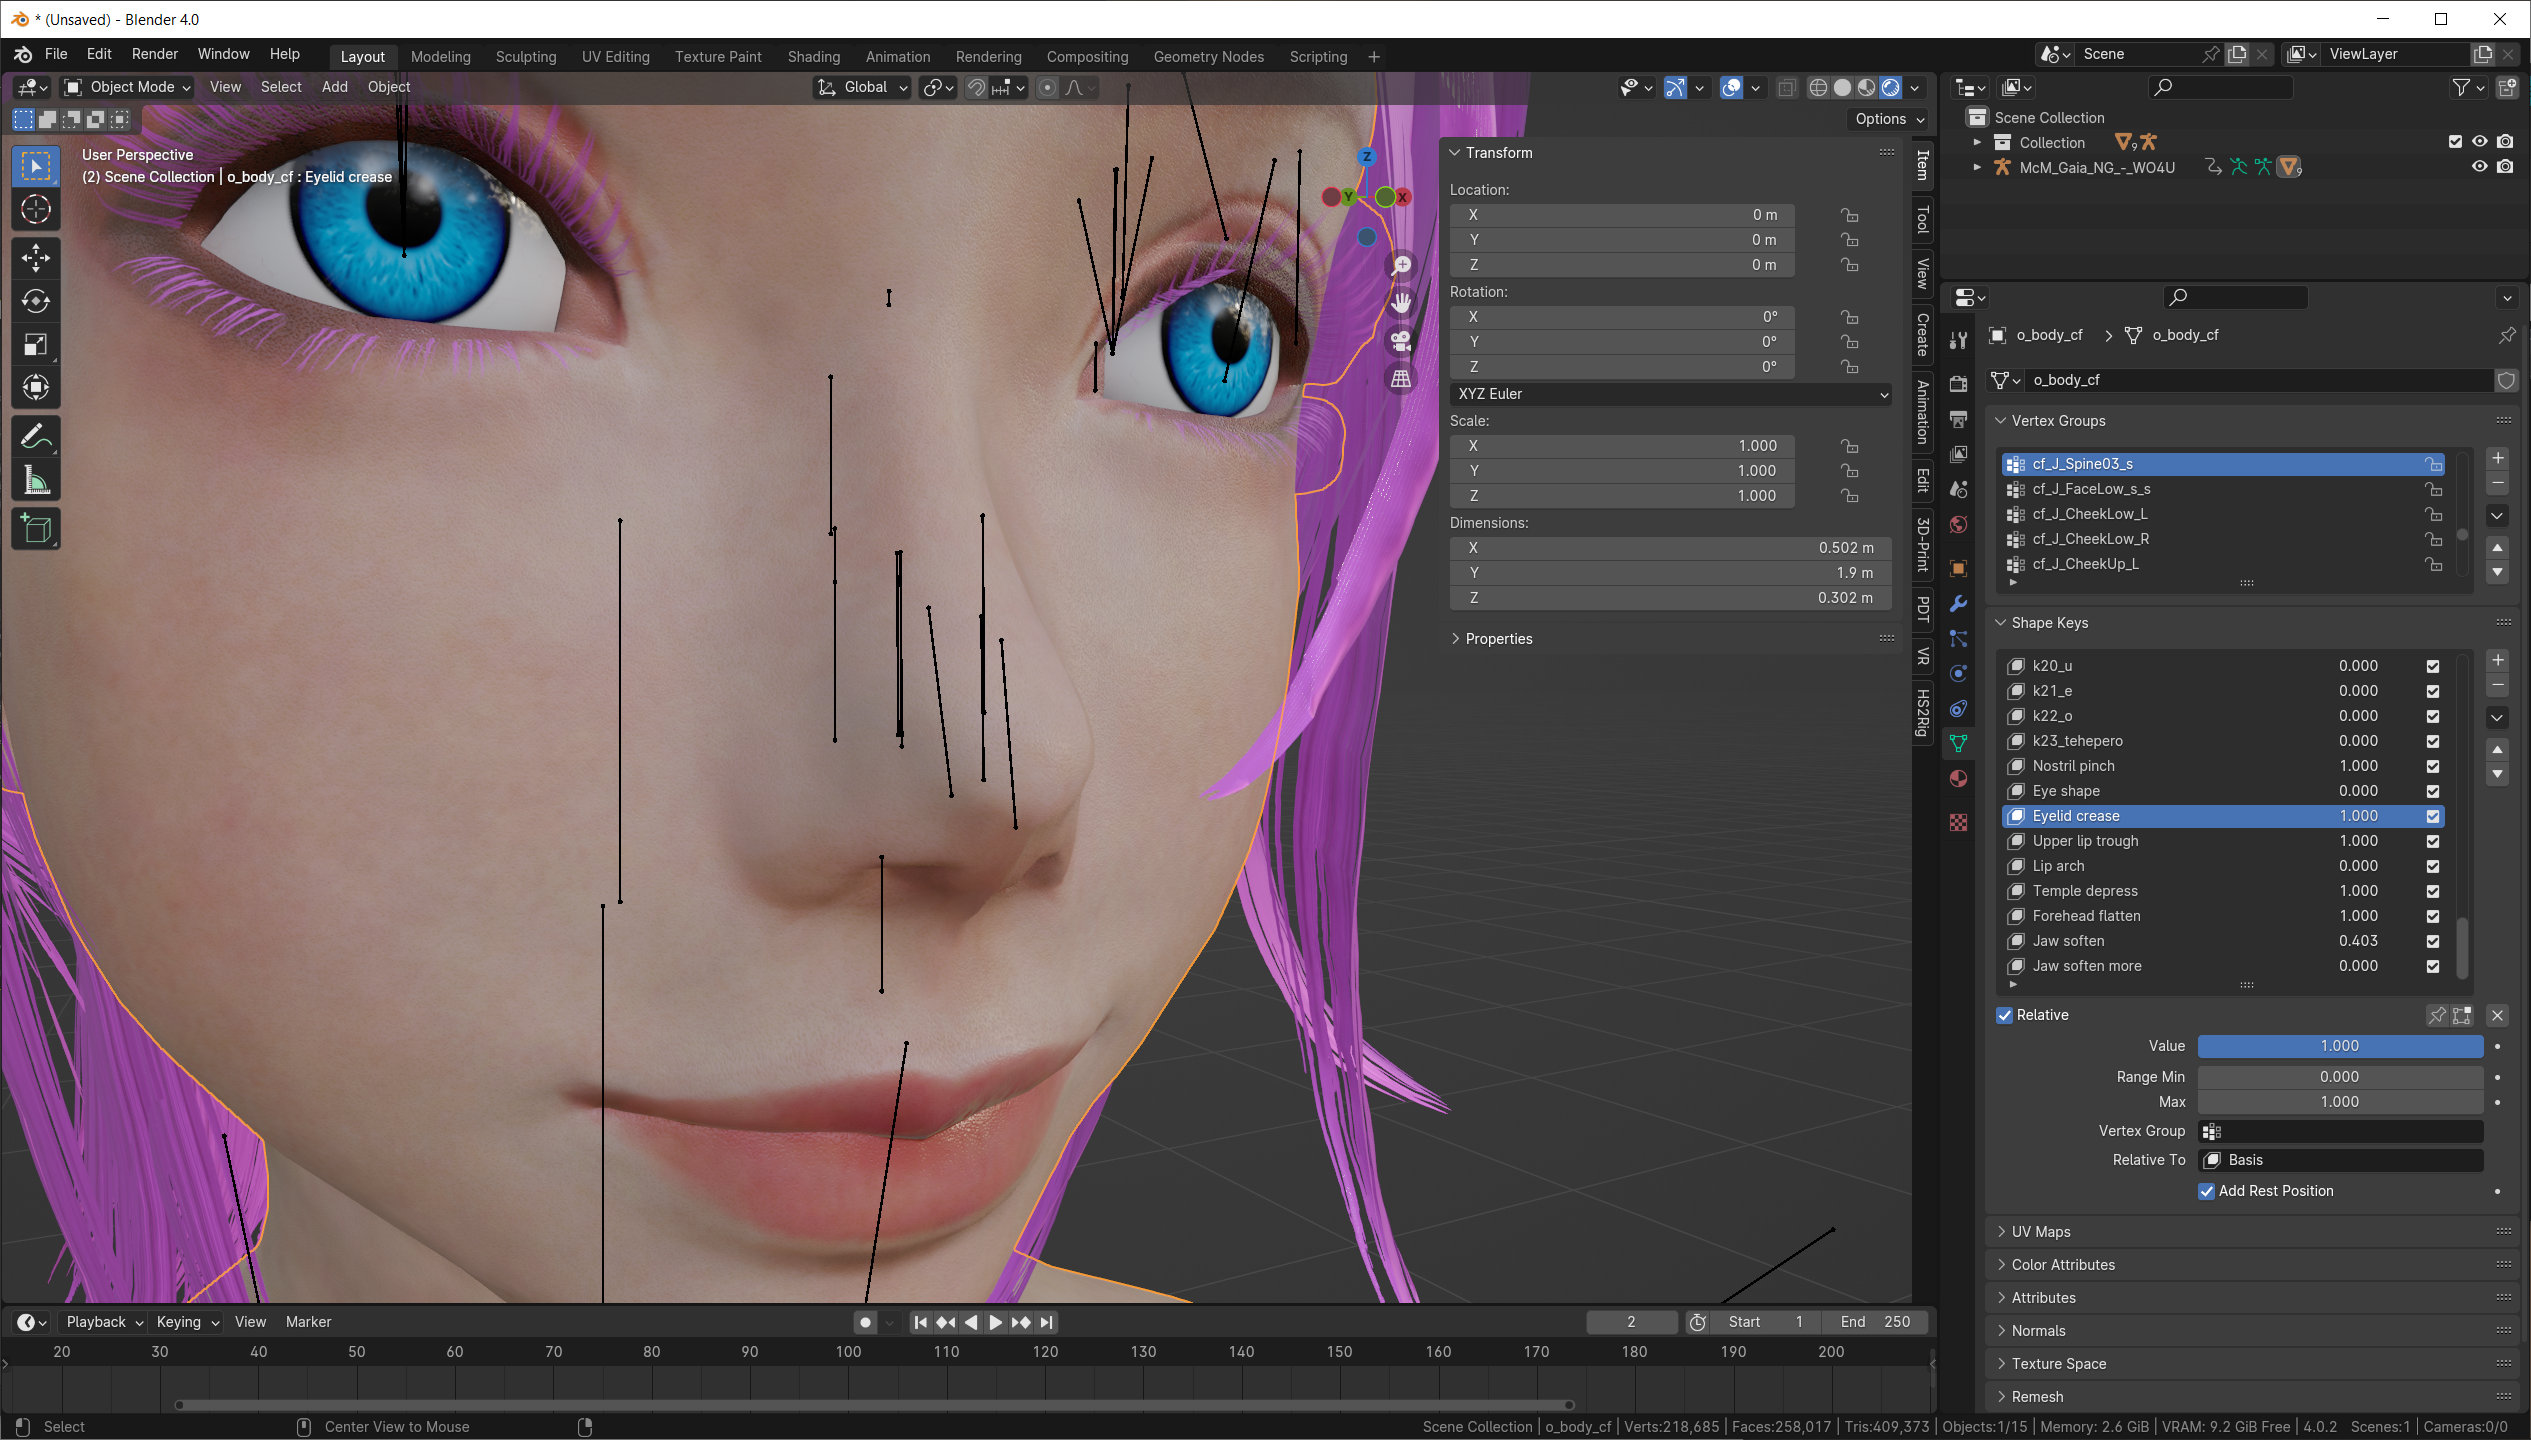
The preferred way to control the face is to use shape keys. "Body", "object mode", "object data properties" (green triangle in the properties panel), "shape keys" window. E.g., to open the character's mouth, set k09_open1 to 1.0. Most names are in Japanese. "Warai" - laughing, "Kanasimi" - sad, "ikari" - angry, "fukure" - bulge(?), "damage" - hurt, "fera" - blow, "sitadasi" - sticking the tongue out, "ahe" - cough(?), "tehepero" - sticking the tongue out at an angle. You also get 'k18_a', 'k19_i', etc, that you can use to simulate speech.
For more complex facial emotions, you need to use multiple shape keys. E.g., for a proper "hurt", you need e05_damage (eyes), g07_damage (eyebrows), and k06_damage (mouth).
Gaze direction is set with cf_J_look_L, cf_J_look_R.
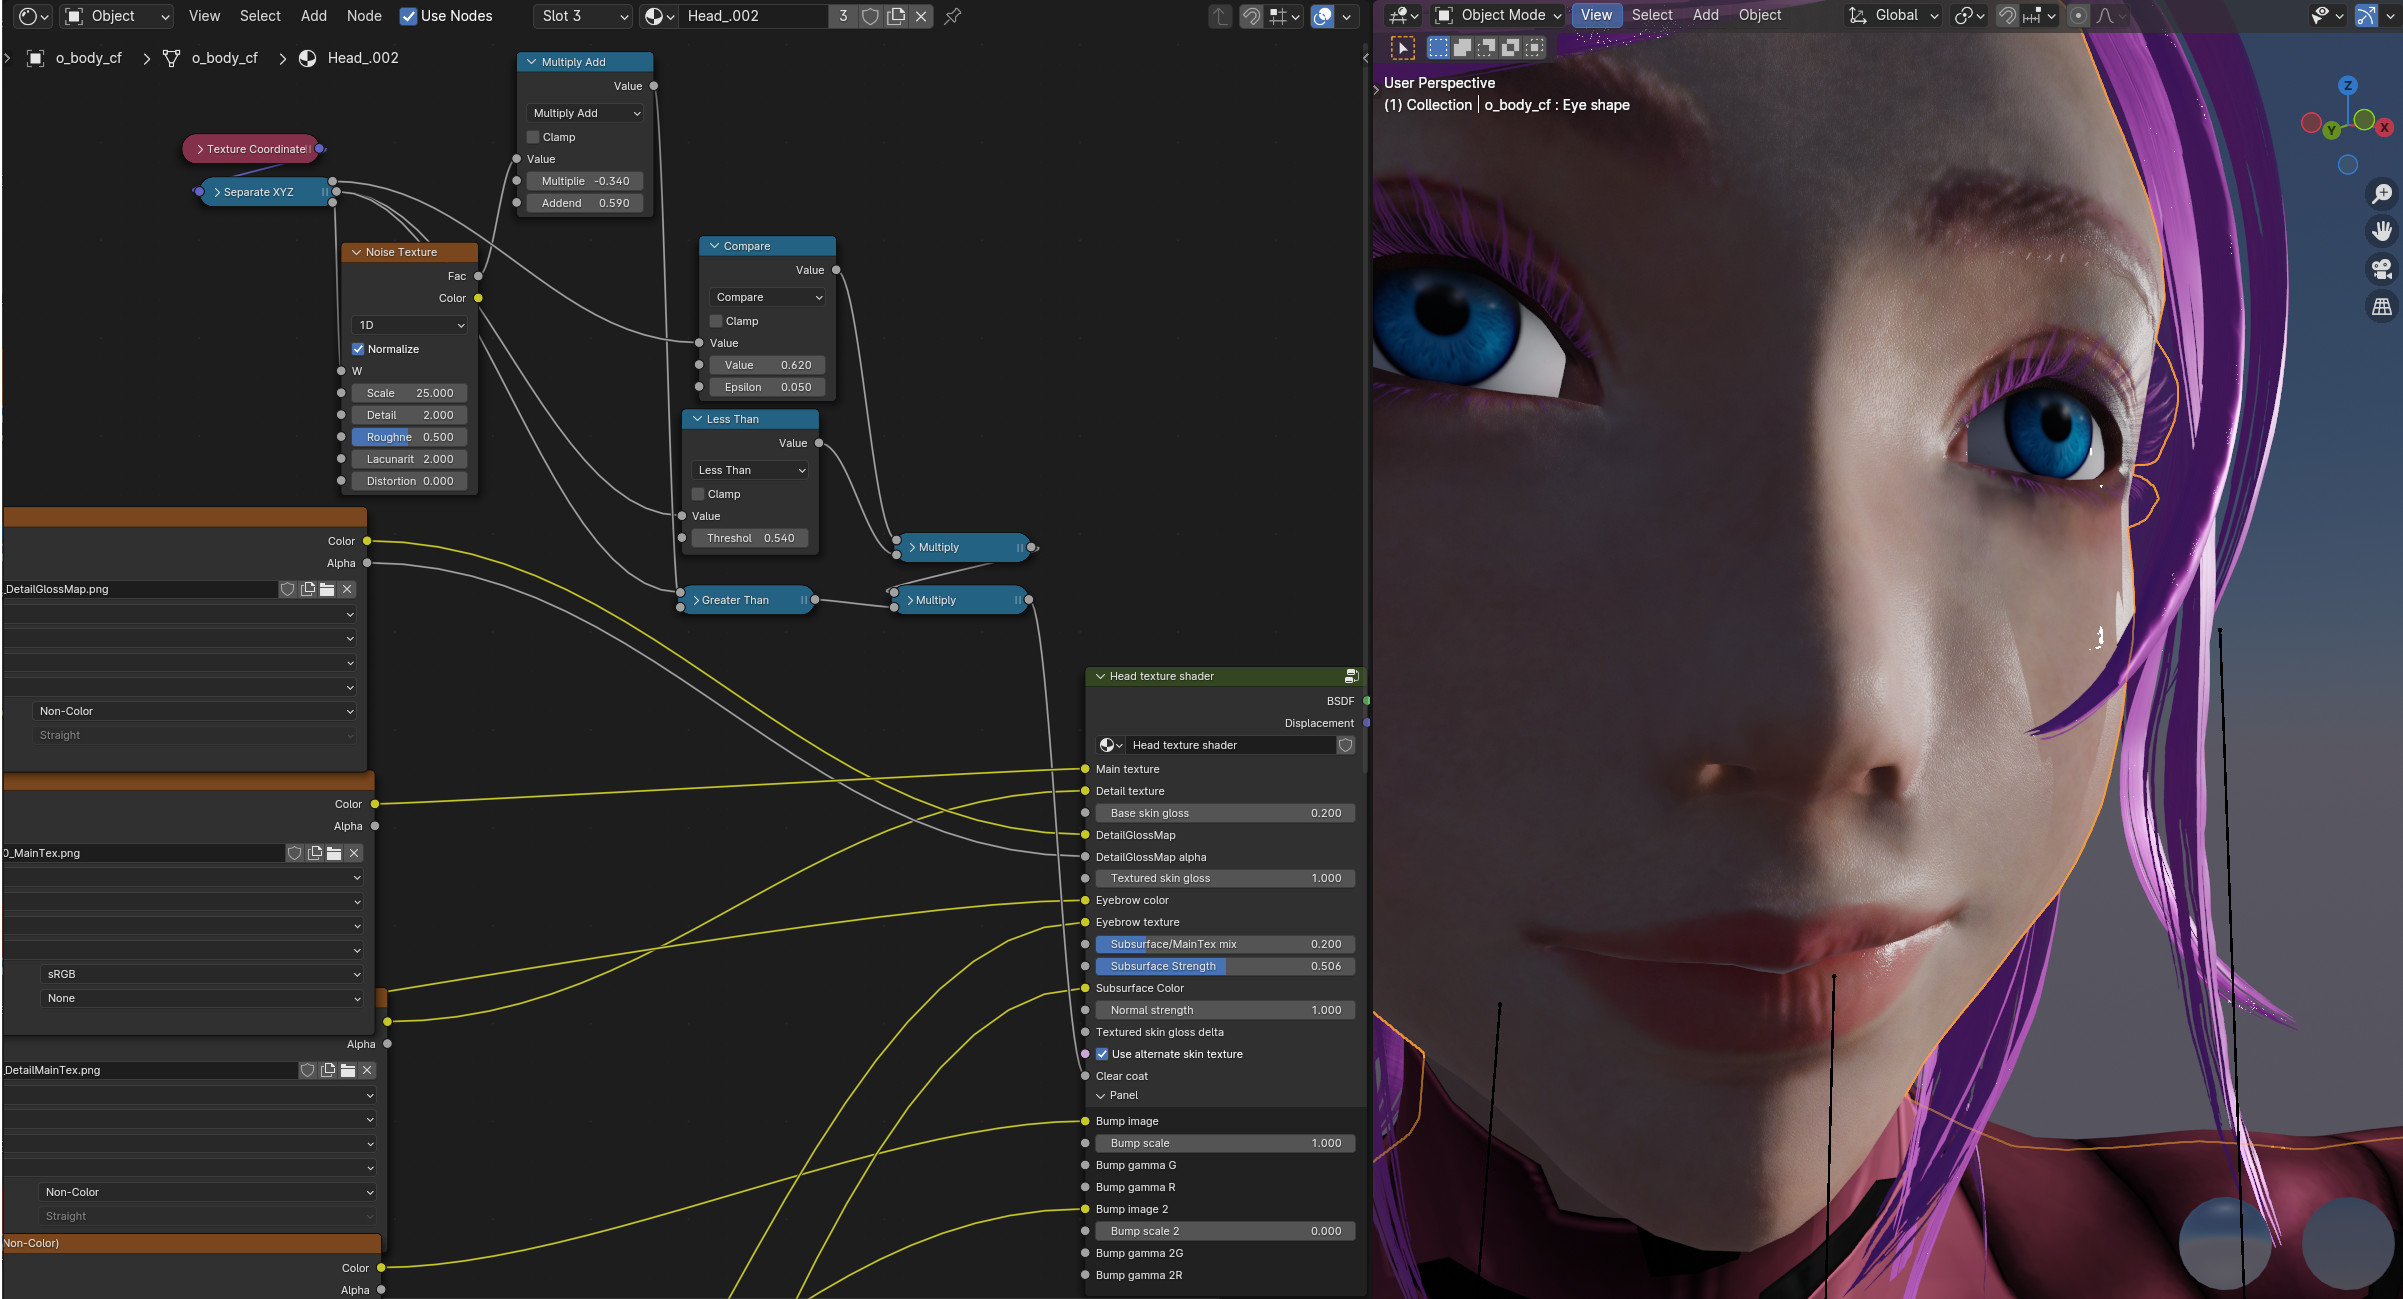
As mentioned, some skin parameters are found in "object properties" of the body mesh (o_body_cm/o_body_cf), since they are shared by all materials (of which there are at least two and possibly up to four), and more shared settings will be moved there in future.
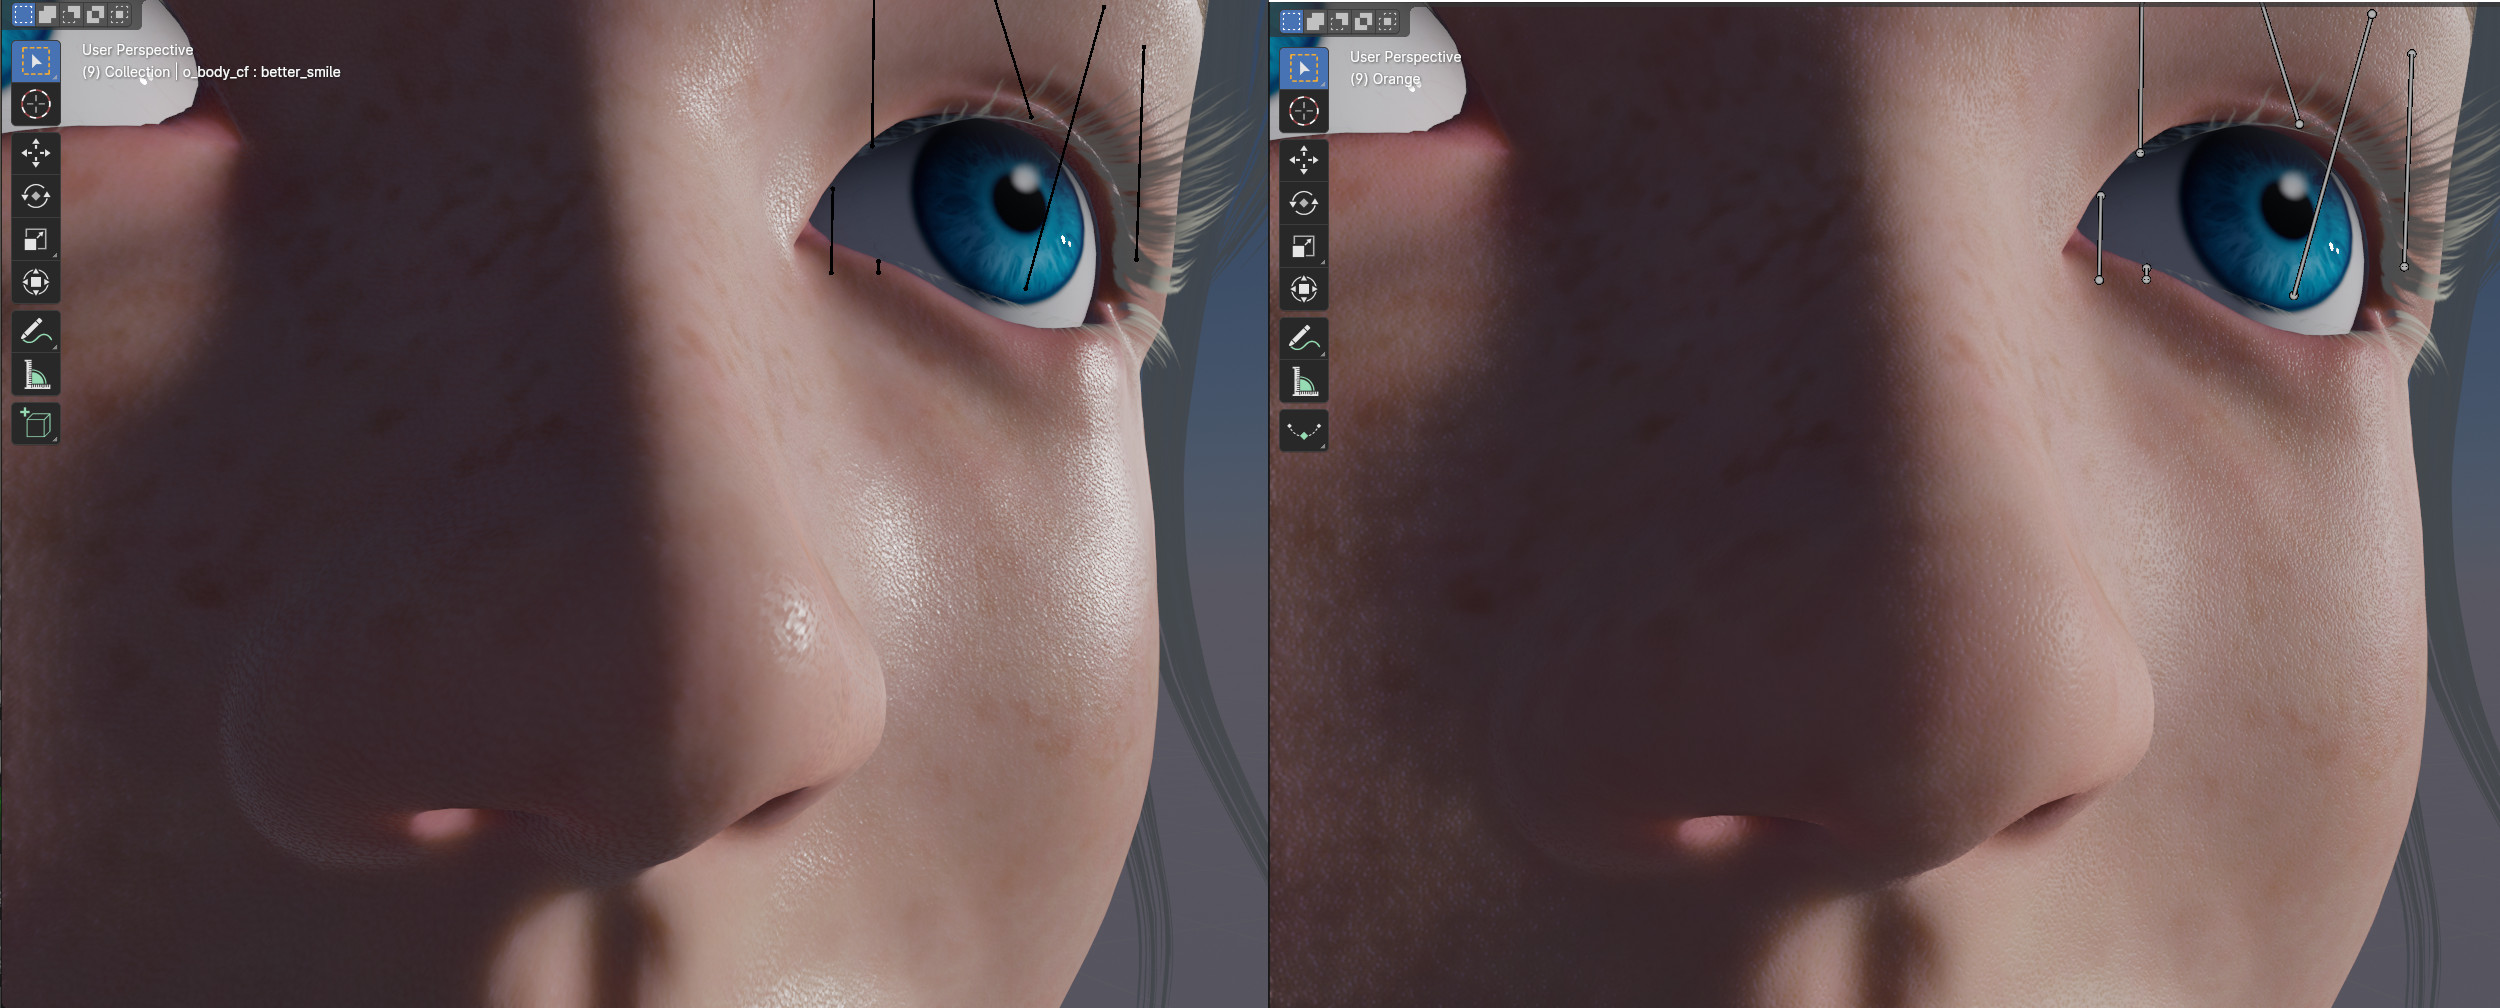
Two types of skin are available: the "default" skin, which emulates in-game skin (left), and the "alternate" skin (right). The "alternate" skin is on by default.
To match in-game skin reflectivity, raise "Base skin gloss" from 0.1 to 0.3 or so.
To add uniform gloss (lip gloss, liquids, etc.) to the face, generate an appropriate texture and plug it into the "Clear coat" port on the "head texture shader":
To transfer clothing between characters (requires "Refactor armature" on both):
- Select the clothing item, right-click, "Clear parent"
- Click on the clothing item, Ctrl+click on the target character, right-click, "Parent -> Armature Deform"
- Right-click again, "Clear Parent Inverse"
KNOWN ISSUES
- Produced characters have no pubic hair; males have no facial hair.
- If the character has a custom head (many female characters do), the outcome is uncertain, but total success is unlikely (in particular, the importer will not attempt to add "new" facial control bones or shape keys if it detects a custom head.)
- It will have a shot at automatic texturing of clothing, accessories and hair, but the result is going to be very crude. Clothing materials often have internal parameters (e.g. colors and texture scales) whose correct values are simply not known to the importer. You will probably need to inspect clothing items in Material Editor to determine how they should be textured.
- If the character uses the "Eye Deep Dive Advanced" eye shader, the eye material will probably be off and will require retouching.
- Teeth are sometimes positioned incorrectly and their placement must be manually adjusted. (The recommended way is to move cf_J_MouthCavity.) The inside of the mouth is generally not expected to be anatomically accurate.
- Possibly many other bugs I haven't discovered yet.