weBIGeo
WeBIGeo is a research project focused on real-time 3D computer graphics, large data visualization, and human-computer interaction. The goal is to offer a platform that is easy to use and allows for fast analysis and visualization of geographical datasets. (Further information can be found here.)
To that end, WeBIGeo uses existing technologies from the AlpineMaps.org Project and introduces a new WebGPU rendering engine.
We are in discord, talk to us! https://discord.gg/p8T9XzVwRa
Setup
weBIGeo's primary target is the web. Additionally we support native builds on Windows, using Dawn. This allows for faster development as emscripten linking is quite slow and GPU debugging is not easily possible in the web. Both setups require significant setup time as we need to compile Qt by source. For the native workflow also Dawn needs to be compiled. The rest of the dependencies should get automatically pulled by the cmake setup.
Building the web version
Dependencies
- Qt 6.7.2 with
- MinGW (GCC on linux might work but not tested)
- Qt Shader Tools (otherwise Qt configure fails)
- Sources
- emscripten
- To exactly follow along with build instructions you need
ninja,cmakeandemsdkin your PATH
Building Qt with emscripten (singlethreaded)
For WebGPU to work we need to compile with emscripten version > 3.1.47. The default emscripten version, supported by Qt 6.7.2 is 3.1.50 (https://doc.qt.io/qt-6/wasm.html#installing-emscripten). However, newer emscripten releases include important fixes (e.g. requesting GPU limits from adapter) and API changes (e.g. new surface API) for webGPU. Therefore we need to recompile the Qt sources with the appropriate version by ourselfs. (This step might be unnecessary in the near future with the release of Qt 6.8).
-
Open new CMD Terminal
-
Navigate to Qt Path:
cd "C:\Qt\6.7.2" -
Generate build and install path (and make sure they are empty)
mkdir build & mkdir wasm_singlethread_emsdk_3_1_61_custom & cd build -
Install and activate specific emsdk version
emsdk install 3.1.61 & emsdk activate 3.1.61 -
Configure Qt with a minimal setup (takes ~ 4min)
"../Src/configure" -debug-and-release -qt-host-path C:\Qt\6.7.2\mingw_64 -make libs -no-widgets -optimize-size -no-warnings-are-errors -platform wasm-emscripten -submodules qtdeclarative -no-dbus -no-sql-sqlite -feature-wasm-simd128 -no-feature-cssparser -no-feature-quick-treeview -no-feature-quick-pathview -no-feature-texthtmlparser -no-feature-textodfwriter -no-feature-quickcontrols2-windows -no-feature-quickcontrols2-macos -no-feature-quickcontrols2-ios -no-feature-quickcontrols2-imagine -no-feature-quickcontrols2-universal -no-feature-quickcontrols2-fusion -no-feature-qtwebengine-build -no-feature-qtprotobufgen -no-feature-qtpdf-build -no-feature-pdf -no-feature-printer -no-feature-sqlmodel -no-feature-qtpdf-quick-build -no-feature-quick-pixmap-cache-threaded-download -feature-quick-canvas -no-feature-quick-designer -no-feature-quick-particles -no-feature-quick-sprite -no-feature-raster-64bit -no-feature-raster-fp -prefix ../wasm_singlethread_emsdk_3_1_61_custom -
Build Qt (takes ~ 8min)
cmake --build . --parallel -
Install Qt (takes ~ 1min)
cmake --install . -
Cleanup
cd .. & rmdir /s /q build
Building Qt with emscripten (multithreaded)
For multithreading to work Qt and emscripten properly, we have to yet again compile a custom version of Qt with an extra flag.
-
Open new CMD Terminal
-
Navigate to Qt Path:
cd "C:\Qt\6.7.2" -
Generate build and install path (and make sure they are empty)
mkdir build & mkdir wasm_multithread_emsdk_3_1_61_custom & cd build -
Install and activate specific emsdk version
emsdk install 3.1.61 & emsdk activate 3.1.61 -
Configure Qt with a minimal setup
"../Src/configure" -debug-and-release -qt-host-path C:\Qt\6.7.2\mingw_64 -make libs -no-widgets -optimize-size -no-warnings-are-errors -platform wasm-emscripten -submodules qtdeclarative -no-dbus -no-sql-sqlite -feature-wasm-simd128 -feature-thread -no-feature-cssparser -no-feature-quick-treeview -no-feature-quick-pathview -no-feature-texthtmlparser -no-feature-textodfwriter -no-feature-quickcontrols2-windows -no-feature-quickcontrols2-macos -no-feature-quickcontrols2-ios -no-feature-quickcontrols2-imagine -no-feature-quickcontrols2-universal -no-feature-quickcontrols2-fusion -no-feature-qtwebengine-build -no-feature-qtprotobufgen -no-feature-qtpdf-build -no-feature-pdf -no-feature-printer -no-feature-sqlmodel -no-feature-qtpdf-quick-build -no-feature-quick-pixmap-cache-threaded-download -feature-quick-canvas -no-feature-quick-designer -no-feature-quick-particles -no-feature-quick-sprite -no-feature-raster-64bit -no-feature-raster-fp -prefix ../wasm_multithread_emsdk_3_1_61_custom -
Build Qt
cmake --build . --parallel -
Install Qt
cmake --install . -
Cleanup
cd .. & rmdir /s /q build
Create Custom Kit for Qt Creator
This step is specifically tailored to the Qt-Creator IDE.
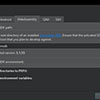
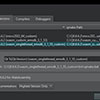
Preferences -> Devices -> WebAssembly: Set path to the emsdk git repositoryPreferences -> Kits -> Qt Versions: Add the newly built Qt-Version(s).Preferences -> Kits -> Kits: Add the new kit(s) and set them to use the custom Qt-Version(s) respectively.
Set EMSDK environment variable
[TODO] find better way of handling that, the IDE should set this
Usually, the Qt-IDE (Qt Creator) sets emscripten environment variables right before building after configuring the correct path to emsdk. However, for the current combination of versions, the variable is not set properly by the IDE. Therefore, in order to build the WebAssmebly version, manually set the environment variable EMSDK to emsdk's root directory.
Building the native version
Dependencies
- Windows
- Qt 6.7.2 with
- Sources
- Qt Shader Tools (otherwise Qt configure fails)
- Python
- Microsoft Visual C++ Compiler 17.6 (aka. MSVC2022) (comes with Visual Studio 2022)
- To exactly follow along with build instructions you need
ninjaandcmakein your PATH
[!IMPORTANT] Dawn does not compile with MinGW! GCC might be possible, but is not tested (hence the Windows Requirement). If compiling on Linux is necessary it is also required to change the way we link to the precompiled Dawn libraries inside of
cmake/alp_target_add_dawn.cmake.
Building Qt for MSVC2022
There is no precompiled version of Qt for the MSVC2022-compiler. Therefore we again need to compile the Qt sources ourselves:
-
We need the compiler env variables, so choose either
-
Start the
x64 Native Tools Command Prompt for VS 2022. -
Start a new CMD and run: (you might have to adjust the link depending on your vs version)
"C:\Program Files\Microsoft Visual Studio\2022\Community\VC\Auxiliary\Build\vcvarsall.bat" amd64
-
-
Navigate to Qt Path:
cd "C:\Qt\6.7.2" -
Generate build and install path (and make sure they are empty)
mkdir build & mkdir msvc2022_64_custom & cd build -
Configure Qt (takes ~ 5min)
"../Src/configure.bat" -debug-and-release -prefix ../msvc2022_64_custom -nomake examples -nomake tests -
Build Qt (takes ~ 25min)
cmake --build . --parallel -
Install Qt (takes ~ 2min)
ninja install -
Cleanup
cd .. & rmdir /s /q build
Create Custom Kit for Qt Creator
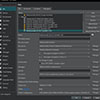
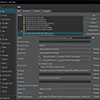
If you work with the Qt-IDE you need to setup the newly created Qt build as a development kit, as it was already done with the emscripten version. Please see the screenshot for a proper configuration.
Building Dawn
Dawn is the webgpu-implementation used in chromium, which is the open-source-engine for Google Chrome. Compiling dawn ourselves allows us to deploy weBIGeo natively such that we don't have to work in the browser sandbox during development. Building Dawn will take some time and memory as we need Debug and Release-Builds.
[!NOTE] We choose the dawn version of branch
chromium/6600, because it is the newest as of writing this. It is well aligned with the emscripten version in use as well as provides important fixes and API changes. All of those versions are subject to change, especially since the webgpu-standard is not finalized!
-
We need the compiler env variables, so choose either (or do manually :P)
-
Start the
x64 Native Tools Command Prompt for VS 2022. -
Start a new CMD and run: (you might have to adjust the link depending on your vs version)
"C:\Program Files\Microsoft Visual Studio\2022\Community\VC\Auxiliary\Build\vcvarsall.bat" amd64
-
-
Navigate to the parent folder of where the weBIGeo renderer is located. (Not strictly necessary as DAWN location can be set with CMAKE-Variable
ALP_DAWN_DIR)cd "/path/to/the/parent/directory/of/webigeo/renderer" -
Clone dawn and step into directory
git clone --branch chromium/6600 --depth 1 https://dawn.googlesource.com/dawn & cd dawn -
Fetch dawn dependencies
python tools/fetch_dawn_dependencies.py -
Create build directories
mkdir build\release & mkdir build\debug -
Debug Build (minimal vulkan only build):
cd build/debug & cmake -GNinja -DCMAKE_BUILD_TYPE=Debug -DTINT_BUILD_SPV_READER=OFF -DDAWN_BUILD_SAMPLES=OFF -DTINT_BUILD_TESTS=OFF -DTINT_BUILD_FUZZERS=OFF -DTINT_BUILD_SPIRV_TOOLS_FUZZER=OFF -DTINT_BUILD_AST_FUZZER=OFF -DTINT_BUILD_REGEX_FUZZER=OFF -DTINT_BUILD_BENCHMARKS=OFF -DTINT_BUILD_TESTS=OFF -DTINT_BUILD_AS_OTHER_OS=OFF -DDAWN_ENABLE_D3D11=OFF -DDAWN_ENABLE_D3D12=OFF -DDAWN_ENABLE_METAL=OFF -DDAWN_ENABLE_NULL=OFF -DDAWN_ENABLE_DESKTOP_GL=OFF -DDAWN_ENABLE_OPENGLES=OFF -DDAWN_ENABLE_VULKAN=ON ../.. & ninja -
Release Build (minimal vulkan only build):
cd ../release & cmake -GNinja -DCMAKE_BUILD_TYPE=Release -DTINT_BUILD_SPV_READER=OFF -DDAWN_BUILD_SAMPLES=OFF -DTINT_BUILD_TESTS=OFF -DTINT_BUILD_FUZZERS=OFF -DTINT_BUILD_SPIRV_TOOLS_FUZZER=OFF -DTINT_BUILD_AST_FUZZER=OFF -DTINT_BUILD_REGEX_FUZZER=OFF -DTINT_BUILD_BENCHMARKS=OFF -DTINT_BUILD_TESTS=OFF -DTINT_BUILD_AS_OTHER_OS=OFF -DDAWN_ENABLE_D3D11=OFF -DDAWN_ENABLE_D3D12=OFF -DDAWN_ENABLE_METAL=OFF -DDAWN_ENABLE_NULL=OFF -DDAWN_ENABLE_DESKTOP_GL=OFF -DDAWN_ENABLE_OPENGLES=OFF -DDAWN_ENABLE_VULKAN=ON ../.. & ninja -
Cleanup (Optional) To cleanup unnecessary files, like the DAWN sources aswell as configuration files we created a python script. It frees up around 3GB of files. Maybe DAWN will introduce an installation target at some point then this shouldnt be necessary. You can get the script either here, or just download and execute it with the following command:
cd ../.. & curl -L "https://github.com/weBIGeo/ressources/raw/main/scripts/cleanup_dawn_build.py" -o cleanup_dawn_build.py && python cleanup_dawn_build.py
About DAWN Backends
Per default we opt for an only Vulkan-Backend Build for two reasons:
- Vulkan is probably the most supported Backend running on most devices
- We have more knowledge about Vulkan which comes to play when we use GPU debugers
That being said it is possible to compile DAWN with all Backends by using the following commands instead of step 6 and 7:
cd build/debug & cmake -GNinja -DCMAKE_BUILD_TYPE=Debug -DTINT_BUILD_SPV_READER=OFF -DDAWN_BUILD_SAMPLES=OFF -DTINT_BUILD_TESTS=OFF -DTINT_BUILD_FUZZERS=OFF -DTINT_BUILD_SPIRV_TOOLS_FUZZER=OFF -DTINT_BUILD_AST_FUZZER=OFF -DTINT_BUILD_REGEX_FUZZER=OFF -DTINT_BUILD_BENCHMARKS=OFF -DTINT_BUILD_TESTS=OFF -DTINT_BUILD_AS_OTHER_OS=OFF ../.. & ninja

cd ../release & cmake -GNinja -DCMAKE_BUILD_TYPE=Release -DTINT_BUILD_SPV_READER=OFF -DDAWN_BUILD_SAMPLES=OFF -DTINT_BUILD_TESTS=OFF -DTINT_BUILD_FUZZERS=OFF -DTINT_BUILD_SPIRV_TOOLS_FUZZER=OFF -DTINT_BUILD_AST_FUZZER=OFF -DTINT_BUILD_REGEX_FUZZER=OFF -DTINT_BUILD_BENCHMARKS=OFF -DTINT_BUILD_TESTS=OFF -DTINT_BUILD_AS_OTHER_OS=OFF ../.. & ninja
Code style
We adhere to the coding guidelines of AlpineMaps.org.


