wwwhisper is an authorization layer for HTTP servers that controls which resources can be accessed by which visitors. wwwhisper works with nginx auth-request module, it is also available as a Heroku add-on that provides wwwhisper as a service for Ruby and Node.js applications on Heroku.
-
wwwhisper grants access to HTTP resources based on visitors' email addresses. Password-less access tokens are used to prove that a visitor owns an allowed email.
-
wwwhisper is application independent. It can be used for anything that HTTP server returns - dynamic content, static files, content generated by back-end servers. No support from applications or back-ends is needed.
-
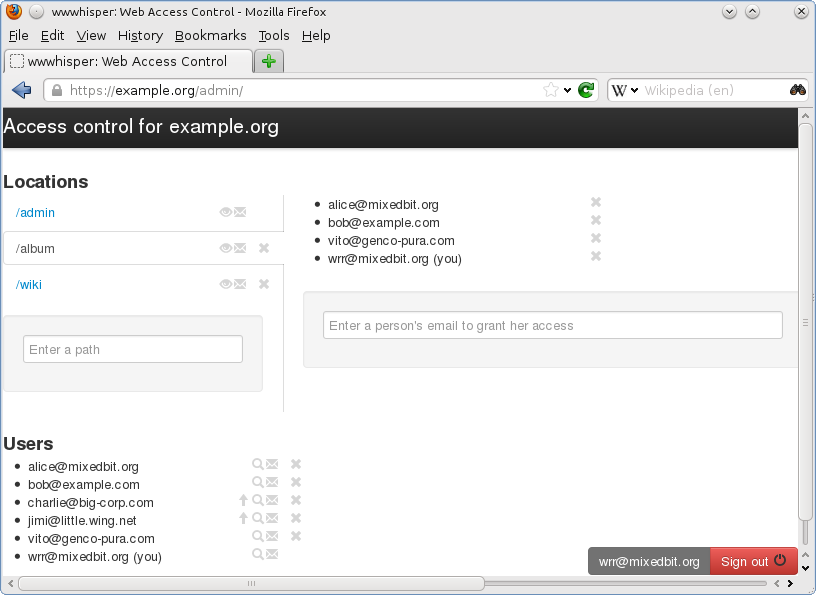
wwwhisper provides an admin web UI for manipulating permissions. Access to the admin is protected by wwwhisper, this allows to easily add and remove admin users.
Quick tour
A user that visits a wwwhisper-protected site is presented with a login prompt:
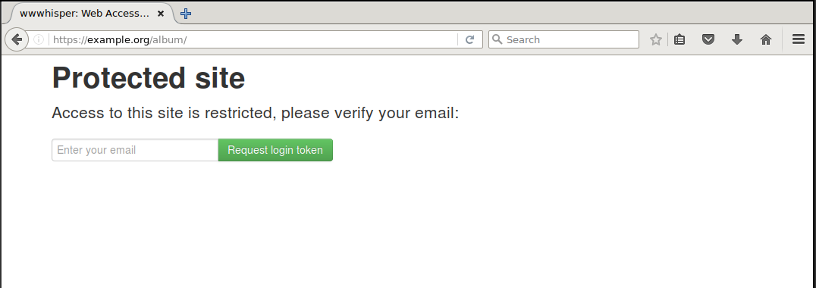
The 'Request login token' button sends a link with an email verification token to the provided email address. The link is valid for 30 minutes and for a single successful login.
After the link is clicked, wwwhisper checks that the user is allowed to visit the URL. If this is the case, the user is taken to the site:
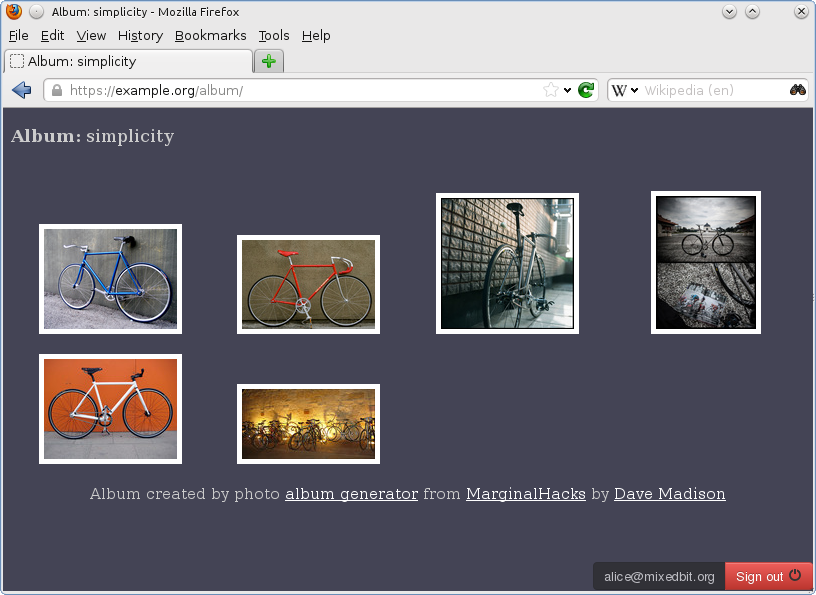
HTTP server inserts a small overlay in the lower-right corner of each protected HTML document. The overlay contains the email of the current user and a 'Sign out' button.
If the user visits a location that he or she is not allowed to access,
an error is displayed: 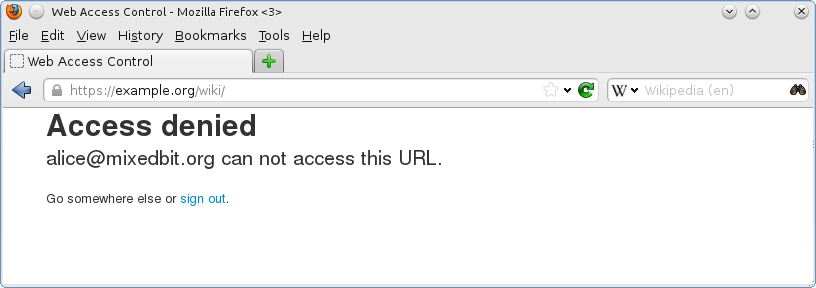
The admin application allows to easily grant and revoke access. There is no need to create, distribute and manage passwords:
Setup
Heroku users can use the wwwhisper add-on with any Rack (Rails, Sinatra) and Node.js Connect based application. This is the fastest and easiest way to setup wwwhisper access control, it requires only 3 lines of config.
NOTE: wwwhisper standalone setup procedure is outdated. The scripts need to be updated to include token email delivery configuration (originally wwwhisper used Mozilla Persona and didn't need to send emails with tokens to verify email ownership).
(Needs update: Following steps demonstrate how to install and configure nginx with wwwhisper authentication on Debian-derivative distributions (including Ubuntu). The steps should be easy to adjust to work on other POSIX systems. Unprivileged installation is good for experiments, development or if you don't have administrative privileged on the machine. System-wide installation is recommended for more serious deployments.)
If you are already using nginx, you may use these steps as guidance and adjust them to fit your current configuration.
Final remarks
-
Make sure content you are protecting can not be accessed through other channels. If you are using a multi-user server, set correct file permissions for protected static files and communication sockets. If nginx is delegating requests to back-end servers, make sure the back-ends are not externally accessible.
-
Use SSL for anything important.