Magento2 zippayment
Zip gives customers the ability to shop now and pay later with no interest while you as the merchant get paid immediately. Customers select Zip at checkout and get approved instantly and shop securely. Zip is fully integrated with the store’s online checkout and can integrate seamlessly with your store directly via API or by using one of our platform plugins.
Prerequisites
- PHP 7 or above
- Configuration credentials
- Composer (optional)
Installation instructions
Install via SFTP or file upload
- You need to download code from current repo
- Put the current repo files into folder
/yourMagento2root/app/code/Zip/ZipPayment/ - Then follow the normal plugin installation below without the composer require command
Install using Composer
To install the extension via Composer, run
cd <your Magento install dir>composer require zip/magento2php bin/magento module:status(Check if Zip_ZipPayment module is disabled)php bin/magento module:enable Zip_ZipPayment(enabled plugin if disabled)php bin/magento setup:upgradephp bin/magento setup:di:compilephp bin/magento setup:static-content:deploy
To upgrade Existing Modules
composer update zip/magento2php bin/magento setup:di:compilephp bin/magento c:cphp bin/magento setup:static-content:deploy
Install using Magento Component Manager
Note:- This extension is not yet available in the Magento Marketplace. This section will be updated once it is released in the marketplace.
Configuration
Payment Section
- Contact Zip instegrations support through one of the following channels depending on your region to request your configuration credentials:
- UK: integrationsuk@zip.co
- NZ: integrationsnz@zip.co
- AU: integrations@zip.co
- Open the Magento Admin
- Click the Stores icon in the left hand menu and from there choose Settings > Configuration
- The configuration page will open. From the little menu on the left hand side of this screen you must click Sales and then choose Payment Methods when it expands.
- On the Payment Methods page, click Other Payment Methods so it expands.

- Set Enable to Yes and a title for the payment method “Zip"
- Enter the Private Key and Public Key.
- Set payment action to Capture, or Authorise if you want to authorise on checkout completion and capture later
Note: Authorise is only available for AU region only
- Set log settings to Info or Debug if you want to log all the debug information as well.
- Set environment to either Sandbox (for your test or development site) or Production (for your live website)
- Set Sort Order to 0 to place the payment method on top.
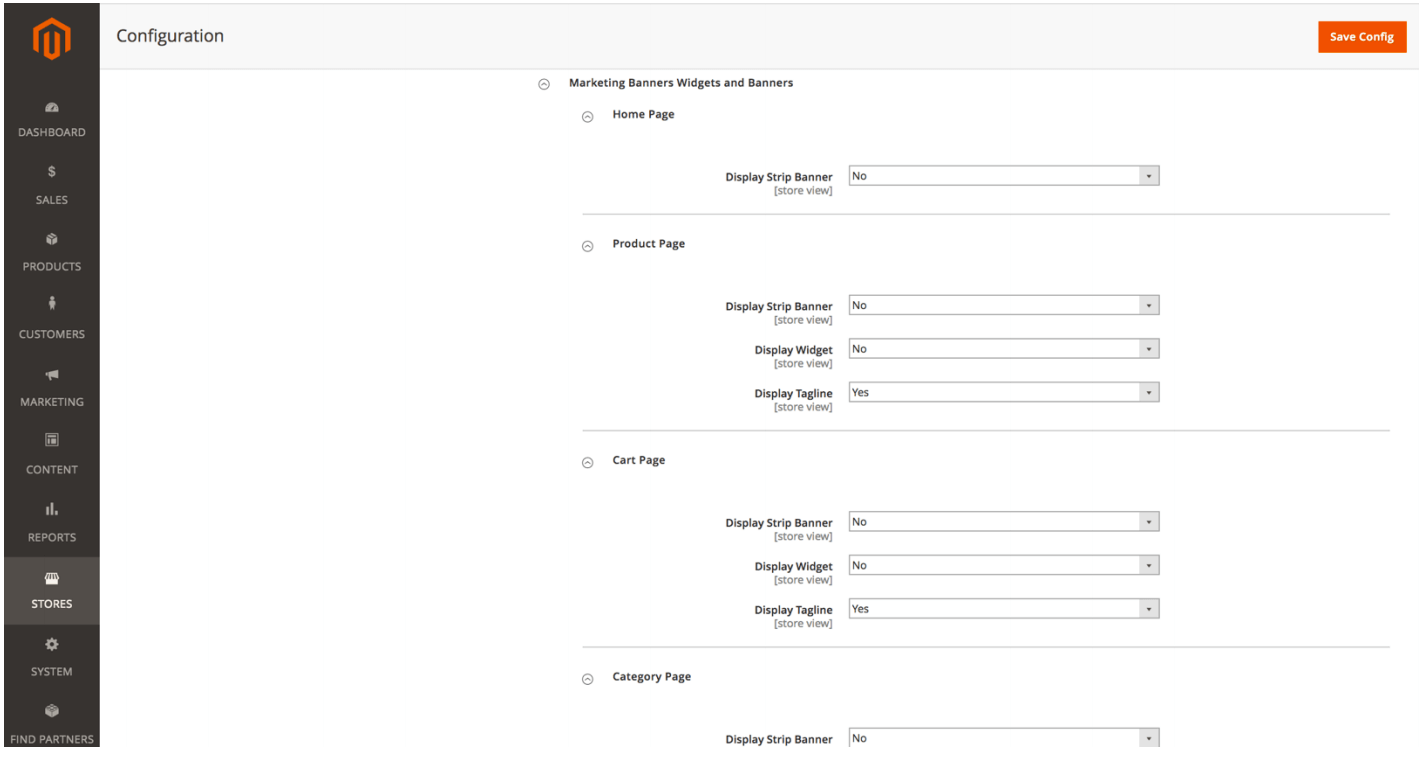
Marketing Banners and Widgets Section

- Scroll down and expand Marketing Banners and Widgets section
- Expand everything and set all options to Yes/No as per your requirement.
- Click Save Config up the top
Questions and feedback
If you have any questions concerning this product or the implementation please contact integrations@zip.co for assistance.