bipedal_control
bipedal_control is an NMPC framework for bipedal robot depending on OCS2
Installation and Usage
Preparation
Before installation, make sure you have ROS noetic installed in Ubuntu 20.04.
Install catkin tools to use catkin build instead of catkin_make.
sudo apt-get install python3-catkin-toolsCreate a catkin workspace:
mkdir -p ~/bipedal_ws/src
cd ~/bipedal_ws/src
others:
sudo apt install ros-noetic-effort-controllersOCS2
OCS2 is a huge monorepo; DO NOT try to compile the whole repo. You only need to compile ocs2_legged_robot_ros and
its dependencies following the step below.
- You are supposed to clone the OCS2, pinocchio, and hpp-fcl as described in the documentation of OCS2.
# Under the src directory of your catkin workspace # Clone OCS2 git clone git@github.com:leggedrobotics/ocs2.git # Clone pinocchio git clone --recurse-submodules https://github.com/leggedrobotics/pinocchio.git # Clone hpp-fcl git clone --recurse-submodules https://github.com/leggedrobotics/hpp-fcl.git # Clone ocs2_robotic_assets git clone https://github.com/leggedrobotics/ocs2_robotic_assets.git # Install dependencies sudo apt install liburdfdom-dev liboctomap-dev libassimp-dev sudo apt install ros-noetic-grid-map-rviz-plugin - Compile the
ocs2_legged_robot_rospackage with catkin tools instead ofcatkin_make. It will take you several minutes.# Under catkin workspace cd ~/bipedal_ws catkin config -DCMAKE_BUILD_TYPE=RelWithDebInfo catkin build ocs2_legged_robot_ros ocs2_self_collision_visualization -
Launch the example to test whether ocs2 is installed correctly.
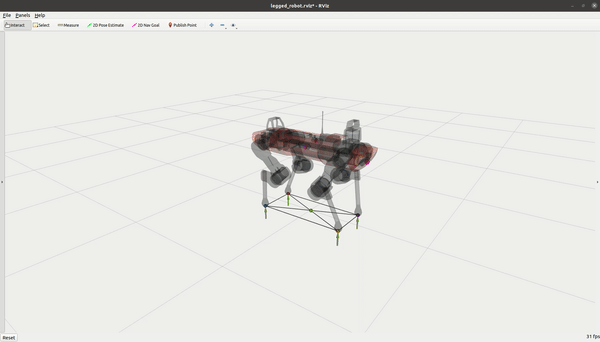
# Under catkin workspace
# Source workspace
source devel/setup.bash
# Launch the example for DDP
roslaunch ocs2_legged_robot_ros legged_robot_ddp.launch
Ensure you can command the ANYmal as shown in the document and below.
Build and simulate in Gazebo
Clone the repository to the src folder of your catkin workspace.
cd ~/bipedal_ws/src
git clone https://github.com/zitongbai/bipedal_control.git
Build the source code of bipedal_control.
cd ~/bipedal_ws
catkin build bipedal_controllers h1_description h1_ocs2_config
run the simulation in Gazebo:
# in terminal 1
roslaunch h1_ocs2_config bringup_gazebo.launch rviz:=true
# wait for gazebo to start
# in terminal 2
rosrun h1_ocs2_config restart_gazebo.py
Sometimes the robot might fall down after reset, in which case you can run the restart command again. And it is recommended to switch to the 'trot' gait as soon as possible to prevent the robot from falling down. (It is a known issue and should be fixed in the future.)
Mujoco >= 3.0.0
If you would like to simulate in mujoco,
sudo apt install libglfw3-dev libxinerama-dev libxcursor-dev libxi-dev# it is not necessary to download the repo in the catkin workspace, you can download, build and install it anywhere you like.
git clone https://github.com/google-deepmind/mujoco.git
mkdir build && cd build
cmake ..
make -j4
sudo make installTest:
simulateIf the mujoco simulator pops up, the installation is successful.
After successfully installing mujoco, you can build related packages in the catkin workspace.
cd ~/bipedal_ws
catkin build bipedal_mujoco
and then run the following command to start the simulation in mujoco:
# in terminal 1
roslaunch h1_ocs2_config bringup_mujoco.launch rviz:=true
# wait for gazebo to start
# in terminal 2
rosrun h1_ocs2_config restart_mujoco.py
Sometimes the robot might fall down after reset, in which case you can run the restart command again. And it is recommended to switch to the 'trot' gait as soon as possible to prevent the robot from falling down. (It is a known issue and should be fixed in the future.)
Implement your own robot
For implementation of your own robot, please refer to the readme in bipedal_robot_example.
Acknowledgement
- OCS2: a C++ toolbox tailored for Optimal Control for Switched Systems.
- legged_control:an NMPC-WBC legged robot control stack and framework.
- [hunter_bipedal_control]https://github.com/bridgedp/hunter_bipedal_control
TODO
- self collision avoidance and visualization
- Currently, the imu name in ros control must be
base_imu. If you want to use another name, you should modify the following code:BipedalController.cpp:imuSensorHandle_ = imuSensorInterface->getHandle("base_imu");src/h1_description/config/hw_sim.yaml:base_imu