![]()
[](https://github.com/FOSS-Cell-GECPKD/pixelvibe/graphs/contributors)
[](https://github.com/FOSS-Cell-GECPKD/pixelvibe/issues)
[](https://github.com/FOSS-Cell-GECPKD/pixelvibe/issues)
[](https://github.com/FOSS-Cell-GECPKD/pixelvibe/pulls)
[](https://github.com/FOSS-Cell-GECPKD/pixelvibe/pulls)

### 📋 Description
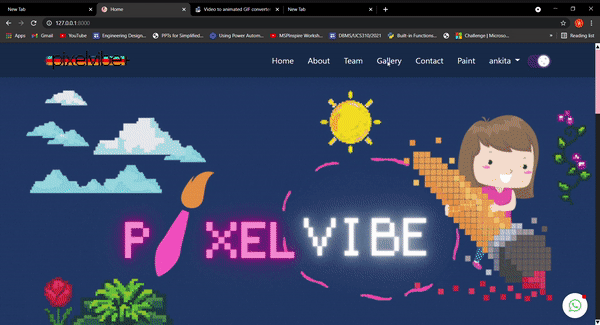
PixelVibe is a pixel-art maker which is mainly made for the creative art lover in you 😃
### Demo 🎥
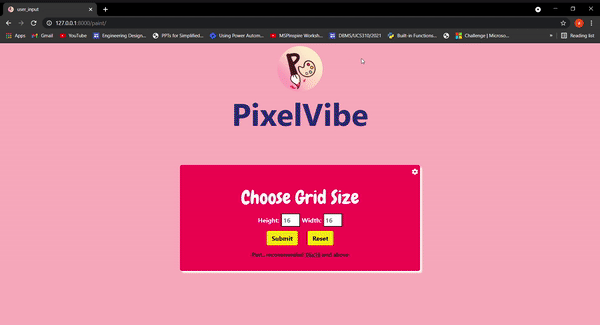
### ✅ Features
1. Variable canvas size as per user requirement
2. Choice of colors for user
3. A drop-down menu for
- Brush of varying sizes
- Eraser for clearing
- Undo feature
- Delete feature to clear the screen
- color fill to fill up the page
4. Signin / sign up page
5. Forgot password feature
6. Can change the password when required
### 💻 Tech Stack
PixelVibe uses a number of open source projects to work properly:
### Front-End:
![]()
![]()
![]()
### Back-End:
![]() ### Data-Base:
### Data-Base:
![]() ### Other:
### Other:
![]() ### Project Structure 💁♀️
```
PixelVibe
│
├───PixelVibe # Main Project Directory
│
├───home # Project Main App Directory
│ │
│ └───migrations # Migrations
│
├───static
| | # Static Directory
│ └───|
│ ├───assets # Image Files
| |
│ ├───css # CSS Files
| |
| ├───fonts # Fonts Used
│ │
| ├───JS # js Files
│ │
│ ├───favicons # favicons
│ |
│
│
|
├───templates # Root Template Directory (all html templates)
|
├───db.sqlite3 # Database File
|
├───manage.py # For running django server
|
├───requirements.txt # All modules which are used in project
```
## 🚀 Quick Start :
#### Step 1: Forking the repository :
To work on an open-source project, you will first need to make your copy of the repository. To do this, you should fork the repository and then clone it so that you have a local working copy.
Get your own Fork/Copy of repository by clicking `Fork` button right upper corner.
### Project Structure 💁♀️
```
PixelVibe
│
├───PixelVibe # Main Project Directory
│
├───home # Project Main App Directory
│ │
│ └───migrations # Migrations
│
├───static
| | # Static Directory
│ └───|
│ ├───assets # Image Files
| |
│ ├───css # CSS Files
| |
| ├───fonts # Fonts Used
│ │
| ├───JS # js Files
│ │
│ ├───favicons # favicons
│ |
│
│
|
├───templates # Root Template Directory (all html templates)
|
├───db.sqlite3 # Database File
|
├───manage.py # For running django server
|
├───requirements.txt # All modules which are used in project
```
## 🚀 Quick Start :
#### Step 1: Forking the repository :
To work on an open-source project, you will first need to make your copy of the repository. To do this, you should fork the repository and then clone it so that you have a local working copy.
Get your own Fork/Copy of repository by clicking `Fork` button right upper corner.
#### Step 2: Clone the Forked Repository
After the repository is forked, you can now clone it so that you have a local working copy of the codebase.
To make your local copy of the repository follow the steps:
- Open the Command Prompt
- Type this command:
```bash
$ git clone https://github.com/ Project Admin ❤️
Ankita Puri Mentor
### 🚀 Contributing
This repository is contribution friendly. If you would like to add or improve, your contribution is welcome!
Do not forget to follow [Contribution Guidelines](Contributing.md) and [Code of Conduct](CODE_OF_CONDUCT.md) 😃
## 📘 License
The PixelVibe is released under the under terms of the [MIT License](LICENSE).
## Open Source Program(s)
This project is a part of GSSOC 2021.
Adarsh Vulli
Arpit Jain This project is a part of SWOC 2021.
 [](https://forthebadge.com)
[](https://forthebadge.com)
show some ❤️ by giving the star to this repo
[](https://forthebadge.com)
[](https://forthebadge.com)
show some ❤️ by giving the star to this repo


