Twitter clone
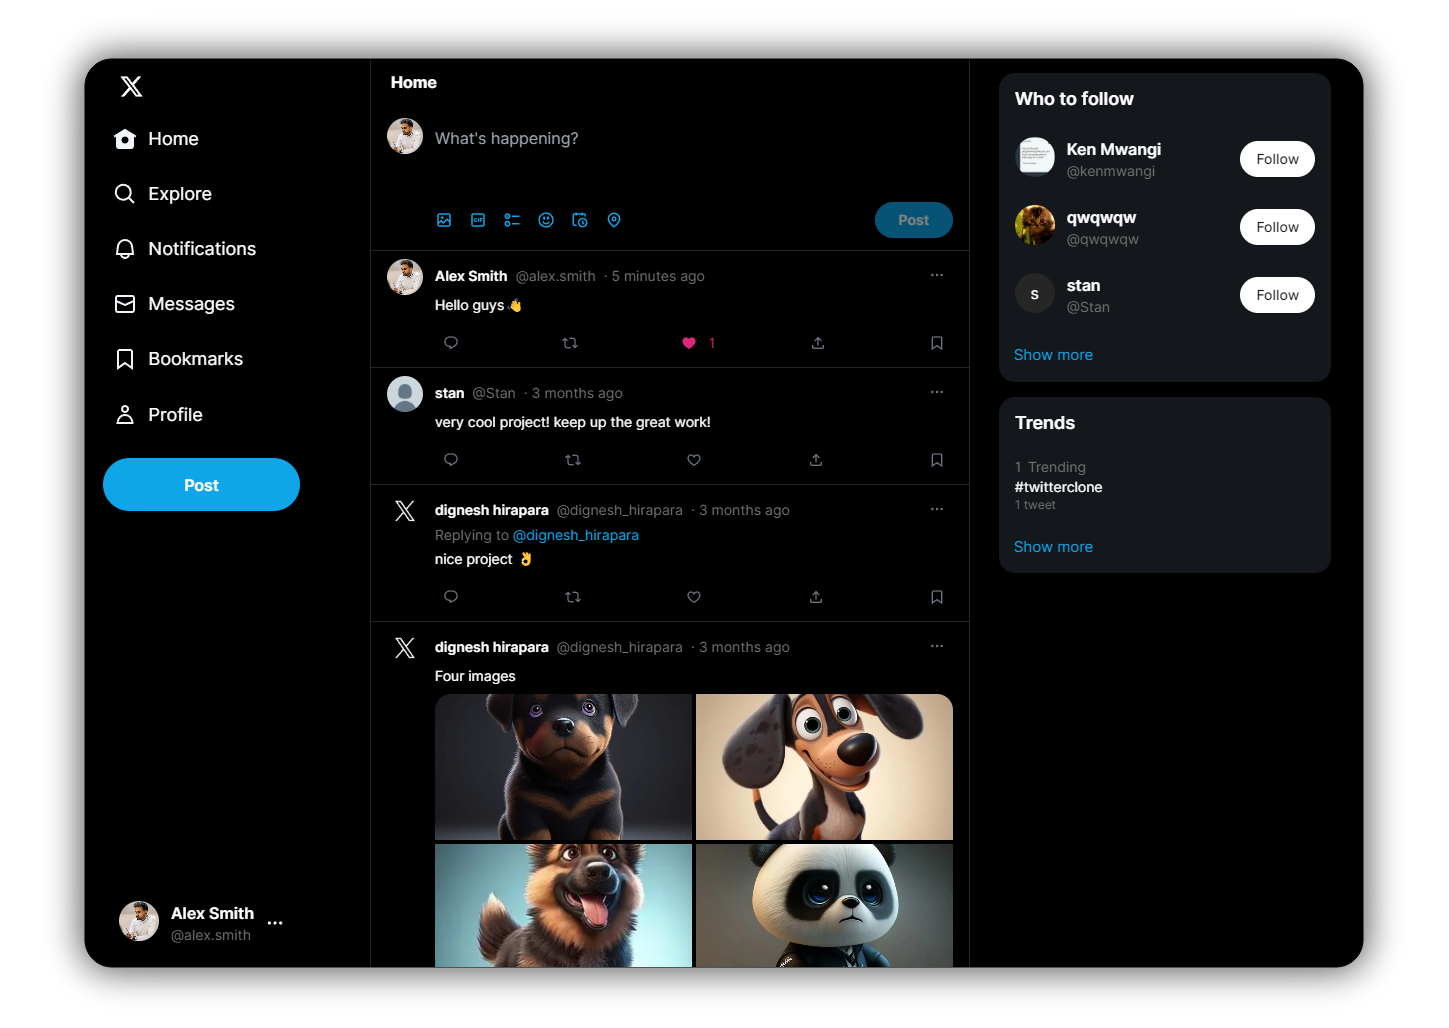
Build a fully functional Twitter clone with using a Next.js 14 with TypeScript, Sass, TailwindCSS, Framer-motion, Tanstack Query, MongoDB, Supabase, Prisma, NextAuth and Zustand. It showcases advanced frontend and backend capabilities.
 ## 📽 Demo video link
https://x.com/imDignesh/status/1784166713694773756
## ✨ Features
- Google / Github / Email (NextAuth) Authentication
- Edit profile with profile / banner images and other details
- Create tweet with upto 4 images and support emojis
- Follow / Unfollow user functionality
- User can Likes / Comments / Replies / Bookmark tweet
- User can see following list of other users
- User can Delete / Pin own post
- User can see other user's following / followers list
- Search any tweet and user
- Discover trending hashtags
- Fully responsive
- Change theme using shortcut `Alt + T`
## Built with
- [Next.js](https://nextjs.org/)
- [TypeScript](https://www.typescriptlang.org/)
- [Tailwind CSS](https://tailwindcss.com/)
- [Sass](https://sass-lang.com/)
- [Mongodb](https://www.mongodb.com/atlas/database)
- [Prisma](https://www.prisma.io/)
- [Supabase](https://supabase.com/docs)
- [Zustand](https://zustand.surge.sh/)
- [TanStack Query](https://tanstack.com/query/latest)
- [NextAuth.js](https://next-auth.js.org/)
- [Upstash Redis](https://upstash.com/)
- [zod](https://github.com/colinhacks/zod)
- [SWR](https://swr.vercel.app/)
## 🛠️ Installation
```bash
git clone https://github.com/devdignesh/twitter-clone.git
cd twitter-clone
npm i
npm run dev
```
## Environment Variables
Before running the development server, make sure to create `.env` file in the root directory of the project and add the required environment variables. You can use the example provided in the repository as a starting point.
```bash
cp .env.example .env
```
## Prisma Setup (MongoDB)
#### 1. Install Dependencies
```bash
npm install
```
- This will automatically install Prisma and all the necessary dependencies
#### 2. Generate Prisma Client
```bash
npx prisma generate
```
#### 3. MongoDB Configuration
- The project uses MongoDB, and the connection is defined in the `.env` file. Make sure your `.env` includes the correct MongoDB connection string
``` bash
DATABASE_URL="mongodb+srv://username:password@xxx.xxx.mongodb.net/twitter_clone"
```
#### 4. Run Prisma Commands
```bash
npx prisma db push
```
#### 5. Done!
## Supabase Setup:
#### 1. Create a Supabase Account
- Visit [Supabase](https://supabase.com/), sign up, and create a new project.
#### 2. Get API Keys
- After creating your project, go to the `API section` or `connect`.
- Find `Project URL` and `API Key/anon key` for the following environment variables:
```bash
NEXT_PUBLIC_SUPABASE_URL="xxx"
NEXT_PUBLIC_SUPABASE_ANON_KEY="xxx"
```
- Copy these keys and add them to your .env file.
#### 3. Create Public Storage Buckets
- Navigate to Storage in the Supabase dashboard.
- Create three public buckets: `images`, `banners`, and `avatars`.
- Set their public access policies so that users can upload and fetch files. Refer to this [detailed guide](https://blog.stackademic.com/upload-file-using-next-js-and-supabase-ad0af2360677) if you need help with configuring storage policies.
#### 4. Set Permissions for Buckets
- In each bucket, set the policy under `Configuration` to make sure the files can be publicly read.
#### 5. That's it!
Once done, your Supabase setup is complete and your application will now be able to store and retrieve images.
## Docker
This project includes Docker support for easier development and deployment.
### Prerequisites
- Docker installed on your machine.
### Usage
1. Clone the repository:
```bash
git clone https://github.com/devdignesh/twitter-clone.git
cd twitter-clone
```
2. Pull the latest Docker image:
```bash
docker pull devdignesh/twitter_clone_nextjs:v1.1.0
```
3. Run the Docker container:
```bash
docker run -d -p 8000:3000 devdignesh/twitter_clone_nextjs:v1.1.0
```
4. Access the application in your browser
```bash
http://localhost:8000
```
## Contributing
Welcome to contribute to our repository! We value your input and appreciate any contributions you make
## 📽 Demo video link
https://x.com/imDignesh/status/1784166713694773756
## ✨ Features
- Google / Github / Email (NextAuth) Authentication
- Edit profile with profile / banner images and other details
- Create tweet with upto 4 images and support emojis
- Follow / Unfollow user functionality
- User can Likes / Comments / Replies / Bookmark tweet
- User can see following list of other users
- User can Delete / Pin own post
- User can see other user's following / followers list
- Search any tweet and user
- Discover trending hashtags
- Fully responsive
- Change theme using shortcut `Alt + T`
## Built with
- [Next.js](https://nextjs.org/)
- [TypeScript](https://www.typescriptlang.org/)
- [Tailwind CSS](https://tailwindcss.com/)
- [Sass](https://sass-lang.com/)
- [Mongodb](https://www.mongodb.com/atlas/database)
- [Prisma](https://www.prisma.io/)
- [Supabase](https://supabase.com/docs)
- [Zustand](https://zustand.surge.sh/)
- [TanStack Query](https://tanstack.com/query/latest)
- [NextAuth.js](https://next-auth.js.org/)
- [Upstash Redis](https://upstash.com/)
- [zod](https://github.com/colinhacks/zod)
- [SWR](https://swr.vercel.app/)
## 🛠️ Installation
```bash
git clone https://github.com/devdignesh/twitter-clone.git
cd twitter-clone
npm i
npm run dev
```
## Environment Variables
Before running the development server, make sure to create `.env` file in the root directory of the project and add the required environment variables. You can use the example provided in the repository as a starting point.
```bash
cp .env.example .env
```
## Prisma Setup (MongoDB)
#### 1. Install Dependencies
```bash
npm install
```
- This will automatically install Prisma and all the necessary dependencies
#### 2. Generate Prisma Client
```bash
npx prisma generate
```
#### 3. MongoDB Configuration
- The project uses MongoDB, and the connection is defined in the `.env` file. Make sure your `.env` includes the correct MongoDB connection string
``` bash
DATABASE_URL="mongodb+srv://username:password@xxx.xxx.mongodb.net/twitter_clone"
```
#### 4. Run Prisma Commands
```bash
npx prisma db push
```
#### 5. Done!
## Supabase Setup:
#### 1. Create a Supabase Account
- Visit [Supabase](https://supabase.com/), sign up, and create a new project.
#### 2. Get API Keys
- After creating your project, go to the `API section` or `connect`.
- Find `Project URL` and `API Key/anon key` for the following environment variables:
```bash
NEXT_PUBLIC_SUPABASE_URL="xxx"
NEXT_PUBLIC_SUPABASE_ANON_KEY="xxx"
```
- Copy these keys and add them to your .env file.
#### 3. Create Public Storage Buckets
- Navigate to Storage in the Supabase dashboard.
- Create three public buckets: `images`, `banners`, and `avatars`.
- Set their public access policies so that users can upload and fetch files. Refer to this [detailed guide](https://blog.stackademic.com/upload-file-using-next-js-and-supabase-ad0af2360677) if you need help with configuring storage policies.
#### 4. Set Permissions for Buckets
- In each bucket, set the policy under `Configuration` to make sure the files can be publicly read.
#### 5. That's it!
Once done, your Supabase setup is complete and your application will now be able to store and retrieve images.
## Docker
This project includes Docker support for easier development and deployment.
### Prerequisites
- Docker installed on your machine.
### Usage
1. Clone the repository:
```bash
git clone https://github.com/devdignesh/twitter-clone.git
cd twitter-clone
```
2. Pull the latest Docker image:
```bash
docker pull devdignesh/twitter_clone_nextjs:v1.1.0
```
3. Run the Docker container:
```bash
docker run -d -p 8000:3000 devdignesh/twitter_clone_nextjs:v1.1.0
```
4. Access the application in your browser
```bash
http://localhost:8000
```
## Contributing
Welcome to contribute to our repository! We value your input and appreciate any contributions you make