
Serial Loops

Serial Loops is a fully-fledged editor for the Nintendo DS game Suzumiya Haruhi no Chokuretsu (The Series of Haruhi Suzumiya).
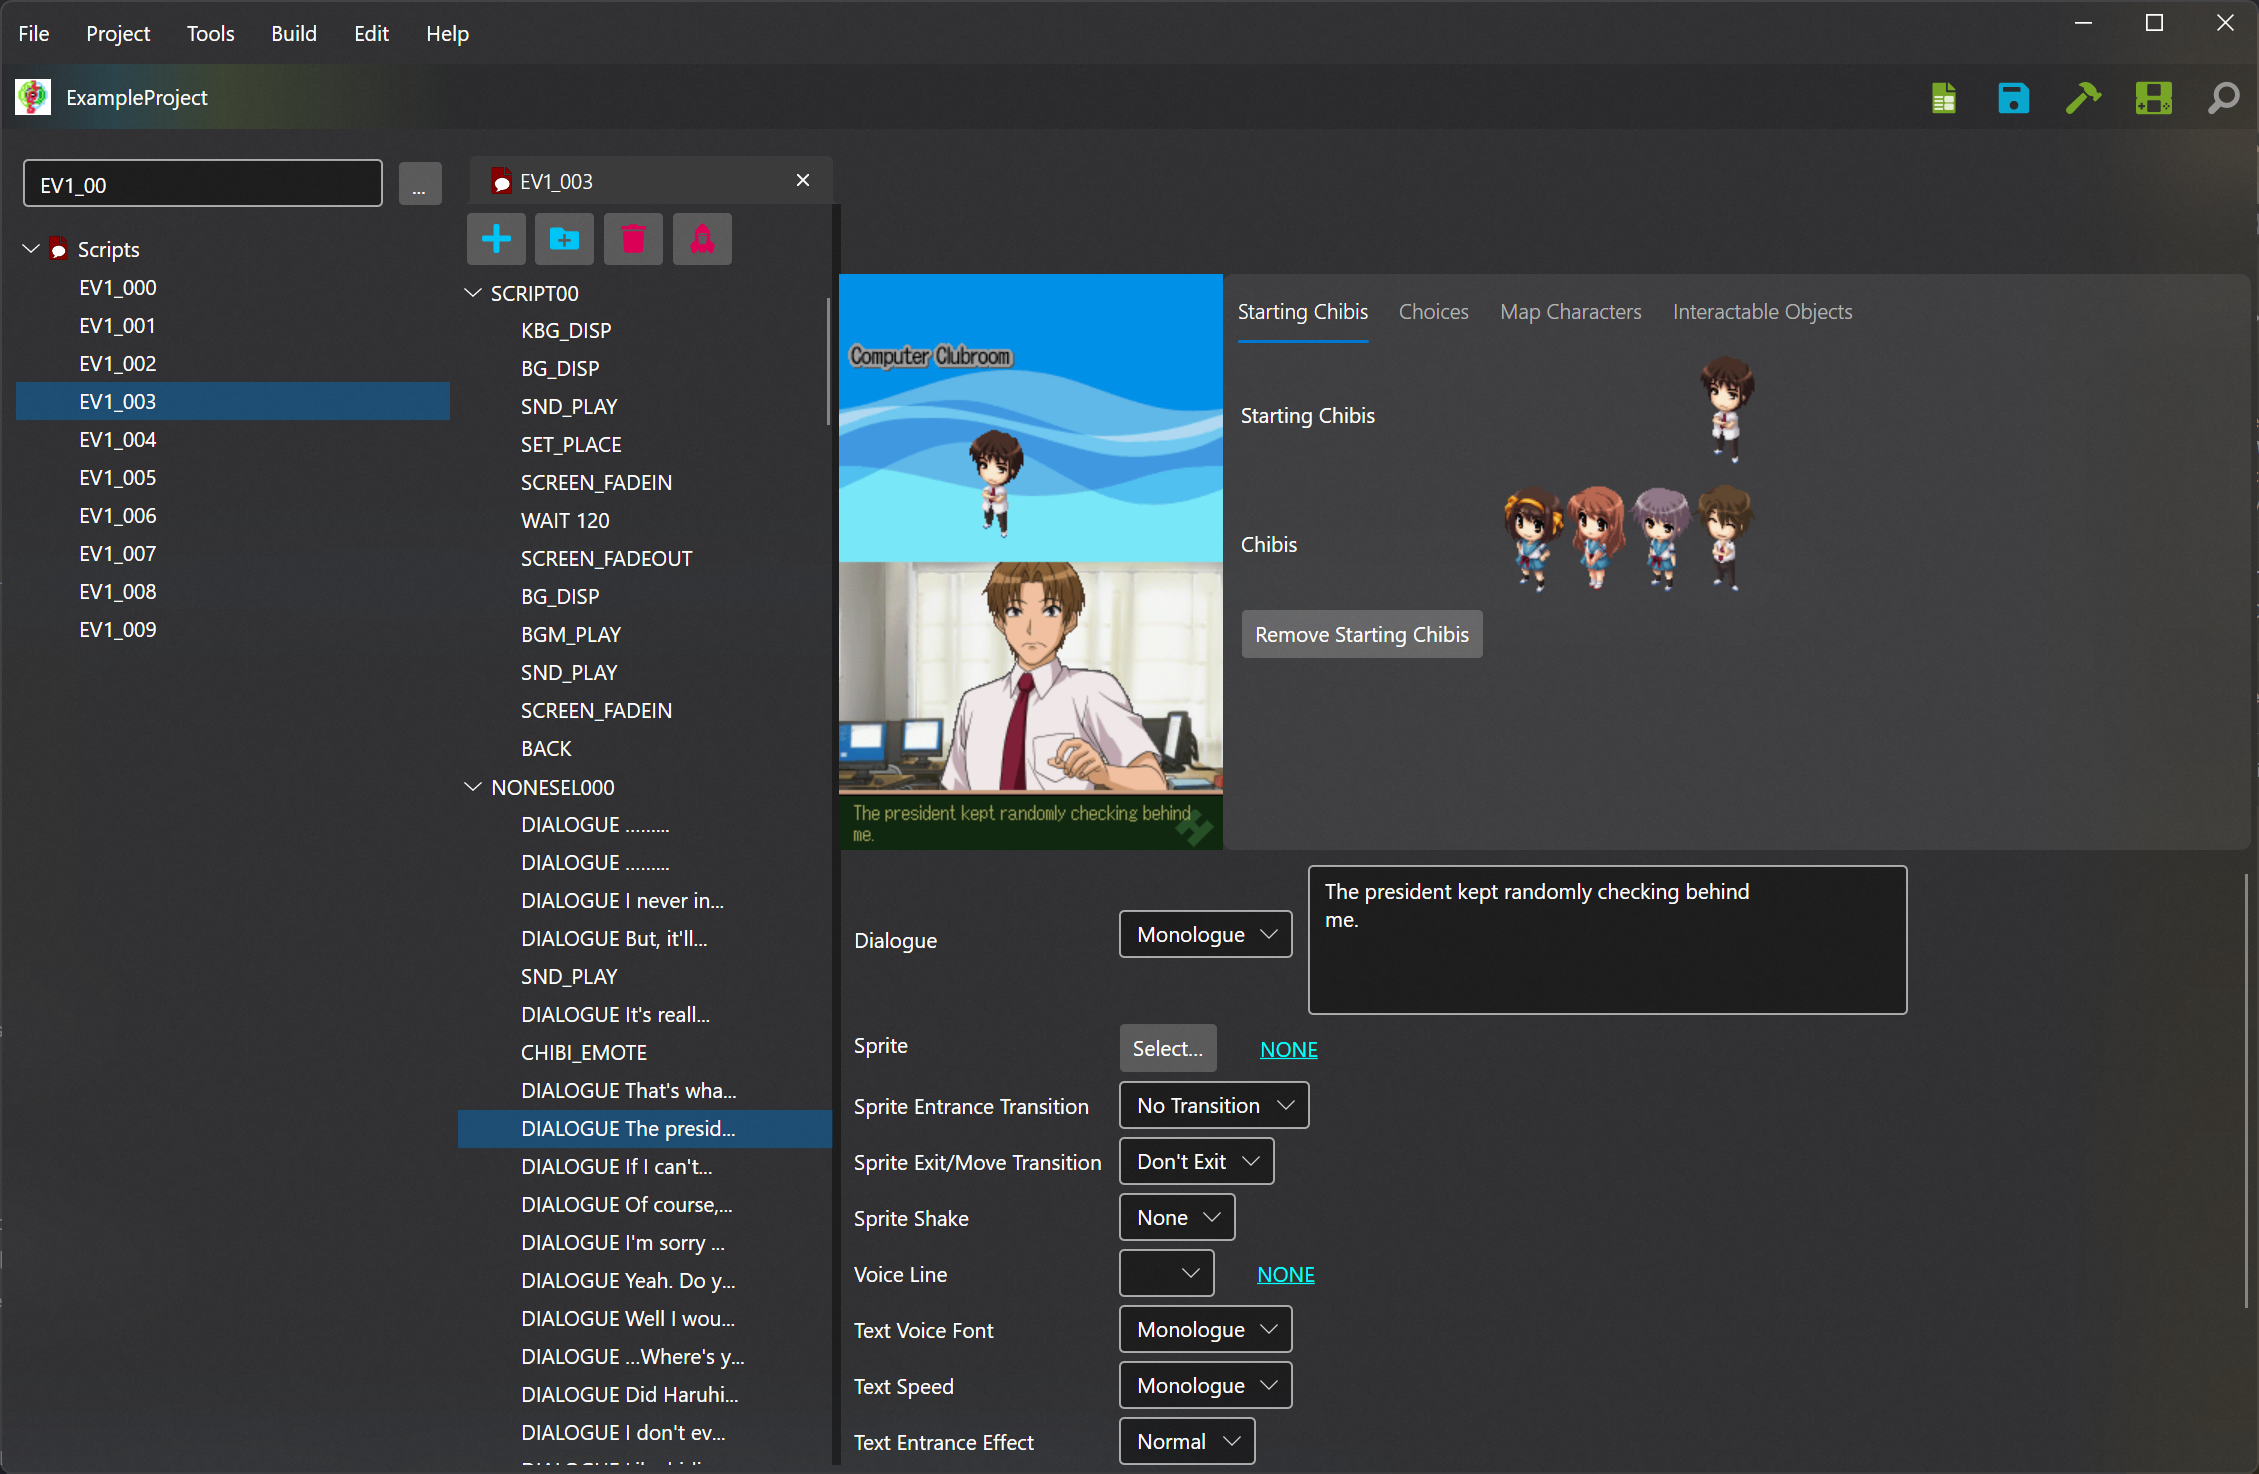
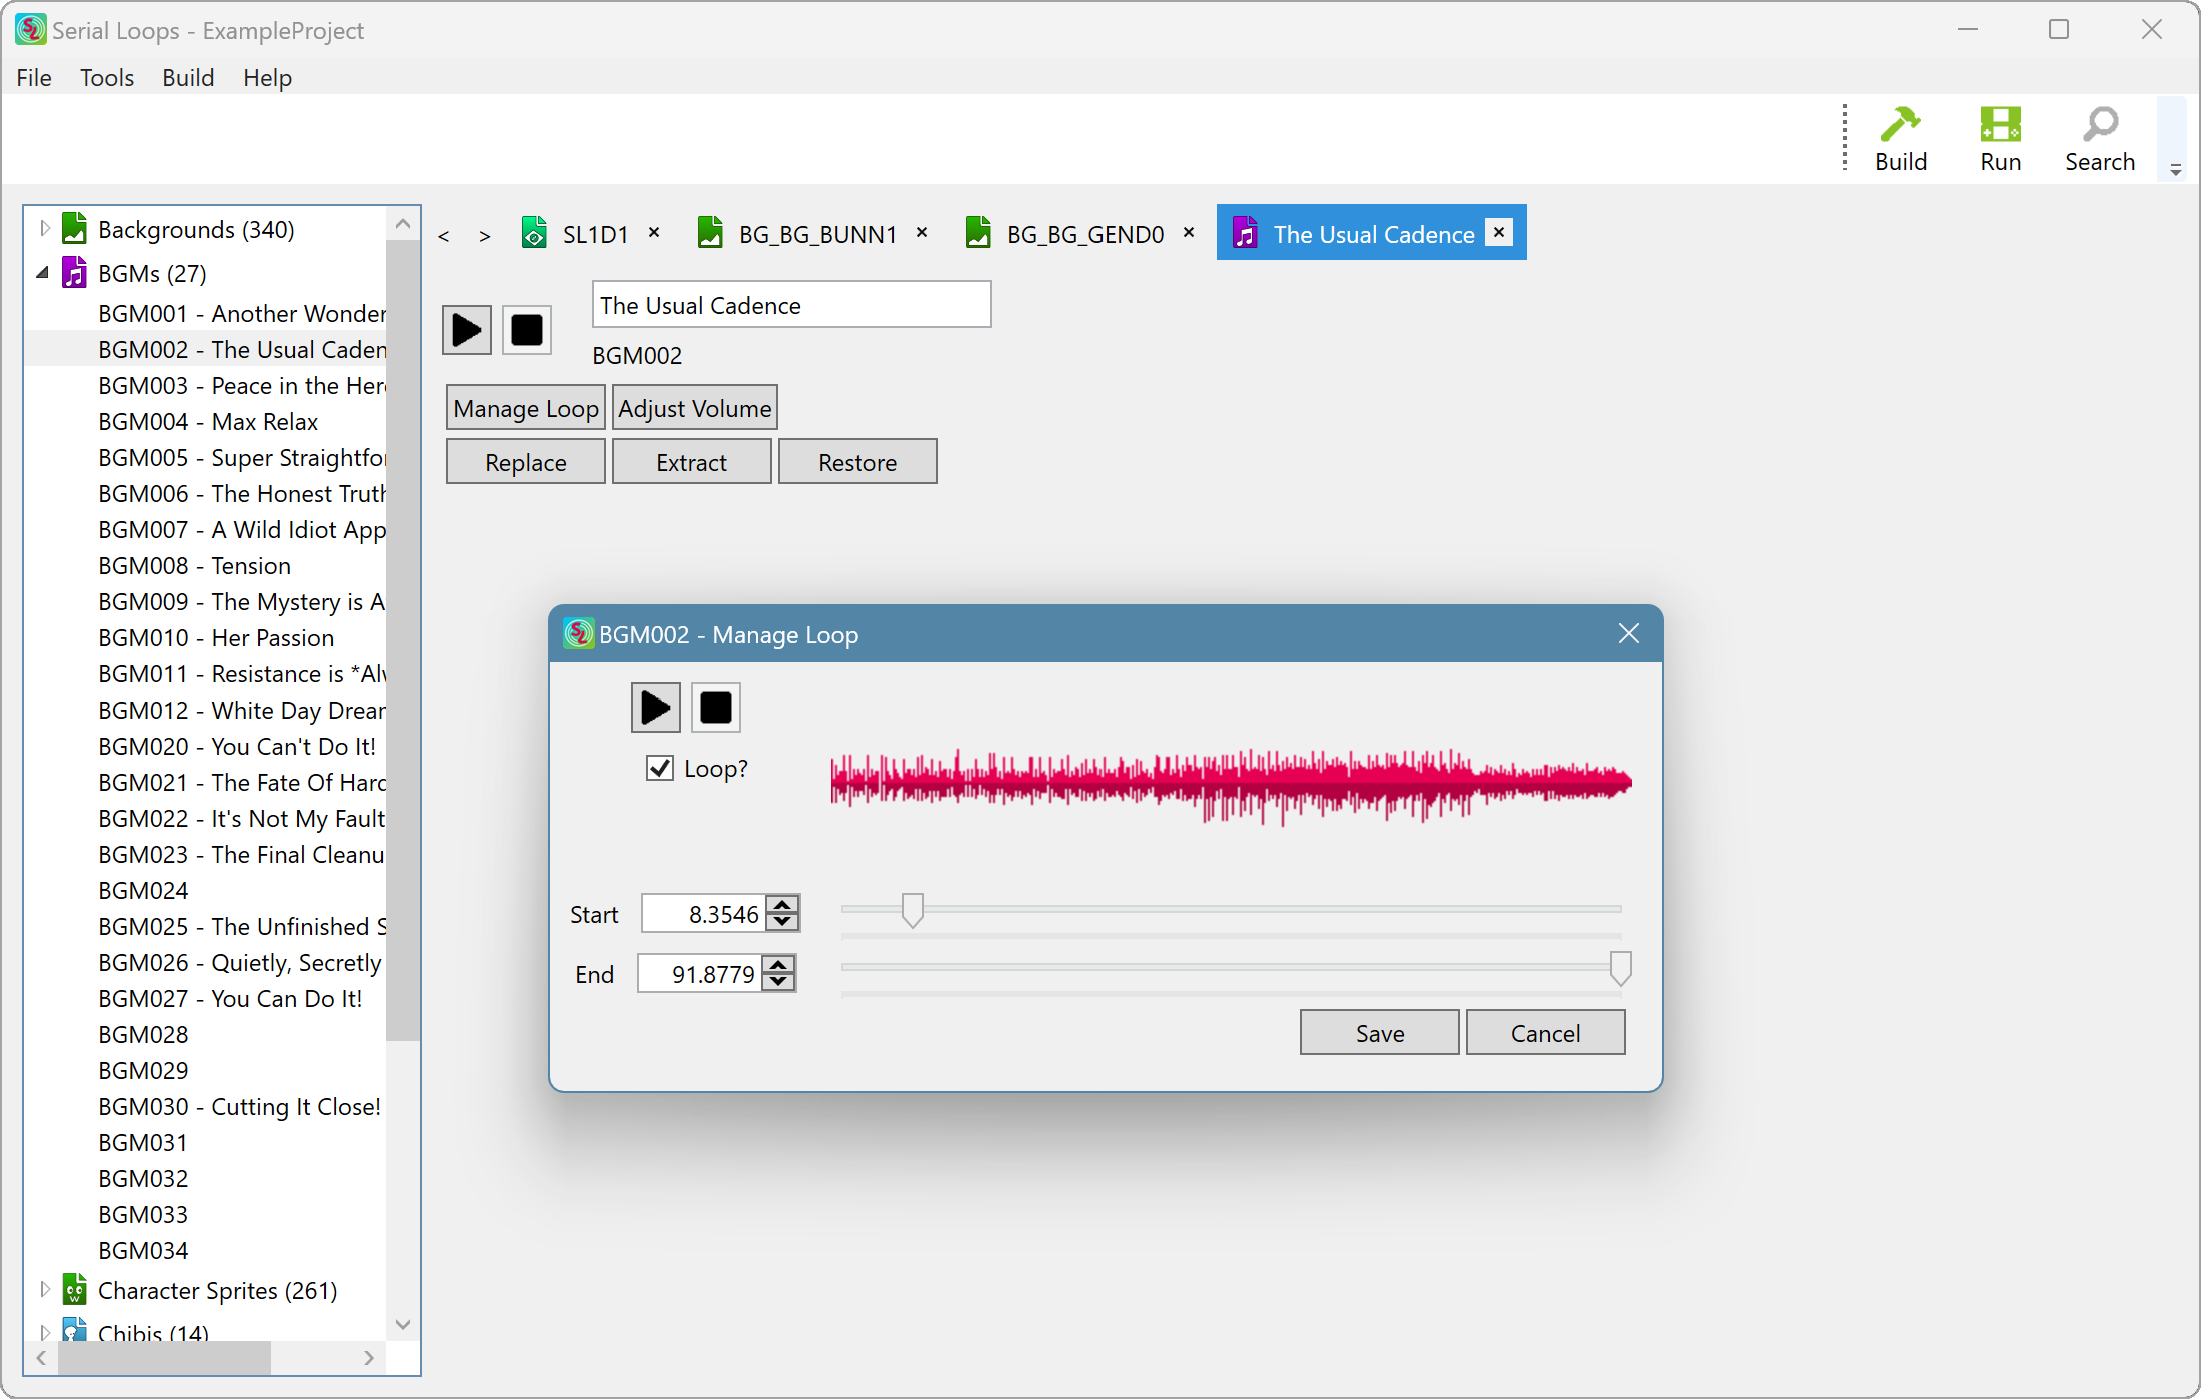
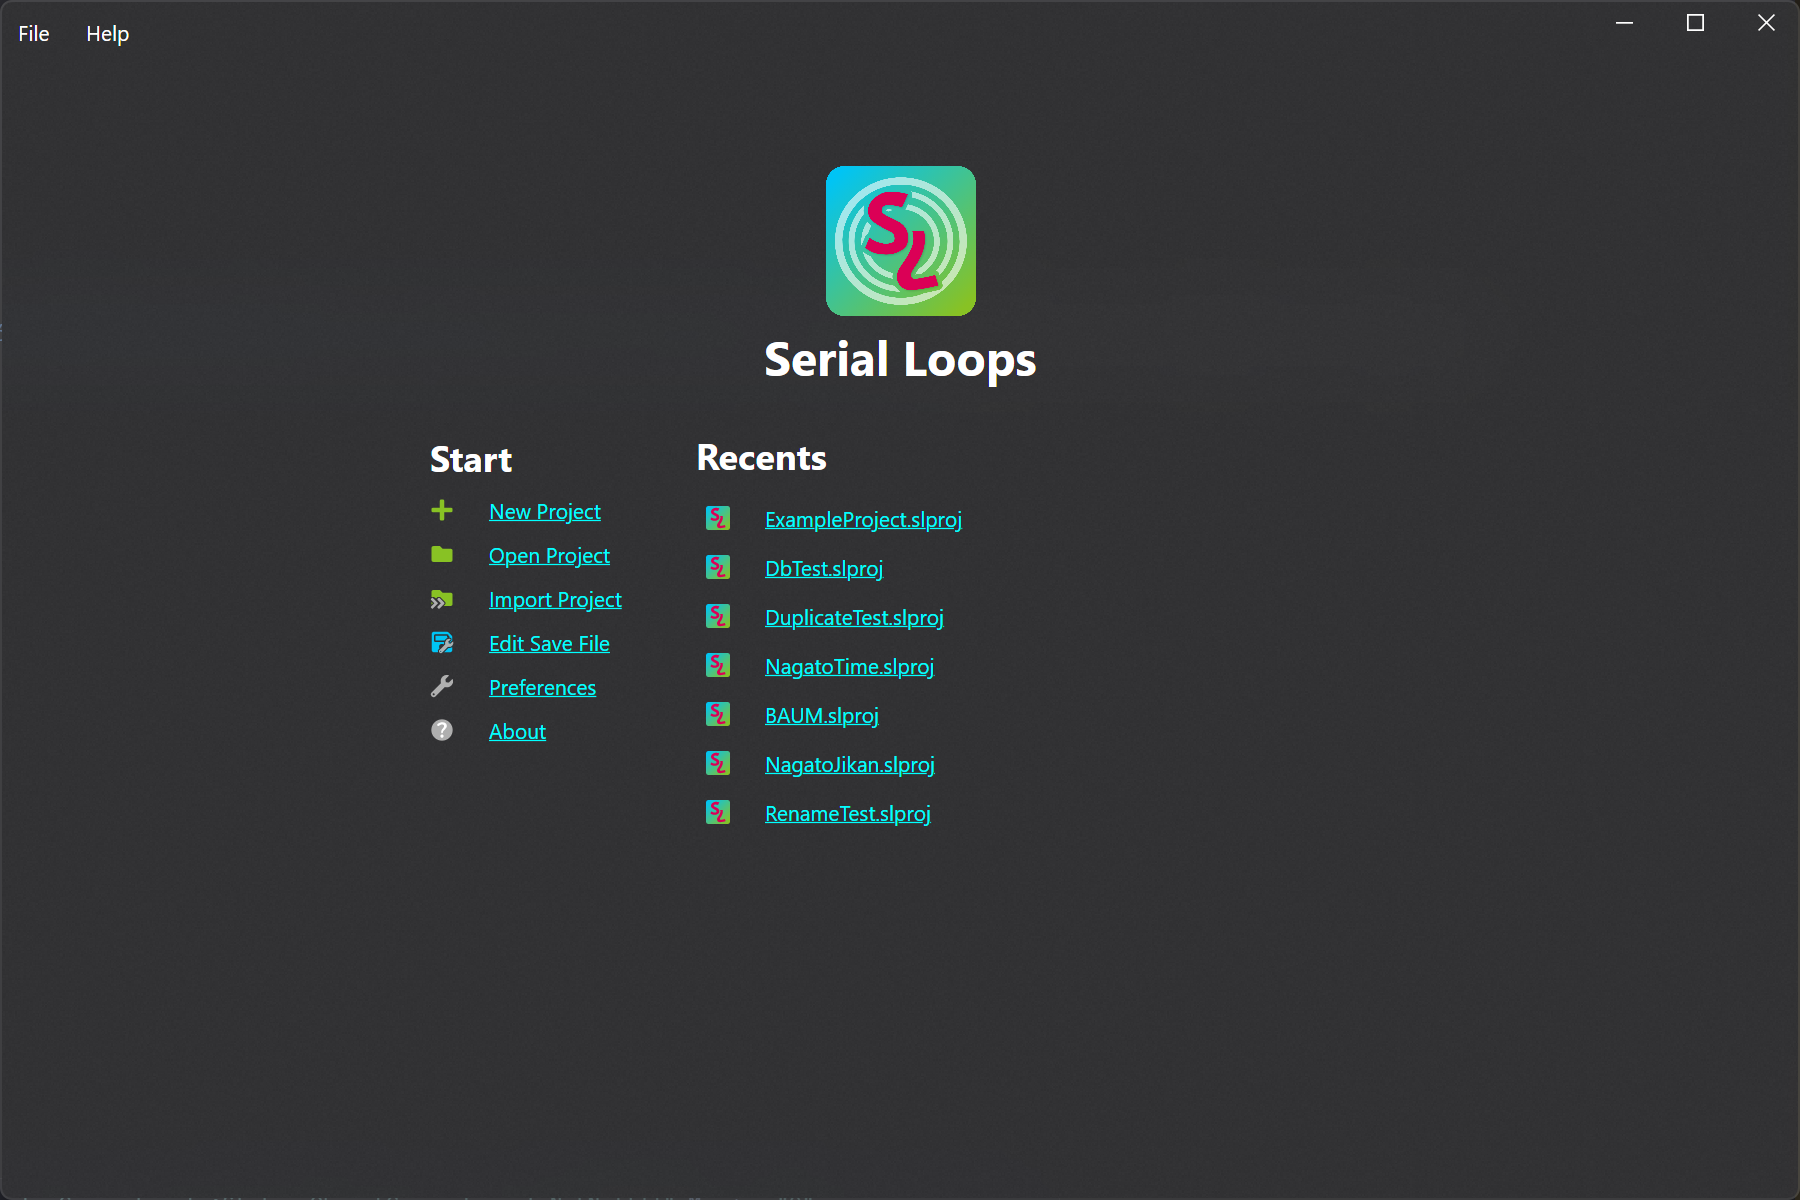
Screenshots

Authors
Developers
Serial Loops is developed by:
- Jonko – Systems architect & reverse engineering work
- William278 – UX architect & design work
Translators
Serial Loops is translated into a variety of langauges thanks to the following contributors:
- Chinese (Simplified/Traditional): Xzonn (traditional is auto-generated via OpenCC)
- Italian: Oropuro_49 and Fuyuko Ayumu
- Japanese: Amelia Chaplin
Documentation
Documentation for how to use Serial Loops can be found on our website.
Installation
Prerequisites
A Nintendo DS Emulator
To test the game easily, you will want to have a Nintendo DS emulator installed. We recommend using melonDS for its accuracy.
Installing devkitARM
devkitARM is required to use Serial Loops on all platforms.
- Using the Windows graphical installer, you can simply select the devkitARM (Nintendo DS) workloads
- On macOS and Linux, run
sudo dkp-pacman -S nds-devfrom the terminal after installing the devkitPro pacman distribution.
Installing Make or Docker
To assemble ASM hacks you want to apply, you will need to decide whether to use Make or Docker. Make is automatically installed when using the Debian and RPM packages we distribute, so you don't need to worry about this step if you're using either of those.
Currently, the Docker path is only supported on Windows due to operating system and framework limitations. It is possible to get Docker running
just fine on Linux distros by running SerialLoops as root (e.g. sudo SerialLoops), but it's easier to just use Make. On macOS, there is no known
way of getting the Docker path to work, so you will have to use Make.
-
Make is the software used to assemble assembly hacks. Installing Make allows you to build the hacks directly on your system.
- To install on Windows, you will have to use a terminal and a package manager. Your options are Winget (installed by default on Win10+) or
Chocolatey. Open an admin PowerShell or Terminal window (Winkey + X + A) and enter
winget install GnuWin32.makefor Winget orchoco install makefor Chocolatey. If using Winget, you will then have to go into system preferences and add Make to the path. - Installation on macOS can be done through Xcode or Homebrew. If using Xcode, open a terminal and type
xcode-select --install. If you would rather use Homebrew, open a terminal after installing Homebrew and typebrew install make. - Make comes preinstalled on many Linux distributions, and if you're using the Debian or RPM package, it was definitely installed when you installed
Serial Loops. If you're using the tar.gz it is not installed on yours, you will likely be able to install it as simply as
[packagemanger] install makefrom a terminal.
To test if make is installed properly, type
make --verisoninto a terminal and see if it produces the version of make. - To install on Windows, you will have to use a terminal and a package manager. Your options are Winget (installed by default on Win10+) or
Chocolatey. Open an admin PowerShell or Terminal window (Winkey + X + A) and enter
- If you would rather not install Make, or if it is not working properly, you can instead run it through a Docker container. To do this, you should
install Docker Desktop or the Docker Engine. Ensure the Docker engine is running and make sure
to check the "Use Docker for ASM Hacks" option in Preferences. You may want to occasionally clean up containers created by Serial Loops, as it will
create many of them.
- On Windows, you will additionally need to install Windows Subsystem for Linux (WSL).
From an admin PowerShell or Terminal window (Winkey + X + A), simply type
wsl --installto install it.
- On Windows, you will additionally need to install Windows Subsystem for Linux (WSL).
From an admin PowerShell or Terminal window (Winkey + X + A), simply type
Installing OpenAL (Linux)
If you're running on Linux and not using one of the package releases (the .deb or .rpm), you will also need to install OpenAL which is used for audio processing.
Download & Install
Once you have installed any necessary prerequisites, to install Serial Loops, download the latest release for your platform from the Releases tab.
Be sure to read the Serial Loops documentation for instructions on how to use it!
Bugs
Please file bugs in the Issues tab in this repository. Please include the following information:
- The platform you are running Serial Loops on
- The version of the Chokuretsu ROM you are using (Japanese, patched English ROM, etc.)
- A description of the steps required to reproduce the issue
- The relevant logs for the issue (can be found in ~/SerialLoops/Logs)
Development
License
Serial Loops is licensed under the GPLv3. See LICENSE for more information.
Building
Serial Loops requires the .NET 8.0 SDK to build. You can download it here. To build Serial Loops for your platform, run:
dotnet build src/PLATFORMRemember to replace PLATFORM with the platform you're on:
SerialLoops.Gtkfor LinuxSerialLoops.Macfor macOSSerialLoops.Wpffor Windows
We recommend Visual Studio 2022 on Windows or Rider on Linux/Mac for development. If you'd like to contribute new features or fixes, we recommend getting in touch on Discord first before submitting a pull request!
Testing
The SerialLoops.Tests project can be run from inside Visual Studio, Rider, or with dotnet test as normal. However, our UI tests (currently only runnable on Windows) are a bit more involved.
Our UI tests rely on Appium.
macOS
- You will need to install nodejs and then use it to install Appium.
- The easiest way to install nodejs is to first install nvm and then run
nvm install <version>followed bynvm use <version>(you can use16as the version)
- The easiest way to install nodejs is to first install nvm and then run
- You will then need to install the Mac2 driver with
appium driver install mac2 - Follow these instructions for installing and setting up the necessary prerequisites for the Mac2 driver to work
Once you've installed the prerequisites, build the SerialLoops.Mac and SerialLoops.Mac.Tests projects with dotnet build src/SerialLoops.Mac/SerialLoops.Mac.csproj and dotnet build test/ui/SerialLoops.Mac.Tests/SerialLoops.Mac.Tests.csproj,
respectively. Then, inside test\ui\SerialLoops.Mac.Tests\bin\Debug\net8.0, create a new text file called ui_vals.json. Inside this file, place the following text, replacing necessary values:
{
    "AppLoc": "PATH/TO/Serial Loops.app",
    "ProjectName": "MacUITest",
    "RomLoc": "PATH/TO/HaruhiChokuretsu.nds",
    "ArtifactsDir": "PATH/TO/artifacts"
}
The artifacts directory can be any arbitrary directory, but ensure it exists before running the tests. The project name by default is WinUITest, but it can be anything you'd like. Have fun.
Finally, you can then run the tests with dotnet test test\ui\SerialLoops.Mac.Tests\SerialLoops.Mac.Tests.csproj. However, it may be better to run appium from a different terminal first so you
can see the server output as well.
Windows
- You will need to install nodejs and then use it to install Appium.
- The easiest way to install nodejs is to first install NVM for Windows and then run
nvm install latestfollowed bynvm use latest(you can sub latest for any version)
- The easiest way to install nodejs is to first install NVM for Windows and then run
- You will then need to install the Appium Windows Driver with
appium driver install --source=npm appium-windows-driver. - Next, download and install WinAppDriver.
Once you've installed all the prerequisites, build the SerialLoops.Wpf and SerialLoops.Wpf.Tests projects from Visual Studio or with dotnet build src\ui\SerialLoops.Wpf\SerialLoops.Wpf.csproj and
dotnet build test\ui\SerialLoops.Wpf.Tests\SerialLoops.Wpf.Tests.csproj, respectively. Then, inside test\ui\SerialLoops.Wpf.Tests\bin\Debug\net8.0, create a new text file called ui_vals.json.
Inside this file place the following text, replacing necessary values:
{
    "AppLoc": "PATH\\TO\\SerialLoops.exe",
    "ProjectName": "WinUITest",
    "WinAppDriverLoc": "PATH\\TO\\WinAppDriver.exe",
    "RomLoc": "PATH\\TO\\HaruhiChokuretsu.nds",
    "ArtifactsDir": "PATH\\TO\\artifacts"
}
Ensure you escape your backslashes (\\ rather than \). WinAppDriver is usually installed to C:\Program Files (x86)\Windows Application Driver\WinAppDriver.exe. The artifacts directory can
be any arbitrary directory, but ensure it exists before running the tests. The project name by default is WinUITest, but it can be anything you'd like. Have fun.
Finally, you can then open the solution inside Visual Studio and run the tests from the Test Explorer. Alternatively, running dotnet test test\ui\SerialLoops.Wpf.Tests\SerialLoops.Wpf.Tests.csproj
may also work.