Homebridge-Schedule
This Homebridge plugin allows you to create HomeKit automations for more than just the default "A time of day occurs"
The original thought for this was to create an hourly automation to check my thermostat in the house and send me a notification if it was above or below a certain threshold
Homebridge-Schedule is similar to Homebridge-Dummy, in the sense that it creates some dummy switches in HomeKit that turn on at your desired interval. They will turn off one second later. This is useful for triggering automations, or even shortcuts.
Installation
sudo npm i homebridge-schedule@latest -gUsage
Interval Based
Add accessories to your config.json similar to below for interval based schedules:
{
  "accessories": [
    {
      "accessory": "Schedule",
      "name": "Hourly",
      "interval": 60,
      "serial": "123456789",
      "enabledDuration": 10
    }
  ]
}| Property | Description |
|---|---|
| Accessory | Must be "Schedule" |
| Name | Unique name for the dummy switch |
| Interval | Interval, in minutes |
| Serial | Serial number to give the accessory in HomeKit. Defaults to 123456789 |
| Enabled Duration | Number of seconds to leave switch enabled before disabling. Defaults to 1 second |
Upon startup of Homebridge, the device will turn on at the specified interval
Notes
The interval starts when Homebridge is started up. If you want something to run hourly on the hour, then you need to make sure Homebridge is started up on the hour
Rarely, if your HomeKit bridge is too sluggish to detect Homebridge Schedule switches turning on and off, you can configure an Enabled Duration to have the switches remain on longer
Cron Based
Add accessories to your config.json similar to below for cron based schedules:
{
  "accessories": [
    {
      "accessory": "Schedule",
      "name": "Hourly",
      "cron": "* * * * * *",
      "serial": "123456789"
    }
  ]
}| Property | Description |
|---|---|
| Accessory | Must be "Schedule" |
| Name | Unique name for the dummy switch |
| Cron | Cron string |
| Serial | Serial number to give the accessory in HomeKit. Defaults to 123456789 |
| Enabled Duration | Number of seconds to leave switch enabled before disabling. Defaults to 1 second |
Cron string details: https://www.npmjs.com/package/cron
Cron string uses seconds, so for an hourly cron string use:
"0 0 * * * *"
"{seconds} {minutes} {hours} {days} {months} {weeks}"
Use Cases
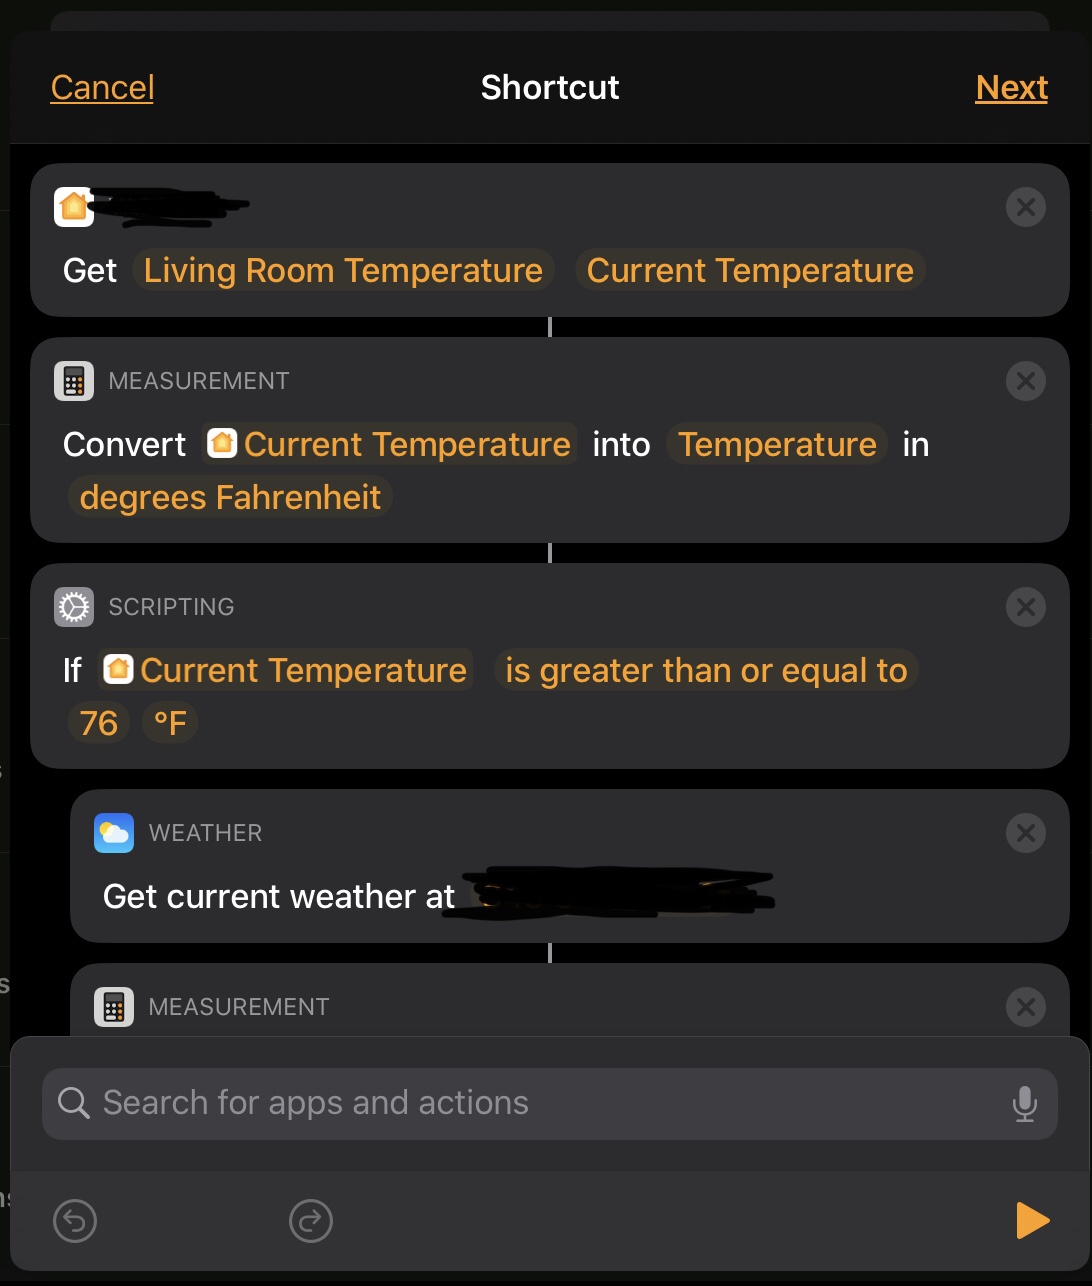
I have created a "room" called Automation in my HomeKit, which then allows me to create an automation "When the Automation Hourly turns on" to check my thermostat temperature, check the current outside temperature at my house, and based on some conditions, set the thermostat.
Steps:
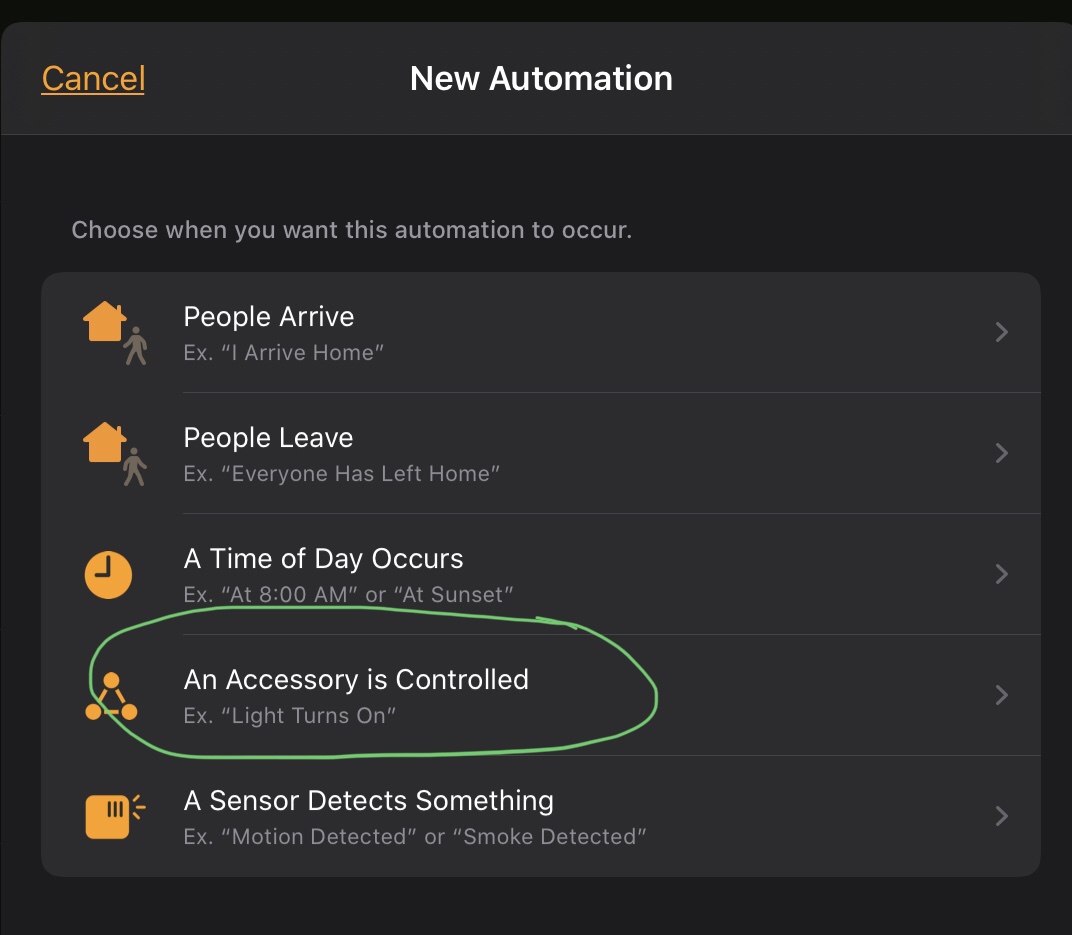
- Create new automation based on "An Accessory is Controlled"
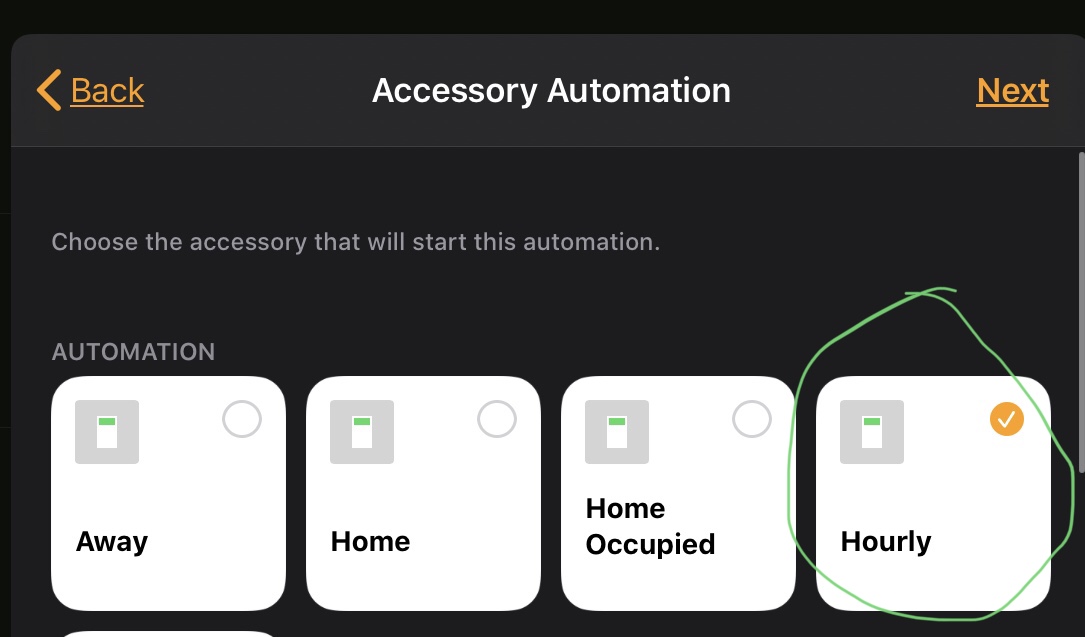
- Find your newly created dummy switch
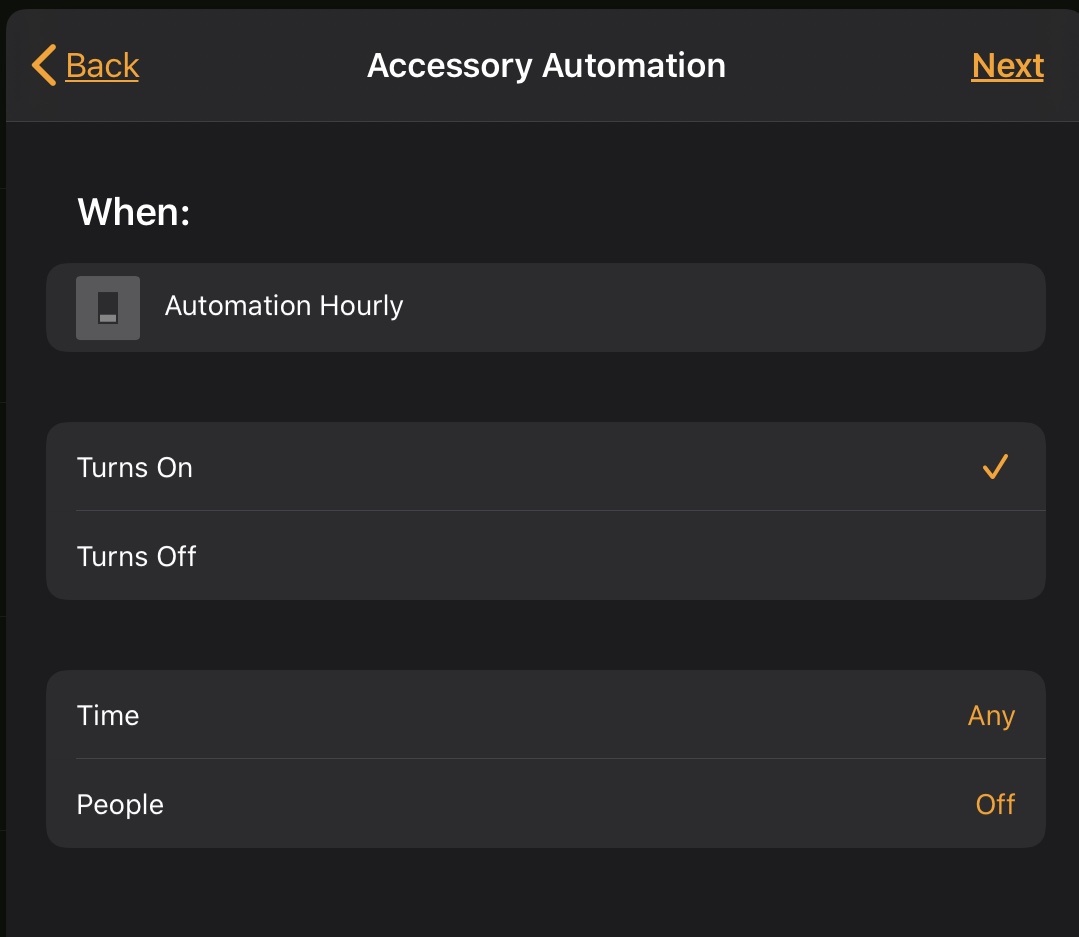
- Select Turns On and add any desired time or people conditions
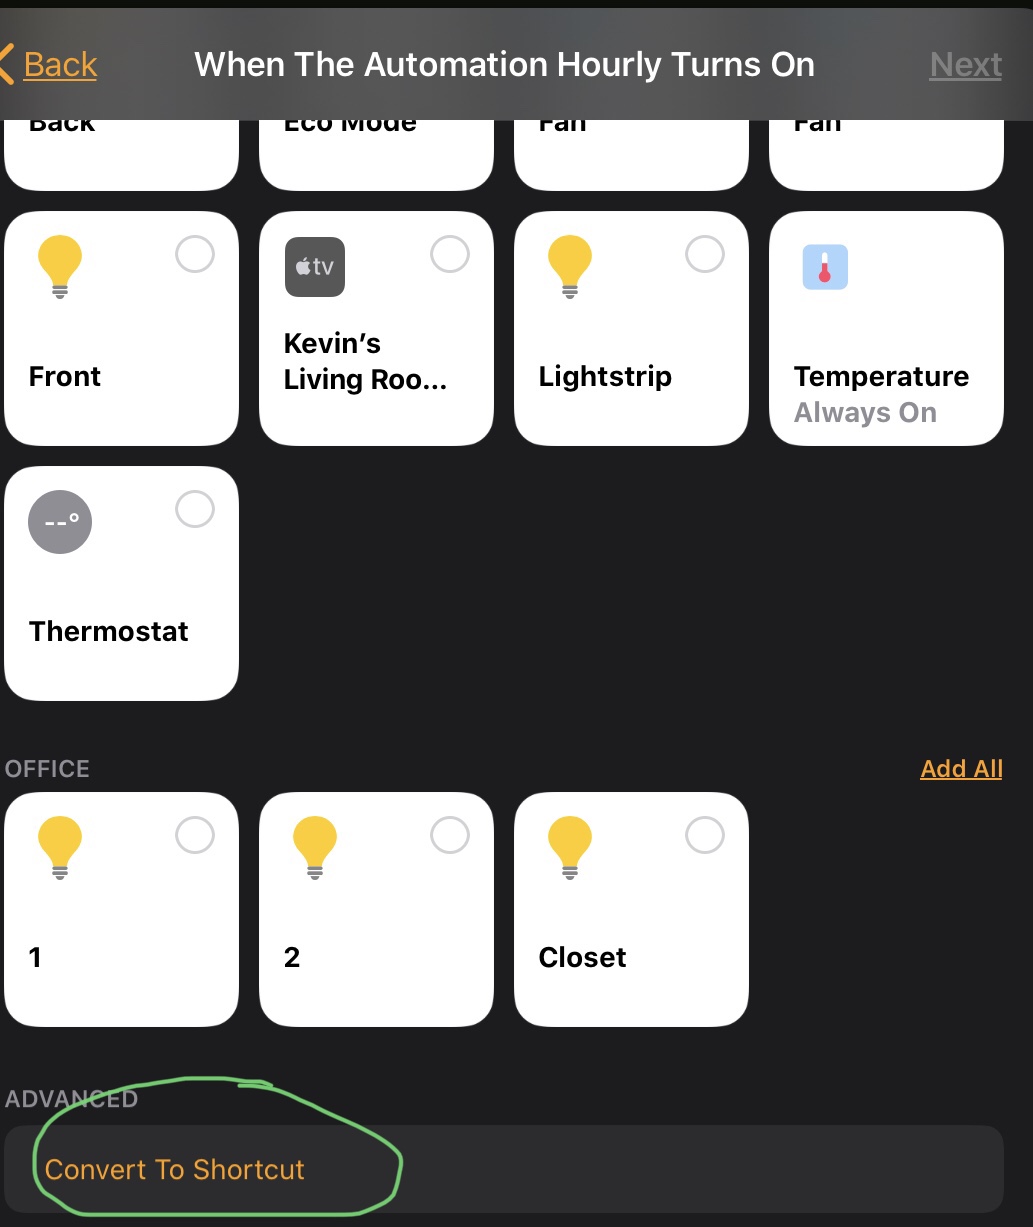
- You can then choose a scene or another accessory to control, or at the very bottom, you can create a shortcut
- Done! You now have one automation for things you want to happen hourly rather than 24
Creating HomeKit Automations
Create new Accessory automation:
Choose the accessory created by homebridge-schedule:
Select when it turns on or turns off and any time or people configurations
Scroll all the way to the bottom and choose Convert to Shortcut
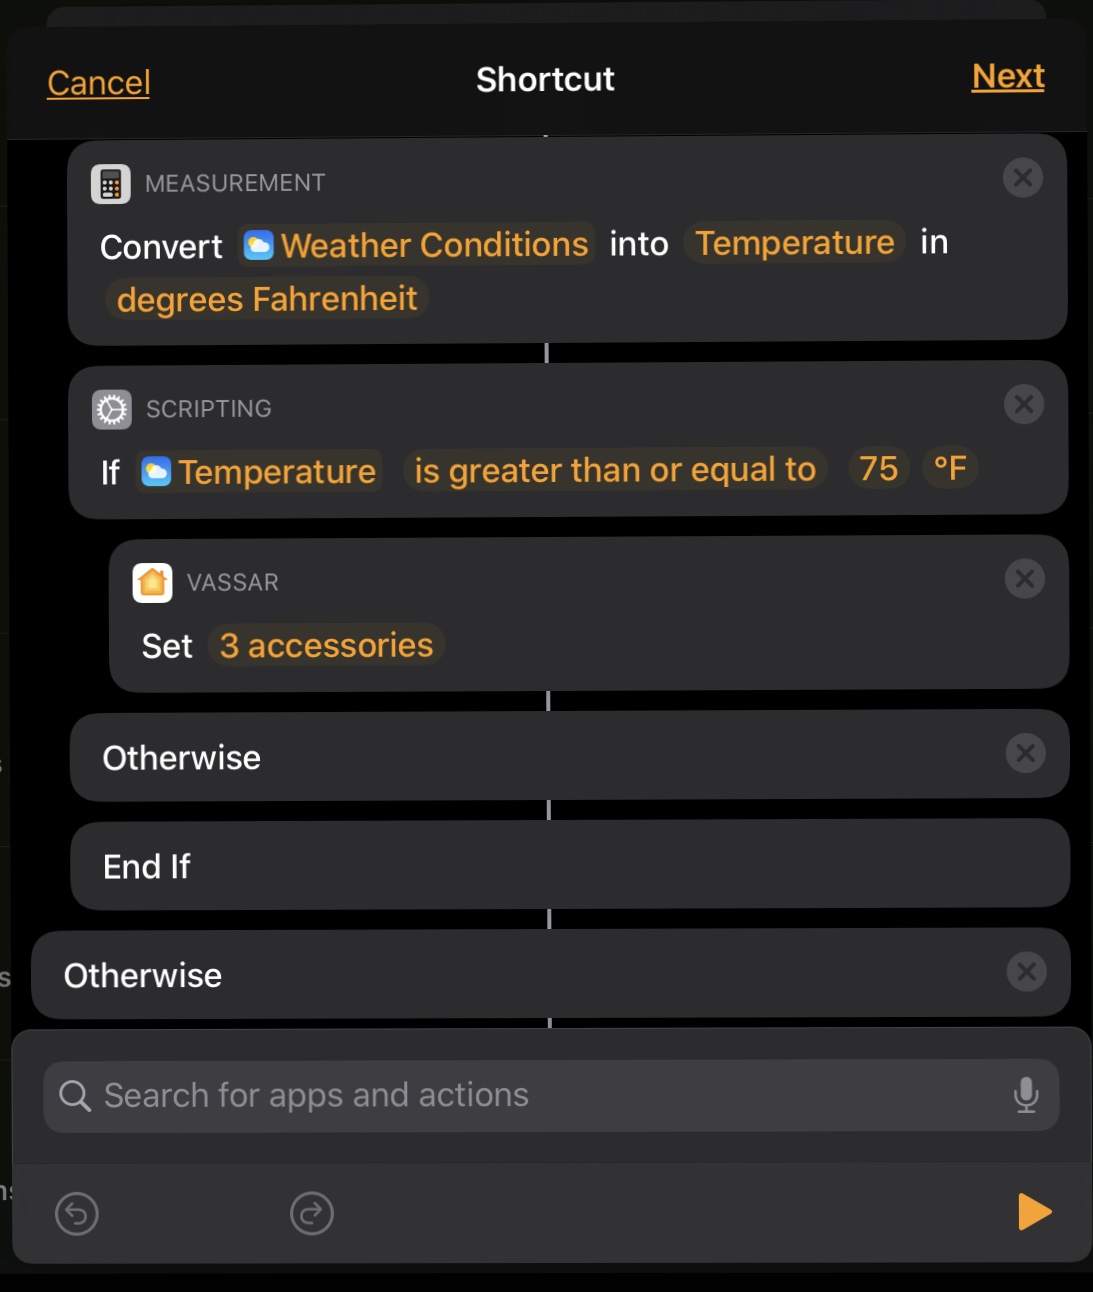
Create shortcut:
- Get the current temperature of a HomeKit thermostat
- Convert to Fahrenheit
- If the indoor temperature is greater than a threshold
- Get current weather outside
- Convert to Fahrenheit
- If the current weather outside is also above a threshold
- Turn on fans, set thermostat, etc.
Development
Clone the latest and run
npm run prepto install packages and prep the git hooks