Introduction
ninESP is a modular firmware for ESP8266 SoC based on SmingFramework.
It is designed to work with a few kinds of different sensors which you can attach to it and then acts as an MQTT Client which serves you telemetry data or let you control things. So you can easily switch relays or simply as a relay server for RC Plugs (All RCSwitch compatible Plugs and Protocols) or just a timer based MQTT publish of sensor values. You can find all currently supported modules/sensors below in the "Peripheral Modules" section.
Also it can start an UDP Server and Serial Console to act/react for most of the peripherals, you can find a protocol description is down below.
Everything should be accessible and especially configurable from a simple webinterface. The Webinterface based on the NetworkConfig Example of the SmingFramework.
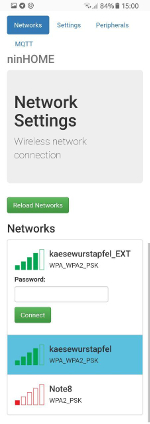
On first run it starts a Wifi Accesspoint from itself with name "ninHome Configuration" which you can connect from any Wifi enabled device and then connect with a webbrowser to "http://192.168.4.1" to get into the webinterface. There you can first configure the Wifi it should connect to, the mqtt settings and the connected periphals and the corresponding mqtt topics. After you configured your ninESP you can find the current IP Address on the defined LWT MQTT Topic when the client is online, if it disconnects it will just say "Offline" in the LWT Topic.
In Version 0.2 the library for the MAX7219 control changed to a more modern and flexible library which can do a lot of more animations. MD_MAX72xx and MD_Parola which are from MajicDesigns Since this version (0.2) your flash size has to be at least a 1M type.
The firmware itself should be mostly compatible to the closed source firmware for the inwall esp8266 which you can find and buy on ebay.
You can find the latest firmware version in a binary format in the firmware folder in the root of this repository
Also there is a project description on hackaday.io about the MAX72xx Module in the ninESP
Screenshots


Peripheral Modules
Peripheral modules which are currently build in or in development state
| Periphery | Working state |
|---|---|
| Status LED on any free GPIO | working |
| Relay Module on any free GPIO with optional Hardware switch support | working |
| Status LED on any free GPIO | working |
| Analog Sensor on Pin A0 Reference Voltage of 3v3 | working |
| HC-SR501 Motion Sensor on any free GPIO | working |
| MAX7219 LED Matrix | working currently only with Hardware SPI Support Pins for HW SPI are IO13 (MOSI) and IO14 (CLK) the CS Pin is free assignable |
| RCSwitch Support for 868/433MHz Remote Plugs | working but configuration Webinterface missing, configuration of plugs currently in config file only |
| HD44780 LCD Display over I2C | not fully implemented |
| WS281x LED Strip | not fully implemented |
| HC-SR04 Ultrasonic Sensor | on the roadmap |
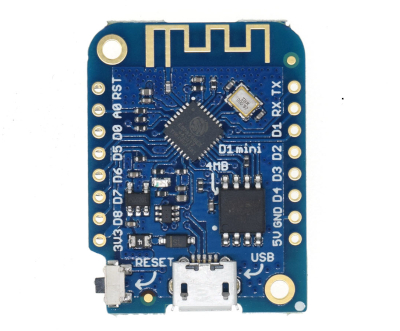
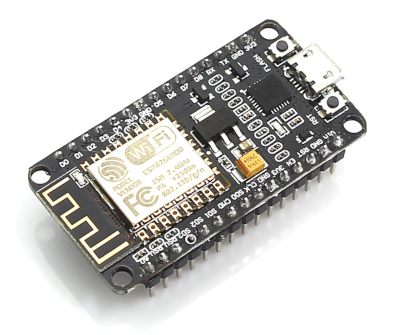
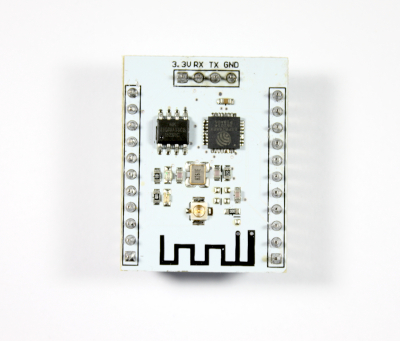
# Known Working Boards/Chips Here you find a list of development boards and modules which are known to work with ninESP firmware. ESP-201 Modules will work but some of them are only manufactured with an 512k flash so it is too small for the ninESP firmware.
| Board / Module | Working state |
|---|---|
WeMos D1 mini clone | works |
NodeMCU v0.9 | works |
ESP-201 Module
| work partially (need at least 1M flash) |
# Dependencies The project relies on SmingFramework for ESP8266, the SmingFramework is as submodule added but not the [esp-open-sdk](https://github.com/pfalcon/esp-open-sdk) , which you had to install also and by yourself. As other submodules are the libraries of MajicDesigns included. [MD_MAX72xx](https://github.com/MajicDesigns/MD_MAX72XX) - MAX72xx Driver Library [MD_Parola](https://github.com/MajicDesigns/MD_Parola) - Animation Library for MAX72XX ~~It uses a slightly modified version of the SmingFramework MQTTClient Class, cause i needed some small additions to that.~~ # How to use If ninESP is configured correctly and is connected to your defined MQTT broker, you can send/receive data on the specified topics for the periphery you want to control, Examples with mosquitto client: #####MAX72XX Module: In the examples we use a topic prefix of "client/display/" Send a new text "Hello World" to Display with topic "client/display/text" ```mosquitto_pub -h YOURMQTTBROKER -u MQTTUSER -P MQTTPASS -r -t client/display/text -m "Hello World"``` Enable inverting of the Display with topic "client/display/invert" ```mosquitto_pub -h YOURMQTTBROKER -u MQTTUSER -P MQTTPASS -r -t client/display/invert -m 1``` #####Relay Module: Switch relay to ON state on topic "client/relay" ```mosquitto_pub -h YOURMQTTBROKER -u MQTTUSER -P MQTTPASS -r -t client/relay -m 1``` #####RCSwitch Module: In the examples we use a topic prefix of "client/rcswitch/" Switch Plug 1 to OFF state on topic "client/rcswitch/1" ```mosquitto_pub -h YOURMQTTBROKER -u MQTTUSER -P MQTTPASS -r -t client/rcswitch/1 -m 0``` You can use any mqtt client to interact with ninESP, for example an mobile android mqtt client is [MQTT Dash](https://play.google.com/store/apps/details?id=net.routix.mqttdash) # MQTT Topic Structure
| Topic | Description | ||||||||||||||||||||||||||||||||||||||||||||||||||||||||||
|---|---|---|---|---|---|---|---|---|---|---|---|---|---|---|---|---|---|---|---|---|---|---|---|---|---|---|---|---|---|---|---|---|---|---|---|---|---|---|---|---|---|---|---|---|---|---|---|---|---|---|---|---|---|---|---|---|---|---|---|
| LWT Topic | Default: lwt/client Last Will and Testament Topic In this topic the actual IP Adress will be published or after timeout a "Offline" string | ||||||||||||||||||||||||||||||||||||||||||||||||||||||||||
| Command Topic | Default: cmd/client General Command Topic where global commands can be run (not implemented yet) | ||||||||||||||||||||||||||||||||||||||||||||||||||||||||||
| Publish Topic | Default: clients/client General Publiush Topic where global message can be seen (not implemented yet) | ||||||||||||||||||||||||||||||||||||||||||||||||||||||||||
| Switch Command Topic | Default: client/relay Switch the state of the relay "on" or 1 enables relay "off" or 0 disables relay Should be retained and QoS of at least 1 to recover the last state on reboot | ||||||||||||||||||||||||||||||||||||||||||||||||||||||||||
| Switch Publish Topic | Default: client/relaystate Actual state of the relay | ||||||||||||||||||||||||||||||||||||||||||||||||||||||||||
| Publish Topic ADC Value | Default: client/adc Actual value of Analog Port | ||||||||||||||||||||||||||||||||||||||||||||||||||||||||||
| Command Topic Prefix | Default: client/rcswitch/ Prefix to control the RC Plugs For every defined RC Plug will be one topic reserved and could be switched then the same way like the relay module for example: client/rcswitch/1 for the first defined RC Plug | ||||||||||||||||||||||||||||||||||||||||||||||||||||||||||
| Publish Topic | Default: client/motion Actual state of motion 0 for no motion detected 1 for motion deteced | ||||||||||||||||||||||||||||||||||||||||||||||||||||||||||
| Topic Prefix | Default: client/display/ The Prefix of the control topic of the display | ||||||||||||||||||||||||||||||||||||||||||||||||||||||||||
| Enable Topic | Default: enable (client/display/enable) Enable or disable display output 0 for disable 1 for enable | ||||||||||||||||||||||||||||||||||||||||||||||||||||||||||
| Display Text Topic | Default: text (client/display/text) The text to display | ||||||||||||||||||||||||||||||||||||||||||||||||||||||||||
| Scrolling Topic | Default: scroll (client/display/scroll) Enable scrolling of the displayed text 0 for disable 1 for enable | ||||||||||||||||||||||||||||||||||||||||||||||||||||||||||
| Scrolling Speed Topic | Default: speed (client/display/speed) The delay of the text effect in ms. Should be a value between 1 and 200 | ||||||||||||||||||||||||||||||||||||||||||||||||||||||||||
| Charwidth Topic | Default: charwidth (client/display/charwidth) The amount of pixels between every character displayed Should be a value between 1 and 5 | ||||||||||||||||||||||||||||||||||||||||||||||||||||||||||
| Intensity Topic | Default: intensity (client/display/intensity) Sets the intensity of the display Should be a value between 0 and 15 (default is 9) | ||||||||||||||||||||||||||||||||||||||||||||||||||||||||||
| Invert Display Topic | Default: invert (client/display/invert) Enable inverting of the displayed text 0 for disable 1 for enable | ||||||||||||||||||||||||||||||||||||||||||||||||||||||||||
| Text Alignment Topic | Default: alignment (client/display/alignment) Alignment of the displayed text 0 for left aligned 1 for centered text 2 for right aligned | ||||||||||||||||||||||||||||||||||||||||||||||||||||||||||
| Pause Time Topic | Default: pause (client/display/pause) Delay time in ms of the staying of the displayed text if an text out effect is greater or equal than 1 | ||||||||||||||||||||||||||||||||||||||||||||||||||||||||||
| Effect In Topic | Default: effectin (client/display/effectin)
| ||||||||||||||||||||||||||||||||||||||||||||||||||||||||||
| Effect Out Topic | Default: effectout (client/display/effectout) Same list as in Effect in Topic description. For a static text use no effect (0) | ||||||||||||||||||||||||||||||||||||||||||||||||||||||||||
| Reset Display Option Topic | Default: reset (client/display/reset) Reset Display animations on changing settings? 0 for disable 1 for enable (default) | ||||||||||||||||||||||||||||||||||||||||||||||||||||||||||
| Command | Reply |
|---|---|
| help | List of commands |
| ip | Dumps the actual ip and mac adress of the module. Example output: ip: 192.168.3.66 mac: ecfabc123458 |
| restart | Restarts the module |
| ls | Displays a list of files in the SPIFFS Example output: filecount 13 bootstrap-core.css.gz periph.html index.html .mqtt_settings.conf ... |
| info | Displays some system information Example output: SDK: v1.5.2(80914727) Free Heap: 28048 CPU Frequency: 80 MHz System Chip ID: 143bc8 SPI Flash ID: 16405e SPI Flash Size: 4194304 |
# Flashing to your board If you just want to flash the firmware without the compiling, you can take one of our binary releases from the firmware folder in the repository. There are zip archives with the firmware files in it. Its not one file builds so you have to flash it seperately. The flash addresses are the file names of the binaries. Except of the spiff rom, which had to be in this case on memory address *0x5A000*. An example flashing command with esptool could look like this. ```esptool.py -p /dev/ttyUSB0 -b 230400 write_flash -ff 40m -fm qio -fs 32m 0x00000 0x00000.bin 0xa000 0xa000.bin 0x5A000 spiff_rom.bin``` # FAQ *Q. My MAX7219 Displays are mirrored or just displaying crap, what can i do?* A. Look in the MAX72XX Submodule folder and open the MAX72xx.h in edit mode and search for the MAX7219 module settings. There you can change the type of module you got and will hopefully fix the displaying issue. *Q. The firmware want compile, it says "error: 'typedef' was ignored in this declaration"* A. Apply the MD_Parola.patch from the repositorys root folder. Or remove the "typedef" tag from MD_Parola.h by yourself *Q. Can i see or download the configuration files for later use?* A. You can see or download the configuration files in json format if you open http://YOUR_ESP_IP/dumpcfg?type=TYPE and TYPE can be *mqtt*, *network* or *periph* *Last Edited on: Sonntag, 20. Mai 2018 01:40*