POV-Ray Extension for Visual Studio Code

The Persistence of Vision Raytracer is a high-quality, free software tool for creating three-dimensional graphics by using a Scene Description Language.
This extension allows you to use Visual Studio Code to edit POV-Ray Scene Description files and render them using POV-Ray in the integrated terminal.
What's New
Version 0.0.11
- Library Updates to address security vulnerabilities in 3rd party package.
Version 0.0.10
- The extension now properly handles spaces in paths and filenames for most cases. (Some known issues with Powershell). Thanks to Galbi3000 for identifying this bug and helping to fix it.
Features
-
Render the current .pov or .ini scene file by clicking the POV-Ray render icon in the editor menu or by using the VS Code build task key combination
ctrl-shift-b.
-
Includes Syntax Highlighting and Snippets for common POV-Ray scene elements
-
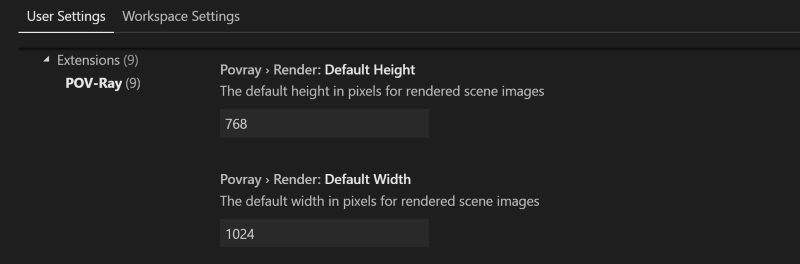
Control output image format and output path through User and Workspace settings

-
Set default image dimensions for rendered images
-
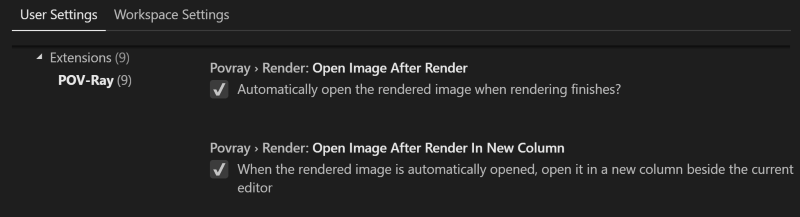
Option to open the rendered image when rendering completes.
-
Enjoy built in VS Code features like bracket matching, code folding, and comment toggling
Requirements
This extension does not install POV-Ray. You can either install it yourself or run it using Docker.
Running POV-Ray using Docker
If you have Docker installed, you can easily run POV-Ray on any platform by selecting the Docker > Enable Docker option in the VS Code POV-Ray settings.
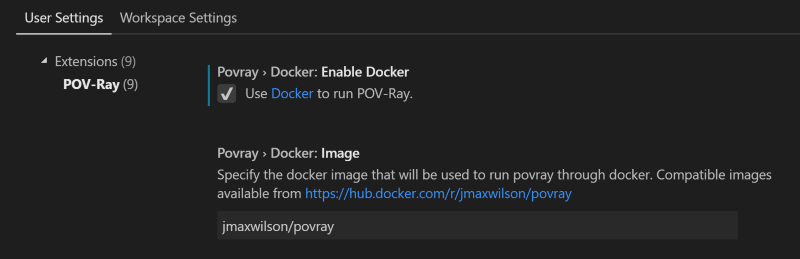
By default, the jmaxwilson/povray:latest docker image will be used. Additional povray docker images are available and you can set the image you want to use in the settings.
Note: if you are using WSL Bash as your integrated terminal on Windows, you will need some addtional setup to make Docker for Windows work with WSL Bash.
Installing POV-Ray
If you are not using Docker, you will need to install POV-Ray for your specific OS and you will need to make sure that it can be run via the commandline from your terminal.
Ubuntu Linux
sudo apt install povrayWindows 10 with WSL
For the best experience on Windows, install the Windows Subsystem for Linux (WSL) and Ubuntu for Windows. Then configure VS Code to use C:\\Windows\\System32\\bash.exe as the integrated shell. Once you have WSL and Ubuntu working, you can install the povray package for Ubuntu exactly the same as above.
Windows
Download and run the POV-Ray installer for Windows:
http://www.povray.org/download/
Make sure the full path to pvengine.exe is added to your PATH Environment Variable so that it can be run from Powershell or the Windows command line.
You may also have to turn off Script I/O Restrictions in the POV-Ray Options.
Mac
Download the unofficial Command line POV-Ray 3.7.0 final for Mac:
http://megapov.inetart.net/povrayunofficial_mac/finalpov.html
Using the terminal, unzip the downloaded file and move the extracted files into ~/povray :
unzip PovrayCommandLineMacV2.zip && mv PovrayCommandLineMacV2 ~/povrayCreate a povray symlink in /usr/local/bin to run Povray37UnofficialMacCmd :
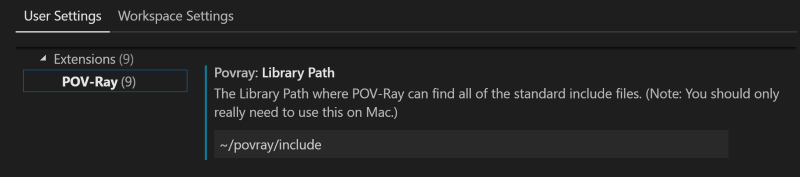
ln -s ~/povray/Povray37UnofficialMacCmd /usr/local/bin/povrayModify the POV-Ray Extension Settings in VS Code to set the Library Path to ~/povray/include
Known Issues
- On Windows using Powershell as the integrated terminal, if the
outputPathsetting has a path with a space in one of the path names ("./out put", "C:\pov\my scenes\output"), POV-Ray fails to honor the output path or fails to render. Spaces in path names work properly on all other supported platforms and terminals.
Links
POV-Ray for VS Code Extension on GitHub
POV-Ray for VS Code Extension in the VS Code Marketplace
Attributions
POV-Ray Scene Description Language syntax highlighting adapted from the atom-language-povray project by 羽洲.
POV-Ray Logo by SharkD.