SensorServer


SensorServer transforms Android device into a versatile sensor hub, providing real-time access to its entire array of sensors. It allows multiple Websocket clients to simultaneously connect and retrieve live sensor data.The app exposes all available sensors of the Android device, enabling WebSocket clients to read sensor data related to device position, motion (e.g., accelerometer, gyroscope), environment (e.g., temperature, light, pressure), GPS location, and even touchscreen interactions.


Since this application functions as a Websocket Server, you will require a Websocket Client API to establish a connection with the application. To obtain a Websocket library for your preferred programming language click here.
Usage
To receive sensor data, Websocket client must connect to the app using following URL.
ws://<ip>:<port>/sensor/connect?type=<sensor type here> Value for the type parameter can be found by navigating to Available Sensors in the app.
For example
-
For accelerometer
/sensor/connect?type=android.sensor.accelerometer. -
For gyroscope
/sensor/connect?type=android.sensor.gyroscope. -
For step detector
/sensor/connect?type=android.sensor.step_detector -
so on...
Once connected, client will receive sensor data in
JSON Array(float type values) throughwebsocket.onMessage.A snapshot from accelerometer.
{
"accuracy": 2,
"timestamp": 3925657519043709,
"values": [0.31892395,-0.97802734,10.049896]
}
where
| Array Item | Description |
|---|---|
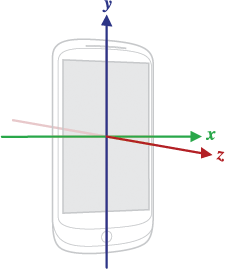
| values[0] | Acceleration force along the x axis (including gravity) |
| values[1] | Acceleration force along the y axis (including gravity) |
| values[2] | Acceleration force along the z axis (including gravity) |
And timestamp is the time in nanoseconds at which the event happened
Use JSON parser to get these individual values.
Note : Use following links to know what each value in values array corresponds to
- For motion sensors /topics/sensors/sensors_motion
- For position sensors /topics/sensors/sensors_position
- For Environmental sensors /topics/sensors/sensors_environment
Undocumented (mostly QTI) sensors on Android devices
Some Android devices have additional sensors like Coarse Motion Classifier (com.qti.sensor.motion_classifier), Basic Gesture (com.qti.sensor.basic_gestures) etc which are not documented on offical android docs. Please refer to this Blog for corresponding values in values array
Supports multiple connections to multiple sensors simultaneously
Multiple WebSocket clients can connect to a specific type of sensor. For example, by connecting to /sensor/connect?type=android.sensor.accelerometer multiple times, separate connections to the accelerometer sensor are created. Each connected client will receive accelerometer data simultaneously.
Additionally, it is possible to connect to different types of sensors from either the same or different machines. For instance, one WebSocket client object can connect to the accelerometer, while another WebSocket client object can connect to the gyroscope. To view all active connections, you can select the "Connections" navigation button.
Example: Websocket client (Python)
Here is a simple websocket client in python using websocket-client api which receives live data from accelerometer sensor.
import websocket
import json

def on_message(ws, message):
    values = json.loads(message)['values']
    x = values[0]
    y = values[1]
    z = values[2]
    print("x = ", x , "y = ", y , "z = ", z )

def on_error(ws, error):
    print("error occurred ", error)

def on_close(ws, close_code, reason):
    print("connection closed : ", reason)

def on_open(ws):
    print("connected")

def connect(url):
    ws = websocket.WebSocketApp(url,
                              on_open=on_open,
                              on_message=on_message,
                              on_error=on_error,
                              on_close=on_close)

    ws.run_forever()

connect("ws://192.168.0.103:8080/sensor/connect?type=android.sensor.accelerometer")
Your device's IP might be different when you tap start button, so make sure you are using correct IP address at client side
Also see Connecting to Multiple Sensors Using Threading in Python
Connecting To The Server without hardcoding IP Address and Port No
In networks using DHCP (Dynamic Host Configuration Protocol), devices frequently receive different IP addresses upon reconnection, making it impractical to rely on hardcoded network configurations. To address this challenge, the app supports Zero-configuration networking (Zeroconf/mDNS), enabling automatic server discovery on local networks. This feature eliminates the need for clients to hardcode IP addresses and port numbers when connecting to the WebSocket server. When enabled by the app user, the server broadcasts its presence on the network using the service type _websocket._tcp, allowing clients to discover the server automatically. Clients can now implement service discovery to locate the server dynamically, rather than relying on hardcoded network configurations.
See complete python Example at Connecting To the Server Using Service Discovery
Using Multiple Sensors Over single Websocket Connection
You can also connect to multiple sensors over single websocket connection. To use multiple sensors over single websocket connection use following URL.
ws://<ip>:<port>/sensors/connect?types=["<type1>","<type2>","<type3>"...]By connecting using above URL you will receive JSON response containing sensor data along with a type of sensor. See complete example at Using Multiple Sensors On Single Websocket Connection. Avoid connecting too many sensors over single connection
Reading Touch Screen Data
By connecting to the address ws://<ip>:<port>/touchscreen, clients can receive touch screen events in following JSON formate.
| Key | Value |
|---|---|
| x | x coordinate of touch |
| y | y coordinate of touch |
| action | ACTION_MOVE or ACTION_UP or ACTION_DOWN |
"ACTION_DOWN" indicates that a user has touched the screen. "ACTION_UP" means the user has removed their finger from the screen. "ACTION_MOVE" implies the user is sliding their finger across the screen. See Controlling Mouse Movement Using SensorServer app
Getting Device Location Using GPS
You can access device location through GPS using following URL.
ws://<ip>:<port>/gpsSee Getting Data From GPS for more details
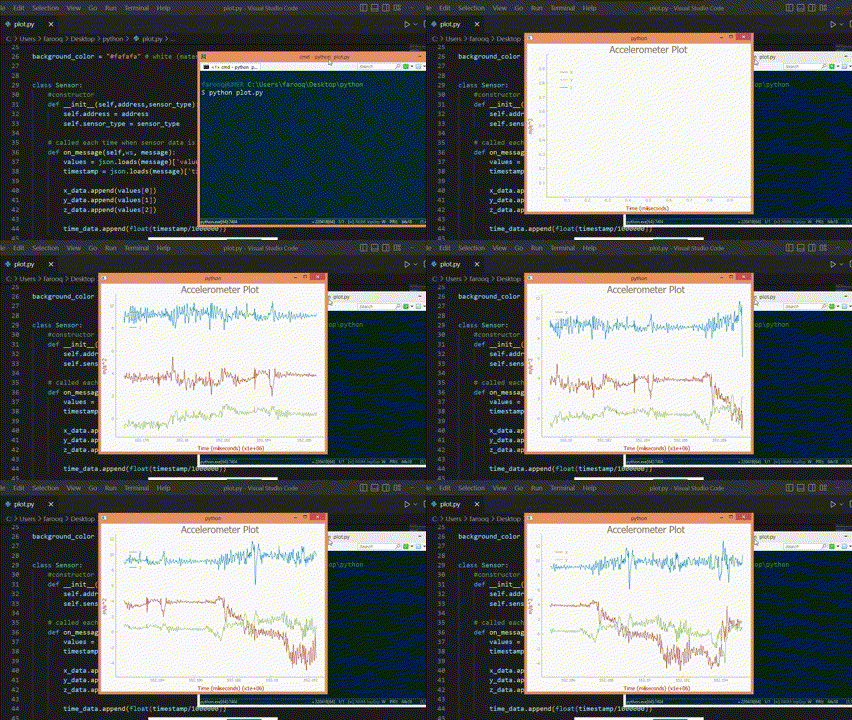
Real Time plotting
See Real Time Plot of Accelerometer (Python) using this app

https://github.com/umer0586/SensorServer/assets/35717992/2ebf865d-529e-4702-8254-347df98dc795
Testing in a Web Browser
You can also view your phone's sensor data in a Web Browser. Open the app's navigation drawer menu and enable Test in a Web Browser.Once the web server is running, the app will display an address on your screen. This address will look something like http://<ip>:<port>.On your device or another computer on the same network, open a web browser and enter that address. The web browser will now display a list of all the sensors available on your device. The web interface have options to connect to and disconnect from individual sensors, allowing you to view their real-time data readings.
This web app is built using Flutter and its source could be found under sensors_dashboard. However, there's one current limitation to be aware of. The app is built with Flutter using the --web-renderer canvaskit option. This means that the resulting app will have some dependencies that need to be downloaded from the internet. This means that any device accessing the web app through a browser will require an internet connection to function properly.
The web app is built and deployed to Android's assets folder via python deploy_web_app.py
Connecting over Hotspot :fire:
If you don't have Wifi network at your work place you can directly connect websocket clients to the app by enabling Hotspot Option from settings. Just make sure that websocket clients are connected to your phone's hotspot
Connecting over USB (using ADB)
To connect over USB make sure USB debugging option is enable in your phone and ADB (android debug bridge) is available in your machine
- Step 1 : Enable
Local Hostoption in app - Step 2 : Run adb command
adb forward tcp:8081 tcp:8081(8081 is just for example) from client - Step 3 : use address
ws://localhost:8081:/sensor/connect?type=<sensor type here>to connect
Make sure you have installed your android device driver and adb devices command detects your connected android phone.
Installation
OR
Download latest APK from Github's Release page
(requires Android 5.0 or above) .
Found this useful
Send Bitcoin at 1NHkiJmjUdjqbCKJf6ZksGKMvYu52Q5tew
OR
Scan following QR code with bitcoin wallet app to send bitcoins

